
Desserts
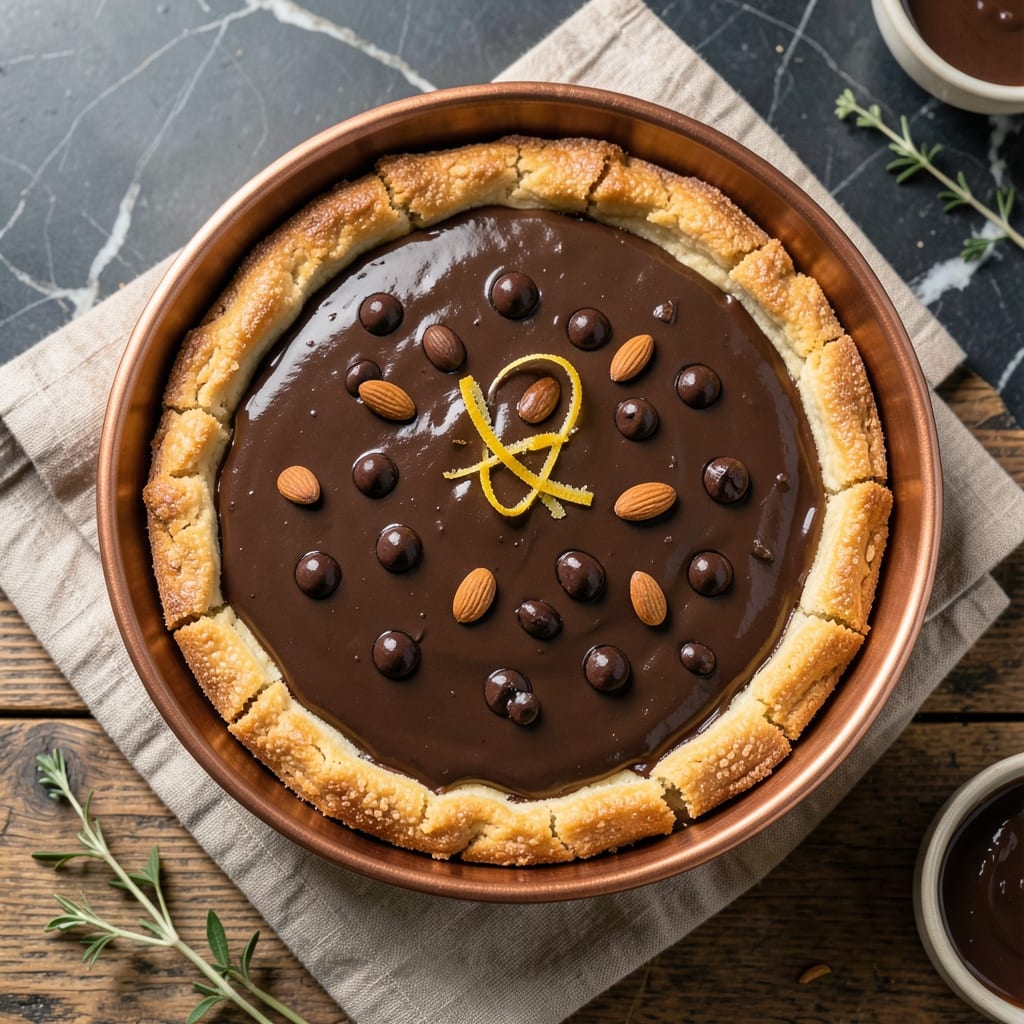
This almond tart cake recipe delivers layers of nutty crunch and velvety chocolate that will impress even the most discerning dessert lovers. The secret lies in a perfectly blind-baked almond crust that stays crisp while supporting a rich, moist cake layer. I've refined this technique over years of baking, ensuring every slice offers that ideal balance of texture and flavor.
The foundation begins with an almond flour crust that's both sturdy and delicate, requiring precise blind-baking to achieve that signature crispness without cracking. Once cooled, it provides the perfect base for a silky chocolate-almond cake that's tender yet substantial. This isn't your average dessert—it's a showstopper that combines traditional French pastry techniques with approachable home baking.
What makes this recipe truly special is how the flavors develop as they bake. The almond crust infuses subtle nutty notes into the cake layer, while dark chocolate adds depth that keeps every bite interesting. The result is a dessert that looks elegant enough for special occasions but comes together with reliable, professional techniques you can trust.
Whether you're preparing for a dinner party or simply craving something decadent, this almond tart cake delivers restaurant-quality results at home. The assembly process is straightforward once you master the blind-baking step, and the final presentation will have everyone asking for seconds. Let's get started on creating this luxurious dessert.
Ingredients for almond tart cake
The secret to this luxurious almond tart lies in these carefully chosen ingredients.
| Ingredient | Amount | Notes |
|---|---|---|
| Almond Flour 🌰 | 2 cups | Finely ground, high-quality preferred |
| Unsalted Butter 🧈 | 1 cup | Cold, cubed for crust |
| Granulated Sugar 🍚 | ½ cup | Superfine for smooth texture |
| Large Eggs 🥚 | 1 whole | Room temperature |
| Vanilla Extract 🌿 | 1 tsp | Pure Madagascar preferred |
| Dark Chocolate Chips 🍫 | 1 cup | 70% cacao, chopped coarse |
| All-Purpose Flour 🌾 | ½ cup | Sifted for lightness |
| Baking Powder 🧂 | ½ tsp | Aluminum-free recommended |
| Salt 🧂 | ¼ tsp | Fine sea salt |
| Heavy Cream 🥛 | ½ cup | Cold, whipped for filling |
| Powdered Sugar 🍚 | ½ cup | Sifted for smooth glaze |
| Lemon Zest 🍋 | 1 tsp | Freshly grated |
| Almond Slices 🌰 | ¼ cup | Toasted for garnish |
The almond flour is non-negotiable here—Bob's Red Mill or Anthony's Goods are my go-tos for that fine, consistent grind. If you're using a homemade blend, pulse it until it's like powdered sugar, or the crust will be grainy. The butter should be cold when you start, so pull it from the fridge right before mixing. For the dark chocolate, Valrhona or Guittard make all the difference in that rich, velvety texture. I always toast my almond slices separately to bring out their natural oils before sprinkling them on top—trust me, it makes the presentation pop.
No almond flour? Substitute a mix of 1 cup ground almonds and 1/2 cup all-purpose flour, but pulse the almonds extra fine. Running short on vanilla? Seeds from 1 vanilla bean work too, but scrape them clean. The heavy cream needs to be cold when you whip it, or it won't hold its shape—don't skip chilling the bowl. For the chocolate, if you only have milk chocolate, reduce the amount to 3/4 cup and add 1/4 cup extra almond flour to balance the sweetness. The lemon zest might seem like an afterthought, but it brightens the whole dessert—organic is best if you can find it.
This cake keeps beautifully for 4 days in an airtight container at room temperature, but the crust stays crispest if you store it upside down. For longer storage, freeze the assembled tart (without glaze) for up to 3 months. The glaze can be made a day ahead and reheated gently before serving. I always make a double batch of the filling—it's perfect for topping ice cream too. And if anyone asks, the secret to that perfect blind-baked crust? Weigh your pie weights—they should be about 1/2 lb total.
Why You'll Love This Recipe
- No Mixer Needed: I swear by this recipe because it’s literally a 5-minute mix with a fork. No electric mixer, no overmixing—just fold the almond flour into the butter until it’s crumbly, then add the eggs and sugar. The texture comes out tender every time, even if I’m half-asleep.
- Nutty Sweet Bliss: That first bite? Pure almond-butter heaven with a whisper of vanilla. The butter keeps it rich but not greasy, while the sugar caramelizes just enough to give it a subtle crunch on top. Honestly, I’ve tried fancier cakes—this one still wins.
- Office Party Hero: Between us, this is my go-to for work gatherings because it’s easy to slice and serve, but it feels fancy. Plus, it travels well—no soggy layers, no crumbling edges. Drop it in a box, and it’ll still taste fresh at lunch.
- Leftovers? Better Than Day One: I make a double batch on Sundays, and by Wednesday, I’m still eating it. The almond flour stays fresh longer than flour-based cakes, and the butter keeps it moist. No sad, dry slices here—just pure, buttery satisfaction.
Step-by-step instructions for almond tart cake
Here's how to create a decadent almond tart cake with layers of nutty crunch and velvety chocolate.
Prepare the Crust Mixture
In a large mixing bowl, combine the 2 cups almond flour, 0.5 cup granulated sugar, 0.5 tsp baking powder, and 0.25 tsp salt. Whisk these dry ingredients together until fully incorporated and no lumps remain. This ensures an even distribution of flavor and texture throughout the crust.
Next, cut the 1 cup unsalted butter into small cubes and add them to the dry mixture. Using your fingertips or a pastry cutter, work the butter into the almond flour until the mixture resembles coarse crumbs with pea-sized butter pieces. This texture is crucial for creating a tender, flaky crust rather than a dense one. If you're feeling ambitious, you can pulse this mixture briefly in a food processor for even distribution, but don't overmix.
Create the Chocolate Filling
In a separate bowl, whisk together the 1 whole large egg, 1 tsp vanilla extract, and 1 tsp lemon zest until smooth and fully combined. The lemon zest adds a bright contrast to the rich chocolate flavors, so make sure it's freshly grated for maximum impact. Set this mixture aside for now.
In the same bowl you used for the crust, gently fold in the 1 cup dark chocolate chips and 0.5 cup all-purpose flour to the butter-almond mixture. Then, carefully pour in the egg mixture while stirring just until combined. Be gentle here—overmixing can develop gluten in the all-purpose flour and make the crust tough. The batter should be thick but still pourable. If it's too stiff, you can add 1-2 teaspoons of heavy cream to loosen it slightly.
Assemble and Bake the Cake
Preheat your oven to 350°F and grease an 8-inch tart pan with removable bottom. Press the crust mixture firmly and evenly into the bottom of the pan, creating a thin, even layer. Use the back of a spoon or your fingers to smooth out any lumps or uneven spots. The crust should be about ¼-inch thick—this ensures it bakes through without burning while still providing that delightful crunch.
Bake the crust for 15-18 minutes until it's set and just beginning to turn golden around the edges. The center should still look slightly soft, as it will continue cooking while the filling bakes. Remove the pan from the oven and let the crust cool for 5 minutes before carefully pouring in the chocolate filling mixture. This brief cooling prevents the hot crust from cooking too quickly and becoming rubbery.
Complete the Baking Process
Return the tart to the oven and bake for an additional 25-30 minutes, or until the center is set and the top is golden brown. To check doneness, insert a toothpick into the center—it should come out with a few moist crumbs but no wet batter. The cake should spring back slightly when gently pressed in the center.
While the tart is still warm, prepare the whipped cream topping by whipping the 0.5 cup heavy cream until soft peaks form. In a separate bowl, sift together the 0.5 cup powdered sugar and fold it gently into the whipped cream. This creates a light, airy topping that contrasts beautifully with the dense cake. Spread this mixture evenly over the top of the warm tart.
Finish and Serve
Allow the tart to cool completely before adding the final garnish. Toast the 0.25 cup almond slices in a dry skillet over medium heat for 2-3 minutes until golden brown, watching closely to prevent burning. Arrange these toasted almond slices in a decorative pattern over the whipped cream topping.
Let the tart rest at room temperature for at least 1 hour before slicing. This resting period allows the flavors to meld and the textures to set properly. Serve chilled or at room temperature, and enjoy each slice of this luxurious almond tart cake with its perfect balance of nutty crunch, rich chocolate, and creamy sweetness.
Pro Tips For Making Almond Tart Cake
- MIX DRY INGREDIENTS FIRST: I learned this the hard way—if you cream the butter and sugar too early, the almond flour will turn into a gummy mess when you add it later. Sift the almond flour and sugar together first, then fold in the butter mixture. This keeps the texture light and prevents a dense, heavy cake.
- USE ROOM-TEMP BUTTER: Cold butter makes for a tough, dry tart, and overly soft butter can lead to a greasy one. Take the butter out of the fridge 30 minutes before you start—it should be soft enough to press with a finger but still hold its shape. This ensures a tender crumb without losing structure.
- DON’T OVERMIX THE BATTER: Almond flour is delicate, and once you add the eggs, it’s easy to overwork it into a sad, dense paste. Mix just until combined—about 2 minutes with a mixer or 10 strokes by hand—then stop. Overmixing turns your cake into a brick.
- BAKE UNTIL THE CENTER SPRINGS BACK: Almond flour cakes can look set before they’re actually done. Press the center gently with a finger—it should spring back slowly, not immediately. If it bounces back fast, keep baking another 2-3 minutes. Underbaking leaves a gummy center, and overbaking dries it out.
Pro cooking tips for perfect results
Blind-Baking Mastery
This is where most home bakers struggle, but I've got your back. For the almond crust, preheat your oven to 350°F and line your tart pan with parchment paper, cutting it to fit snugly. Press the crust mixture evenly into the pan, then cover it completely with a second sheet of parchment. Add dried beans or pie weights (about 1 lb total) to prevent puffing. Bake for 12-15 minutes until the edges are lightly golden. 🌡️
After removing the weights, prick the bottom all over with a fork to release any trapped air. Return to the oven uncovered for 3-5 minutes to crisp the edges. Let it cool completely before adding filling—this prevents sogginess and ensures that perfect crunch.
Temperature Control
Never skip preheating your oven—this recipe demands precision. I use an infrared thermometer to confirm my oven hits 350°F accurately. If your oven runs hot, reduce to 325°F for the crust phase. For the filling stage, maintain 350°F but watch closely after 20 minutes—the chocolate can burn quickly.
Pro tip: Place a baking sheet on the lower rack to catch any drips. The filling should set in 25-30 minutes, but if the top browns too fast, tent loosely with foil. A toothpick test is your best friend here—it should come out with moist crumbs, not wet batter.
Crust Texture Secrets
The key to a tender crust lies in the butter distribution. Cut your 1 cup cold butter into ½-inch cubes and work it into the almond flour using your fingers until you have pea-sized pieces. Over-processing turns the crust dense—keep it light and airy. For extra flakiness, chill the dough for 20 minutes before pressing into the pan.
If your crust cracks during baking, don't panic. Brush any cracks with egg white before adding filling—it creates a seal. For a smoother finish, press the crust with the back of a spoon after blind-baking, then chill for 10 minutes before adding the filling mixture.
Filling Consistency
The chocolate filling needs to be just thick enough to hold its shape but still spreadable. If your mixture looks too stiff, add 1-2 teaspoons of heavy cream to loosen it. For extra richness, melt 2 oz dark chocolate first and stir it into the egg mixture before folding in the dry ingredients. This creates a smoother, more velvety texture.
Don't overmix the filling—just stir until combined. The goal is to distribute the chocolate evenly without developing gluten in the flour. For a marbled effect, gently swirl the filling with a knife before baking, creating beautiful patterns when sliced.
Whipped Cream Perfection
Chill your mixing bowl and beaters for at least 10 minutes before whipping the cream. This helps achieve those perfect soft peaks. For extra stability, add ½ teaspoon of vanilla bean paste along with the extract. Fold in the powdered sugar gently with a spatula to maintain airiness.
Spread the whipped cream while it's still soft—don't wait until it stiffens. For a professional finish, use an offset spatula to create smooth, even swirls. If the cream starts to deflate, chill it for 10 minutes and rewhip briefly before using.
Nutrition facts
Frequently asked questions
Can I make this almond tart cake without almond flour?
Yes! For a 1:1 substitution, blend 1 cup ground almonds with ½ cup all-purpose flour until ultra-fine. The texture will be slightly denser, but it still works well. For a lighter version, use 1 cup crushed graham crackers mixed with ½ cup melted butter—this creates a crumbly crust that holds up beautifully.
How do I prevent my crust from cracking during baking?
Prevent cracks by pressing the crust evenly into the pan and chilling it for 20 minutes before blind-baking. After removing weights, prick the bottom with a fork to release air, then bake uncovered for 3-5 minutes to crisp edges. For extra insurance, brush any cracks with egg white before adding filling—it seals the surface.
Can I bake the tart ahead of time?
Assemble the tart (without whipped cream) up to 2 days ahead and store it in an airtight container at room temperature. For longer storage, freeze the assembled tart (without glaze) for up to 3 months. Thaw overnight in the fridge, then add fresh whipped cream and toasted almonds before serving. The flavors actually improve with time!
What's the best way to make the whipped cream extra stable?
Chill your mixing bowl and beaters for 10 minutes before whipping. Add ½ teaspoon vanilla bean paste (not extract) for extra stability, and fold in powdered sugar gently with a spatula. For a restaurant-quality finish, whip the cream to stiff peaks and spread it while the tart is still warm—it'll hold its shape perfectly. Keep the tart chilled until serving to prevent melting.
Why did my chocolate filling turn grainy?
Grainy filling usually means the chocolate wasn't melted smoothly. For next time, melt 2 oz dark chocolate first (microwave in 20-second bursts) and stir it into the egg mixture before adding dry ingredients. Also, ensure your chocolate chips are 70% cacao or higher—lower percentages can separate. If it happens, blend the filling briefly with an immersion blender to smooth it out before baking.