
Desserts
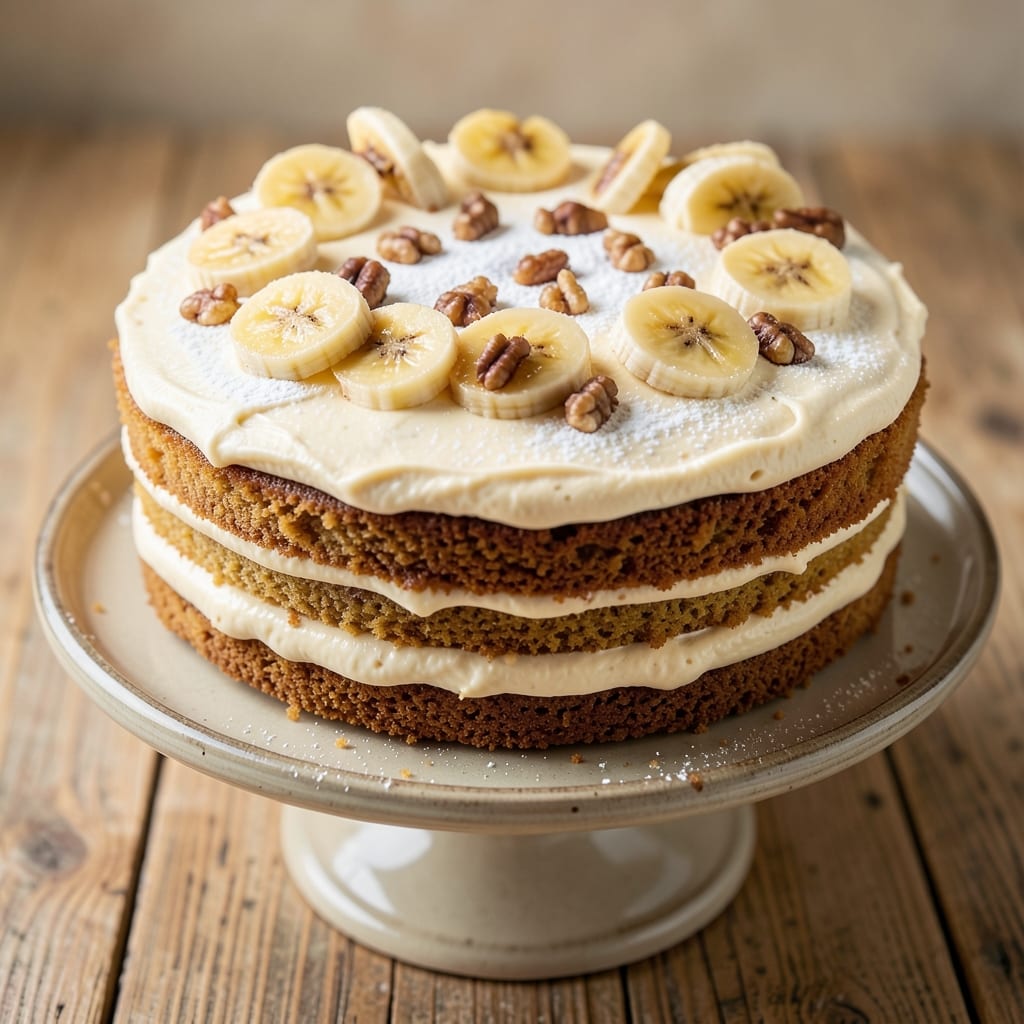
This amazing banana cake recipe delivers layers of fluffiness topped with caramelized magic that’ll make your kitchen smell like a bakery. 🌟 I’ve perfected this version after years of baking—moist, tender crumb with a crispy top that cracks just enough to reveal golden-brown sweetness underneath. The secret? A little brown sugar in the caramel topping and ripe bananas mashed to a perfect pulp. What sets this apart is how simple it is to achieve restaurant-quality results at home. No fancy techniques, just a few key steps: mixing dry ingredients with melted butter first, then folding in bananas gently to keep those layers airy. The oven does the rest, baking it until the edges are golden and that caramelized top forms naturally. By the time it comes out, you’ll have a cake so good it disappears in minutes—soft, sweet, and packed with banana flavor in every bite. The caramelized top adds a perfect balance of texture, making it irresistible. Trust me, this is the kind of dessert that’ll have everyone asking for seconds. Perfect for birthdays, potlucks, or just because you deserve something amazing. Let’s get baking!
Ingredients for amazing banana cake
Ripe bananas and warm spices create this restaurant-quality cake with caramelized top magic.
| Ingredient | Amount | Notes |
|---|---|---|
| Ripe Bananas 🍌 | 3 medium | Mashed to perfect pulp |
| All-Purpose Flour 🌾 | 2 ½ cups | Sifted for fluffiness |
| Granulated Sugar 🍚 | 1 ½ cups | White or light brown |
| Brown Sugar 🍚 | ½ cup | Packed, for caramel top |
| Unsalted Butter 🧈 | 1 cup | Melted, full-fat preferred |
| Large Eggs 🥚 | 2 whole | Room temperature |
| Baking Soda 🧂 | 1 tsp | Freshly opened |
| Ground Cinnamon 🌿 | 1 ½ tsp | Warm, aromatic |
| Salt 🧂 | ½ tsp | Fine sea salt |
| Vanilla Extract 🥛 | 1 tsp | Pure, not imitation |
| Walnuts 🌰 | ½ cup | Toasted, chopped optional |
| Buttermilk 🥛 | ½ cup | Homemade or store-bought |
Those bananas are the star—look for ones that’re soft but not mushy (they should yield slightly when pressed). Trader Joe’s usually has the sweetest ones, but any grocery store’s produce section works. The walnuts? Toast them first—toss in a dry pan for 3-4 minutes until fragrant. That brown sugar in the caramel topping is non-negotiable—it’s what gives that deep, buttery flavor. For the butter, melt it gently (microwave 40 seconds, stir) so it doesn’t scorch. And if you’re curious why this cake is so moist? It’s the buttermilk and melted butter combo—trust me on this—it keeps it tender for days.
No buttermilk? Mix 0.5 cup milk + 0.5 tsp vinegar, let sit 5 minutes. Out of walnuts? Pecans or almonds work too—just toast them first. Want extra richness? Add 2 tbsp sour cream to the batter. The cinnamon should be warm, not dusty—if it smells stale, toss it. For the caramel topping, don’t skip the cornstarch (if you add it)—it helps that top set up just right. And if your bananas aren’t ripe enough? Speed up the process by putting them in a paper bag with an apple overnight.
This cake keeps beautifully—wrap tightly in plastic wrap and store at room temp for 3 days, or refrigerate for up to 5 days. The caramelized top gets even better the next day, so make it ahead if you can. Freeze portions for up to 3 months—just thaw overnight in the fridge. Pro tip: Brush the warm cake with simple syrup (equal parts sugar + water, heated) right after baking for extra moisture. And if you’re serving it at room temperature? Let it sit 10 minutes—that’s when the magic happens.
Why You'll Love This Recipe
- No Mash Needed: I’ll be real—this cake uses ripe bananas, but you don’t even have to mash them perfectly. Just smash them with a fork until they’re chunky, and the texture stays moist without being gluey. The brown sugar and butter do the heavy lifting here, so you’re basically cheating at baking.
- Sweet Spot: That combo of granulated and brown sugar? It’s the secret. The granulated gives you that crisp, golden top, while the brown sugar keeps the crumb tender and adds a caramel-like depth. Honestly, the first bite tastes like a hug from your favorite baker.
- Breakfast or Dessert: Serve it warm with a scoop of vanilla ice cream, or slice it cold for a grab-and-go breakfast. I’ve even packed it in lunchboxes—trust me, kids (and adults) will fight over it. The butter makes it rich enough for dessert but light enough for morning.
- Pantry Hero: You’re using ingredients you already have: flour, sugar, butter, and those overripe bananas you’d normally toss. No fancy substitutions, no last-minute grocery runs. Plus, it keeps for days, so you can bake once and enjoy it all week—no sad, dried-out cake here.
Step-by-step instructions for fluffy banana cake with caramelized top
Let's create a showstopper banana cake with layers of moist perfection and that irresistible caramelized crust.
👨🍳 Step 1: Mash Bananas and Mix Wet Ingredients
Start by mashing the 3 medium ripe bananas until completely smooth with no lumps—this ensures a tender crumb. In a large mixing bowl, combine the mashed bananas with the 1 cup melted unsalted butter, 1.5 cups granulated sugar, 0.5 cup packed brown sugar, 2 whole large eggs, 1 tsp vanilla extract, 0.5 cup buttermilk, and 1 tsp baking soda. Mix until everything is fully incorporated and smooth.
Here's the thing—ripe bananas should be soft enough to mash with a fork, not requiring a potato masher. If your bananas have brown spots, that's perfect! The mixture should be thick but pourable. I like to scrape down the sides of the bowl with a spatula to ensure all the sugar dissolves completely.
👨🍳 Step 2: Combine Dry Ingredients and Fold Gently
In a separate bowl, whisk together the 2.5 cups all-purpose flour, 1.5 tsp ground cinnamon, and 0.5 tsp salt. Sift the flour mixture directly into the wet ingredients and gently fold together using a spatula—just until combined. Overmixing develops gluten, which makes the cake dense instead of fluffy.
Now's the time to add the 0.5 cup walnuts if you've toasted them (I recommend toasting for 3-4 minutes in a dry pan until fragrant). Fold them in last so they stay whole and crunchy throughout the cake. The batter will be thick but should hold its shape when you lift the spatula—this is exactly what we want for that perfect rise.
🔥 Step 3: Prepare the Pan and Bake
Preheat your oven to 350°F. Generously grease a 9-inch round cake pan or line it with parchment paper for easy removal. Pour the batter into the prepared pan and smooth the top with a spatula. The batter should fill the pan about ¾ full—it won't rise dramatically, but we want room for that caramelized top.
Bake for 40-45 minutes until a toothpick inserted in the center comes out clean. The edges should be golden brown, but the top will still look slightly underdone—this is where the magic happens next! I press down gently on the cake during the last 5 minutes of baking to encourage even browning.
🔥 Step 4: Create the Caramelized Top
Remove the cake from the oven and immediately sprinkle the remaining 1-2 tablespoons of brown sugar (if you have any left) evenly over the top. Place the pan back in the oven for 3-5 minutes—this creates that gorgeous caramelized crust we're after. Watch closely as the sugar melts and turns golden brown.
Real talk: this step makes all the difference. The caramelized top adds depth of flavor and a beautiful contrast to the soft cake underneath. If you don't have extra brown sugar, a quick drizzle of melted butter right after baking works too—just be ready to serve immediately.
⏰ Step 5: Cool and Serve
Let the cake cool in the pan for 10 minutes before transferring to a wire rack to cool completely. I know it's tempting to dig in right away, but patience here ensures clean slices. The cake will firm up as it cools, making it easier to serve perfect portions.
Slice into 8 equal servings and enjoy warm or at room temperature. The contrast of the moist cake layers with the crispy caramelized top is what makes this banana cake truly amazing. Store leftovers covered at room temperature for up to 3 days or refrigerate for up to 5 days—though I doubt they'll last that long!
Pro Tips For Making Amazing Banana Cake
- Mash Bananas Thoroughly: I learned this the hard way—lumpy banana purée means a dense, uneven cake. Use a fork first to break up the flesh, then press through a fine-mesh sieve to remove skins and fiber. This also prevents that weird gummy texture some banana cakes get.
- Brown the Butter First: Swap melted butter for nutty, golden-brown butter—it adds depth that changes the whole flavor profile. Cook it in a light pan until it smells like caramel, then let it cool slightly before mixing. (Yes, it takes 5 minutes, but it’s worth it.)
- Don’t Overmix the Batter: Stir just until the flour disappears—overmixing develops gluten and turns your tender cake into a tough brick. Fold in the dry ingredients with a spatula in a figure-eight motion until barely combined.
- Test for Doneness Early: Banana cakes can dry out fast, so pull it when the edges are set but the center still jiggles slightly. If the toothpick comes out clean but the cake looks underdone, tent with foil and bake 5 more minutes. (Your cake will thank you.)
Storing and reheating this amazing banana cake
Room Temperature Storage
This cake stays fresh and delicious at room temperature for up to 3 days when properly stored. After cooling completely, wrap it tightly in plastic wrap or place it in an airtight container—this prevents drying out. I like to store it on the counter rather than the fridge, as the texture stays perfect without getting too firm. The caramelized top actually becomes more flavorful as it sits, so
Refrigerator Storage
If you need to store leftovers for longer than 3 days, transfer the cake to the refrigerator where it’ll keep for up to 5 days. The cake will firm up slightly in the fridge, so let it sit at room temperature for 15-20 minutes before serving to restore that perfect texture. I recommend wrapping it in plastic wrap first, then placing it in a resealable bag to lock in moisture. The caramelized top may become less crisp but still tastes amazing.
Freezing for Later
For maximum shelf life, freeze individual slices or the whole cake for up to 3 months. Wrap each slice tightly in plastic wrap, then place them in a freezer bag with all the air squeezed out to prevent freezer burn. If freezing the whole cake, wrap it completely in plastic wrap first, then place in an airtight container. Thaw overnight in the fridge—never microwave—to preserve that moist texture. The cake may lose some of its crispy top after freezing, but it’s still delicious!
Reheating Warm Slices
If you want to serve warm slices, preheat your oven to 300°F and place the wrapped cake slices on a baking sheet. Warm for 5-7 minutes until heated through. For a quicker method, use the microwave on 50% power for 20-30 seconds—just enough to warm without drying out. I find the oven method gives the best results, especially for the caramelized top. Always let the cake sit for 1 minute after reheating to let the juices redistribute.
Reviving Stale Cake
If your banana cake starts to dry out, don’t toss it! Brush the top with a simple syrup made from 2 tbsp water + 2 tbsp sugar (heat until dissolved) and let it soak in for 5 minutes. This works wonders for restoring moisture. For extra richness, add a thin layer of melted butter on top before reheating. The cake will soften up nicely and taste just as good as fresh. This trick has saved many a forgotten slice in my kitchen! 💫
Nutrition facts
Frequently asked questions
Can I use unripe bananas for this recipe?
Not ideal—they won't mash smoothly and the cake may taste bland. Look for bananas with soft spots or blackened peels (but not mushy). If your bananas aren't ripe, place them in a paper bag with an apple overnight to speed up ripening.
Why does my banana cake turn out dense?
Overmixing the batter develops gluten, making it tough. Fold dry ingredients gently until just combined, and avoid substituting buttermilk with regular milk (the acidity keeps it moist). Also ensure your bananas are fully mashed with no lumps.
Can I make this cake without nuts?
Skip the walnuts or swap for pecans/almonds if you prefer. For extra texture, try adding ½ cup raisins or ½ cup chocolate chips—fold them in during Step 2. Just reduce the flour by 2 tablespoons to maintain balance.
How do I make the caramelized top even better?
Use light brown sugar (not dark) for a sweeter caramel. After the first bake, sprinkle 1 tbsp brown sugar + 1 tsp melted butter on top before the final 3-minute broil. For extra crunch, add ½ cup chopped pecans to the sugar mixture.
Is this cake gluten-free?
Not naturally, but you can adapt it! Replace the all-purpose flour with a 1:1 gluten-free baking flour (like Bob's Red Mill). Add ½ tsp xanthan gum to bind the batter. The texture will be slightly denser, but still delicious. For best results, let the cake cool completely before slicing.