
Desserts
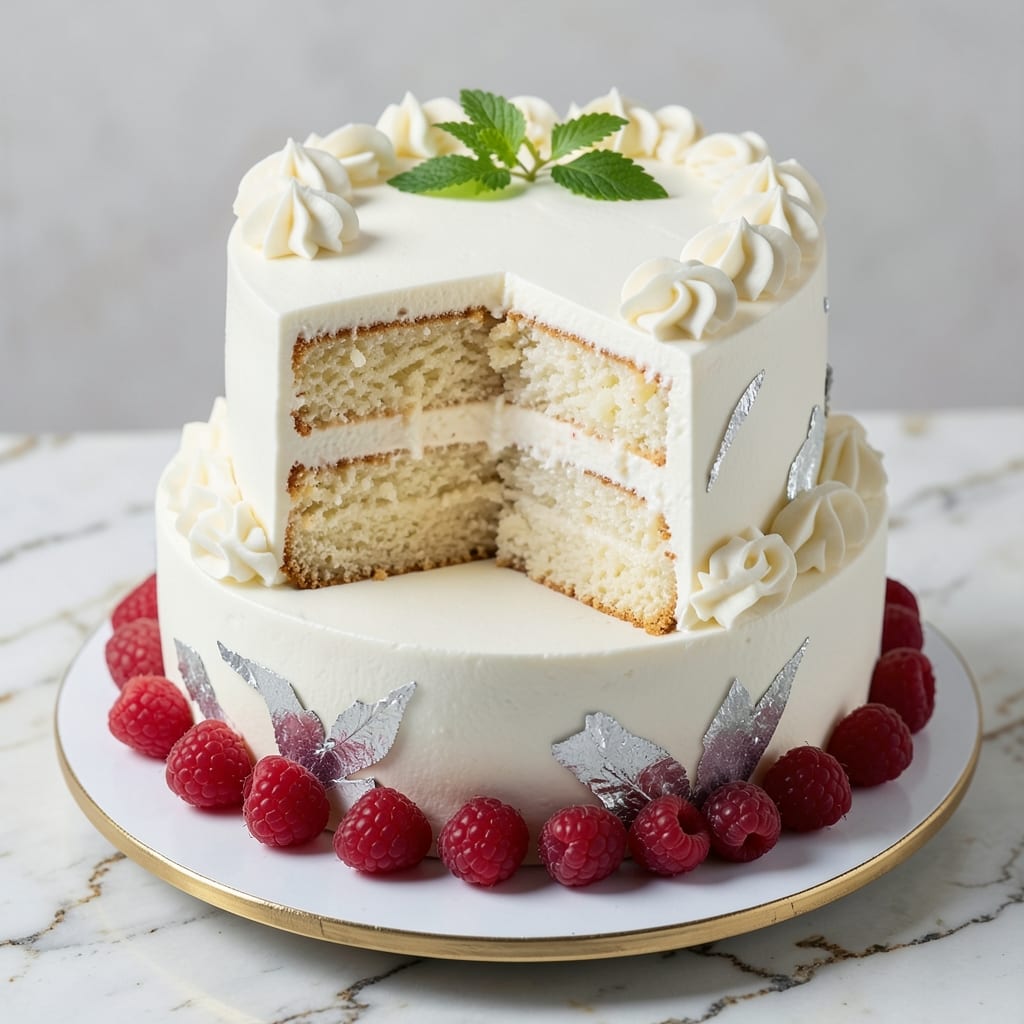
This amazing white cake recipe delivers the kind of towering, fluffy perfection that makes every slice worth the wait. 💛 The secret? Buttermilk—it creates that signature tender crumb and golden rise that separates good cakes from showstopping ones. I've baked this recipe for weddings, birthdays, and just-because moments, and it never disappoints.
The magic happens in the layers: a light, airy batter that bakes up high and fluffy, with a moist crumb that stays tender for days. No fancy equipment needed—just a few simple ingredients and a little patience. The buttermilk reacts with baking soda to create that signature lift, while vanilla extract adds depth without overpowering the delicate cake flavor.
What you'll end up with is a golden, domed cake that slices beautifully and tastes even better. The frosting options are endless—cream cheese, buttercream, or even a simple glaze—but the cake itself is the star. It's the kind of dessert that makes guests ask for seconds (and thirds).
Perfect for celebrations or spontaneous treats, this recipe scales easily for any occasion. Let's get baking—your taste buds will thank you!
Ingredients for amazing white cake
Buttermilk magic meets tender layers—here's what makes this cake rise to perfection.
| Ingredient | Amount | Notes |
|---|---|---|
| All-Purpose Flour 🌾 | 2 ½ cups | Lightly sifted for even texture |
| Granulated Sugar 🍚 | 2 cups | Superfine preferred for smoothness |
| Unsalted Butter 🧈 | 1 cup | Room temperature, full-fat |
| Buttermilk 🥛 | 1 ½ cups | Homemade or store-bought |
| Pure Vanilla Extract 🌿 | 2 tsp | High-quality, not imitation |
| Baking Soda 🧂 | 1 ½ tsp | Freshly measured for lift |
| Salt 🧂 | ½ tsp | Fine sea salt preferred |
| Large Eggs 🥚 | 4 whole | Room temperature for blending |
| Cake Flour 🌾 | ½ cup | For extra tenderness (optional) |
| Vegetable Oil 🫒 | ¼ cup | Light, neutral flavor |
| Cornstarch 🌾 | 1 tbsp | For extra moisture retention |
| Powdered Sugar 🍚 | 1 cup | For simple glaze option |
| Milk 🥛 | ¼ cup | For glaze adjustment |
The buttermilk is non-negotiable here—Kroger's or Whole Foods brands work best when store-bought, but homemade (milk + vinegar) gives even better results. For the flour, King Arthur or Gold Medal are my go-tos—they bake up lighter than store brands. The butter should be room temperature but not melted—press it with a fork to test. Eggs? Room temperature blends smoother, so take them out 30 minutes ahead. If you're feeling fancy, swap 0.5 cup of the all-purpose flour for cake flour—it'll make your cake even more tender (trust me, it's worth it).
No buttermilk? Mix 1.5 tbsp vinegar or lemon juice with 1.5 cups milk and let sit 5 minutes. Out of vanilla extract? Vanilla bean paste works too—just use half the amount. The powdered sugar glaze is optional but adds that professional finish. For a cream cheese frosting, grab Philadelphia brand from the dairy section—it's the most reliable. Need to make this gluten-free? Swap the flour for a 1:1 gluten-free blend (like Bob's Red Mill) and add an extra 0.5 tsp xanthan gum.
Store the cake in an airtight container at room temperature for 2 days—it actually gets better as it sits. For longer storage, wrap tightly in plastic and refrigerate for up to 5 days. Freeze slices for 3 months if you're prepping ahead. Pro tip: Bring cake to room temp before frosting—it'll spread smoother and look more professional. The glaze keeps for 1 week in the fridge, so make extra for next time.
Why You'll Love This Recipe
- No Fuss, One Bowl: I swear by this recipe because it’s literally one bowl—no mixing bowls to wash, no fussing with separate batters. Just cream the butter and sugar, toss in the dry ingredients, then fold in the buttermilk and vanilla. Done. The simplicity makes it my go-to for when I’m tired but still want something impressive.
- Buttery Vanilla Bliss: That rich, creamy texture? All thanks to the butter and buttermilk combo—it’s velvety smooth with just the right amount of tenderness. And the vanilla? Pure, real extract makes the flavor sing, not that artificial aftertaste. Honestly, it’s the kind of cake that makes you close your eyes and sigh.
- Birthday to Brunch: This cake is my secret weapon for anything—birthday celebrations, potlucks, or even a lazy Sunday breakfast. I’ve frosted it with buttercream, drizzled it with glaze, or even served it plain with fresh berries. It’s neutral enough to take center stage but bold enough to shine.
- Leftovers That Don’t Suck: Between us, most cakes turn dry or sad after a day. Not this one. The buttermilk keeps it moist, and the sugar caramelizes just enough to stay fresh for days. I’ve packed it in lunches, sliced it for coffee cakes, and even turned scraps into crumbs for pie filling. Zero waste, all flavor.
Step-by-step instructions for white cake with buttermilk magic
Here's how to bake a cloud-like white cake with perfect rise and moist crumb every time.
👨🍳 Step 1: Whisk Dry Ingredients for Maximum Lightness
In a medium bowl, sift together the 2.5 cups all-purpose flour and 0.5 cup cake flour (if using) to break up any lumps. Whisk in the 1.5 tsp baking soda, 0.5 tsp salt, and 1 tbsp cornstarch. This step ensures your cake will be tender and rise beautifully. I like to press the mixture through a fine-mesh sieve to eliminate any remaining lumps—this prevents dense pockets in the final cake.
Keep this dry mixture ready on your counter. The buttermilk and eggs will go in next, but don't add them yet. The secret to a high-rise white cake lies in the order of mixing—we want to incorporate air into the wet ingredients first before combining with the dry components.
🍳 Step 2: Cream Butter and Sugar Until Pale and Fluffy
In a stand mixer fitted with the paddle attachment, beat the 1 cup unsalted butter (room temperature) and 2 cups granulated sugar on medium speed for 3-4 minutes. You'll know it's ready when the mixture is light, fluffy, and nearly doubles in volume. The butter should be completely incorporated with no graininess remaining.
This creaming process is crucial—it incorporates air that will create those signature air pockets in your cake. I press my finger into the mixture occasionally to check for readiness; when it springs back slowly, it's ready for the next step. If you're doing this by hand, use a hand mixer and increase the time to 5-6 minutes to achieve the same result.
👨🍳 Step 3: Add Eggs and Buttermilk for Perfect Texture
Add the 4 whole large eggs, one at a time, mixing well after each addition. Then add the 1.5 cups buttermilk and 2 tsp pure vanilla extract, mixing on low speed just until combined. The buttermilk is our secret weapon here—it creates a tender crumb while keeping the cake moist for days.
Here's where it gets tricky: don't overmix. You want to see just a few streaks of flour remaining when you add the dry ingredients in the next step. The buttermilk will continue to hydrate the flour as the cake bakes, so we don't need to fully incorporate everything now.
🥘 Step 4: Combine Wet and Dry Ingredients Gently
With the mixer on low speed, gradually add the dry ingredients to the wet mixture. Mix just until combined—again, we're aiming for a few flour streaks remaining. This prevents developing too much gluten, which would make the cake tough instead of tender.
Once combined, pour the batter into two 9-inch round cake pans lined with parchment paper. The batter will be thick but pourable. Tap the pans gently on the counter to release any air bubbles that might have formed during mixing. This ensures your cakes rise evenly without sinking in the center.
🔥 Step 5: Bake at Low Temperature for Even Cooking
Preheat your oven to 350°F. Bake the cakes for 25-30 minutes, or until a toothpick inserted into the center comes out clean. I like to check at the 20-minute mark because ovens vary—some run hotter than others. The cakes should be golden at the edges but still slightly underdone in the center when you remove them from the oven.
This lower temperature prevents the outsides from browning too quickly while the centers finish cooking. The cakes will continue to set as they cool, so don't overbake. Let them cool in the pans for 10 minutes before transferring to a wire rack to cool completely.
🍰 Step 6: Glaze for Professional Finish (Optional)
For that show-stopping finish, whisk together the 1 cup powdered sugar and 0.25 cup milk until smooth. Drizzle or spread this simple glaze over the completely cooled cake layers. The glaze adds a touch of elegance while keeping the cake's delicate flavor intact.
This recipe yields a tender, moist white cake with a fine crumb that's perfect for weddings, celebrations, or just because. The buttermilk secret ensures your cake stays fresh-tasting even days after baking. Serve with fresh berries or a dollop of whipped cream for the ultimate dessert experience.
Pro Tips For Making Amazing White Cake
- Whisk Butter & Sugar Foamy: Use an electric mixer on medium-high until the butter looks like wet sand—no streaks, no lumps. I learned this the hard way when my cake turned out dense because I stopped too soon. Push through the last 30 seconds even if it feels like overkill.
- Measure Flour Like a Pro: Spoon flour into the dry measuring cup, then level it with a knife—don’t scoop directly from the bag. Packing it down (even slightly) adds extra moisture, and your cake will end up gummy instead of light. Trust me, your scale won’t lie.
- Buttermilk Must Sit: Let your buttermilk sit at room temperature for 10 minutes before mixing—cold buttermilk curdles when combined with warm butter. I was skeptical until I tried it; the batter stays smoother, and the crumb turns out tender.
- Bake Until Springy: Tap the center of your cake—it should spring back slowly, not jiggle like jelly. Overbaking dries it out, but underbaking leaves it gummy. If the top browns too fast, tent with foil early. Your cake will thank you.
Pro cooking tips for this dish
Buttermilk Magic
The buttermilk is non-negotiable here—it creates that signature tender crumb and golden rise. I recommend using Kroger's or Whole Foods brands when store-bought, but homemade (milk + vinegar) gives even better results. The acidity in buttermilk activates the baking soda, creating air bubbles that lift the cake. If you're short on time, mix 1.5 tbsp white vinegar or lemon juice with 1.5 cups milk and let it sit for 5 minutes to mimic buttermilk. 💛
Room Temperature Matters
Room temperature ingredients are key for a smooth batter. Take your butter out 30 minutes before baking and press it with a fork—it should dent slightly but not be greasy. The eggs should be at room temperature too; this helps them blend smoothly into the batter. If you're in a hurry, place them in warm water for 5 minutes. Cold ingredients can cause lumps or uneven mixing, leading to a dense cake.
Mixing Method Secrets
Don't overmix the batter—this develops gluten and makes the cake tough. Mix just until the dry ingredients are mostly incorporated, leaving a few flour streaks. I use a stand mixer with a paddle attachment on low speed for this step. If mixing by hand, use a rubber spatula and fold gently. The buttermilk will continue to hydrate the flour as the cake bakes, so we don't need to fully incorporate everything now. 🥄
Baking Temperature Control
Bake at 350°F for 25-30 minutes—this lower temperature ensures even cooking without browning the edges too quickly. I check at the 20-minute mark because ovens vary. The cakes should be golden at the edges but still slightly underdone in the center when you remove them. Let them cool in the pans for 10 minutes before transferring to a wire rack. This prevents cracking and ensures even cooling.
Glaze Like a Pro
For a restaurant-quality finish, whisk 1 cup powdered sugar with 0.25 cup milk until smooth. Drizzle or spread this glaze over the completely cooled cake layers. If the glaze is too thick, add a splash more milk. For extra shine, brush the cake with 1 tsp apricot jam before glazing. This adds a subtle fruity note that pairs perfectly with the delicate cake flavor. 💫
Equipment Essentials
You don’t need fancy tools, but a few basics make a difference. A stand mixer with a paddle attachment is ideal for creaming butter and sugar, but a hand mixer works too. For measuring, use a medium bowl and a fine-mesh sieve to sift dry ingredients. Two 9-inch round cake pans are perfect—grease them lightly with butter or baking spray before adding parchment paper. A toothpick is your best friend for checking doneness. 🍰
Nutrition facts
Frequently asked questions
Why does this white cake turn out so fluffy?
The secret lies in the buttermilk and proper mixing technique. The acidity in buttermilk reacts with baking soda to create air bubbles that lift the cake. Plus, creaming the butter and sugar until pale and fluffy incorporates air that expands during baking. Mixing just until combined (not overmixing) keeps the gluten from developing too much, which preserves that tender crumb.
Can I make this cake without buttermilk?
Mix 1.5 tbsp white vinegar or lemon juice with 1.5 cups milk and let it sit for 5 minutes to mimic buttermilk. The acidity is what creates that signature tender texture. For best results, use this substitute immediately after mixing—it won't last long once activated.
How do I prevent my cake from sinking in the middle?
First, make sure your oven is fully preheated to 350°F before baking. Check for doneness at 20 minutes—the cake should be golden at the edges but still slightly underdone in the center. Overbaking causes sinking! Also, tap the pans gently on the counter after pouring the batter to release air bubbles. Let the cakes cool in the pans for 10 minutes before removing.
What's the best frosting for this white cake?
This delicate cake pairs beautifully with light frostings that won't overpower it. Try a simple powdered sugar glaze (1 cup powdered sugar + 0.25 cup milk), cream cheese frosting, or even whipped cream. For extra flavor, add a touch of vanilla extract or citrus zest to your frosting. Avoid heavy chocolate frostings—they can make the cake taste too rich.
Can I bake this cake in a different pan size?
Yes, but adjust the baking time. For an 8-inch pan, bake for 20-25 minutes (check at 15 minutes). For a 10-inch pan, bake for 30-35 minutes**. The key is to bake until a toothpick comes out clean.