
Desserts
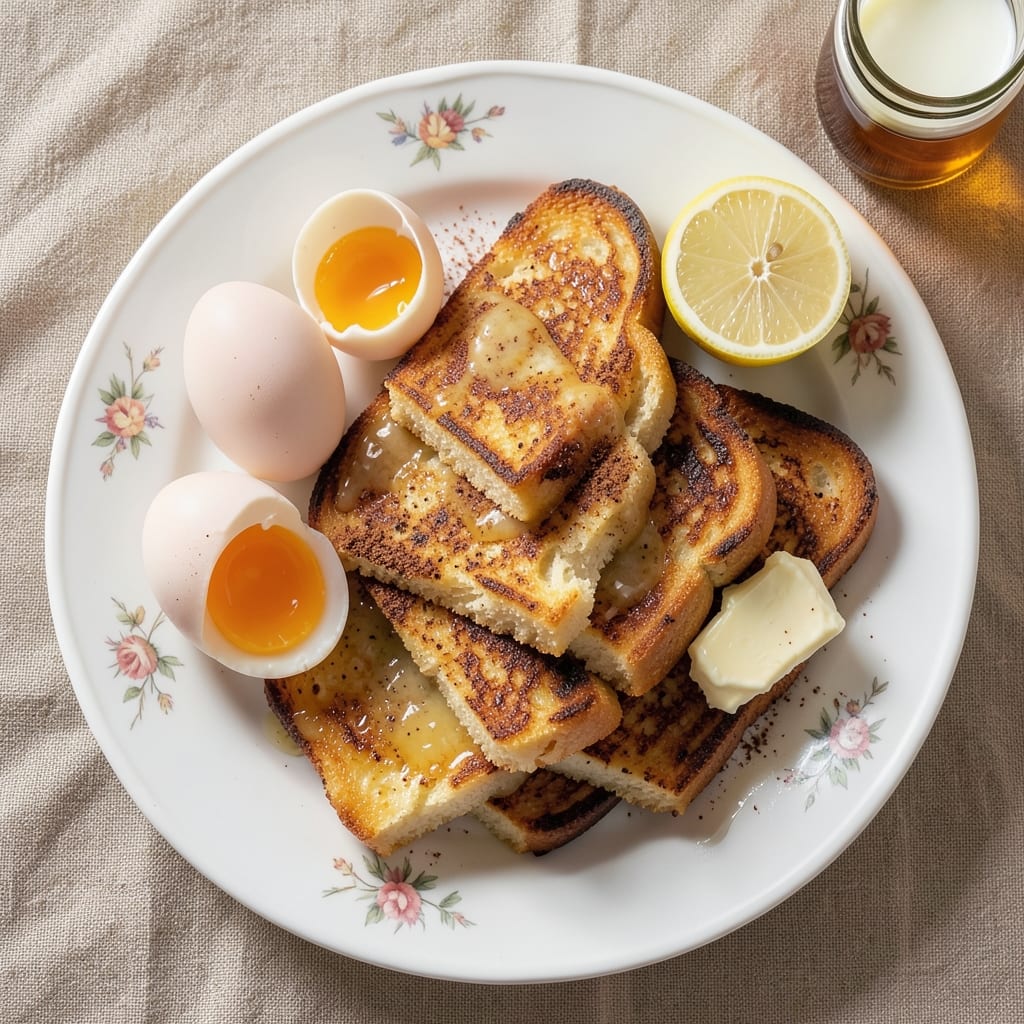
This angel food cake French toast recipe transforms a classic breakfast into something extraordinary—light, airy layers of cake soaking up a custardy batter, then crisped to golden perfection with a rich brown butter glaze. The secret lies in the fusion of two beloved desserts: the delicate structure of angel food cake and the comforting indulgence of French toast, elevated with modern techniques that make it feel like a restaurant dessert at home.
The process begins by cutting store-bought or homemade angel food cake into thick slices—no crumbs, no fuss. A simple egg-milk-cinnamon batter infuses each slice with moisture and warmth, while pan-frying on medium heat creates that signature caramelized crust without overcooking the delicate interior. The result? A stack that’s crisp on the outside, tender and fluffy within, with every bite balancing sweetness and texture.
What truly sets this recipe apart is the brown butter glaze—a nutty, caramelized drizzle that adds depth and richness without overwhelming the cake’s natural lightness. Paired with fresh berries or a dollop of whipped cream, it becomes a showstopper for brunch or dessert. The best part? It’s a make-ahead dream, letting flavors meld overnight for even better results.
Whether you’re serving a crowd or treating yourself to a decadent breakfast, this recipe delivers restaurant-quality indulgence with minimal effort. Ready to transform a simple cake into something extraordinary? Let’s get started.
Ingredients for angel food cake french toast
Transform ordinary breakfast into a restaurant-worthy dessert with these carefully chosen ingredients.
| Ingredient | Amount | Notes |
|---|---|---|
| Angel Food Cake 🍰 | 1 whole | Store-bought or homemade, cut into 1-inch slices |
| Large Eggs 🥚 | 3 whole | Room temperature for even batter |
| Whole Milk 🥛 | ¾ cup | Cold, full-fat preferred |
| Granulated Sugar 🍚 | ½ cup | For sweetening batter |
| Ground Cinnamon 🌿 | 1 tbsp | Freshly ground for warmth |
| Unsalted Butter 🧈 | ½ cup | Cold, cubed for browning |
| Vanilla Extract 🌸 | 1 tsp | Pure, high-quality extract |
| Salt 🧂 | ¼ tsp | Fine sea salt for balance |
| Fresh Blueberries 🫐 | 1 cup | Optional garnish, washed |
| Heavy Whipping Cream 🥛 | ½ cup | Chilled, for whipped cream |
| Powdered Sugar 🍚 | ¼ cup | For dusting whipped cream |
| Lemon Zest 🍋 | 1 tsp | Fresh, for bright contrast |
The angel food cake is the foundation—opt for a high-quality boxed mix like Betty Crocker or homemade for superior texture. Trader Joe's or Whole Foods carry excellent pre-made options if you prefer convenience. For homemade, ensure it's fully cooled and cut into uniform 1-inch slices to prevent crumbling during frying. The unsalted butter deserves special attention: Land O'Lakes or Plugrá brands provide consistent browning. Store butter in the freezer to maintain freshness, and let it sit at room temperature for 30 minutes before cubing to ensure even caramelization.
No vanilla extract? Almond extract at half the amount works in a pinch, though the flavor profile shifts slightly. Substituting vanilla bean paste for the extract adds speckled flecks of flavor. For the milk, whole milk yields the creamiest batter, but 2% or skim can be used if preferred. The blueberries can be swapped for raspberries or strawberries—just ensure they're washed and dried to prevent excess moisture. If you're avoiding dairy, coconut milk can replace the heavy cream, though the texture will differ slightly. Diamond Crystal kosher salt is ideal for its fine grain, but any sea salt will suffice.
The batter components should be prepped 1 day ahead for optimal flavor melding—store in the fridge until ready to use. Brown butter glaze can be made 2 days in advance and reheated gently before serving. Whipped cream should be whipped just before serving to maintain peak texture. Angel food cake slices freeze beautifully for up to 3 months—thaw overnight in the fridge before frying. For make-ahead stacks, assemble the French toast, chill, then reheat in the oven at 350°F for 10 minutes to restore crispiness.
Why You'll Love This Recipe
- No Cake Left Behind: I swear by this trick—using day-old angel food cake means no waste, just pure magic. That dry, crumbly texture soaks up the egg-milk custard like a dream, turning stale cake into something irresistible.
- Sweet-Cinnamon Crunch: The cinnamon isn’t just sprinkled on top—it’s baked into every golden slice. That first bite? Warm, lightly crisp edges with a custardy center that tastes like breakfast in a bakery, not your kitchen.
- Brunch or Dinner Fix: Serve it with fresh berries for a Sunday morning spread or top with maple syrup and bacon for a weeknight dinner. Honestly, I’ve even packed it for lunch—yes, even on a Tuesday.
- Budget Breakfast Hack: Angel food cake is cheaper than bread, and this recipe stretches it further. Three eggs, a splash of milk, and a pinch of sugar turn simple ingredients into a dish that feels like a treat, not a splurge.
Step-by-step instructions for angel food cake French toast
Transform your angel food cake into decadent French toast with this foolproof method.
Prepare the French Toast Batter
In a large bowl, whisk together the 3 whole Large Eggs until the yolks and whites are fully combined. Add the 0.75 cup Whole Milk, 0.5 cup Granulated Sugar, 1 tsp Vanilla Extract, and 0.25 tsp Salt. Whisk vigorously until the sugar dissolves completely and the mixture becomes smooth and pale yellow. This batter should be thick enough to coat the back of a spoon but still flow easily.
Next, fold in the 1 tbsp Ground Cinnamon using a spatula, ensuring it's evenly distributed throughout the batter. The cinnamon will infuse warmth into every bite, balancing the cake's natural sweetness. Let the batter sit at room temperature for 5 minutes while you prepare the cake slices—this allows the flavors to meld slightly and ensures even absorption.
Cut and Soak the Angel Food Cake
Slice the 1 whole Angel Food Cake horizontally into 1-inch thick pieces. You should have about 4 slices for a stack. Arrange the slices on a plate and gently brush both sides with a thin layer of the batter using a pastry brush. This initial coating helps the cake absorb the full flavor of the batter without becoming soggy.
Place the brushed slices back into the batter bowl and let them soak for 10-15 seconds per side. You'll notice the cake immediately begins to absorb the liquid—this is normal. The goal is to saturate the cake without turning it into a puddle. Work quickly but carefully to avoid over-soaking, which can make the French toast dense rather than light and airy.
Cook the French Toast to Golden Perfection
Heat a large skillet over medium-low heat and melt 0.25 cup Unsalted Butter (about half of the total amount) until it foams but doesn't brown. Add the soaked cake slices and cook for 2-3 minutes per side, pressing down gently with a spatula to ensure even contact with the pan. The butter should sizzle gently, creating a golden crust on the outside while keeping the interior tender.
As you cook, resist the urge to flip too soon. You'll know the French toast is ready when the edges are deep golden brown and the cake releases easily from the pan. Transfer the cooked slices to a warm plate and repeat with the remaining batter and cake slices, adding more butter as needed to prevent sticking. The residual heat from the pan will continue to crisp the French toast as it rests.
Assemble and Serve With Brown Butter Glaze
While the French toast cooks, prepare the brown butter glaze by melting the remaining 0.25 cup Unsalted Butter in a small saucepan over medium heat. Swirl the pan occasionally until the butter turns a rich nutty brown color and emits a toasty aroma—this adds depth of flavor. Immediately pour the brown butter into a small bowl and stir in the 1 tsp Lemon Zest. Let it cool slightly but keep it warm for drizzling.
Stack the cooked French toast slices on a serving platter, drizzle generously with the brown butter glaze, and top with the 1 cup Fresh Blueberries. For an extra touch, whip the 0.5 cup Heavy Whipping Cream with the 0.25 cup Powdered Sugar until soft peaks form, then dollop around the stack. Serve immediately while the glaze is still warm and the cake is at its most tender, with a side of extra blueberries for garnish.
Pro Tips For Making Angel Food Cake French Toast
- SOAK THE CAKE FIRST: Angel food cake is dry by design—don’t just dunk slices into the egg-milk mix. Cut the cake into ½-inch-thick slices, then place them in a shallow dish and pour just enough warm milk over them (about ¼ cup per 4 slices) for 10–15 seconds. This jumpstarts the absorption without turning your French toast into a soggy mess.
- USE ROOM-TEMP EGG MILK: Cold eggs and milk make your batter sluggish, leading to uneven cooking. Crack the eggs into a bowl, add the milk, and let the whole mix sit for at least 10 minutes before dipping the cake. I learned this the hard way—my first batch came out undercooked in the center because I rushed straight to the pan.
- LOW AND SLOW: Angel food cake French toast needs patience—don’t blast it on high. Medium-low heat is your friend here. The outside should sizzle gently while the inside cooks through; if it’s browning too fast, crack the heat down. I used to flip too soon, and the centers stayed raw. Now I wait until the edges are golden and the cake resists easily with a spatula.
- DOUBLE-DIP THE EDGES: The edges of angel food cake are denser and absorb less batter. After the first dip, flip the slice and press the edges into the egg-milk mix again. This guarantees even moisture and a consistent texture throughout. It’s an extra 10 seconds of work, but the payoff is worth it—no dry corners here.
Make-ahead tips for leftovers
Batter Prep Ahead
Mix the French toast batter up to 24 hours ahead and store it in an airtight container in the refrigerator. The flavors deepen as it rests, and the eggs thicken slightly, creating a more cohesive texture when frying. When ready to cook, whisk the batter again briefly to redistribute the cinnamon and ensure even consistency. I like to label the container with the date to track freshness—this batter stays good for 3 days in the fridge. 💫
Cake Slice Prep
Cut the angel food cake into 1-inch slices and store them in a single layer on a baking sheet lined with parchment paper. Place the sheet in the freezer for 30 minutes before assembling the French toast—this prevents crumbling when soaking. For make-ahead stacks, assemble the soaked slices on a parchment-lined tray, cover with plastic wrap, and refrigerate for up to 4 hours. Reheat in a 350°F oven for 8-10 minutes to restore crispiness. ✨
Glaze Pre-Make
Brown the butter for the glaze 2 days ahead and store it in a sealed jar at room temperature. The nutty flavors intensify over time, adding depth to your French toast. When reheating, warm the glaze gently in a small saucepan over low heat or microwave in 10-second bursts until just melted. Stir in the lemon zest fresh each time to preserve its bright aroma. This pre-made glaze keeps for 5 days in the fridge. 🔥
Stack Assembly
Assemble the French toast stacks 1-2 hours ahead of serving. Place the cooked slices on a wire rack in a single layer, then drizzle lightly with the brown butter glaze. Cover loosely with plastic wrap and refrigerate—this prevents sogginess while keeping the layers intact. When ready to serve, reheat the stacks in a 375°F oven for 5-7 minutes to restore the golden crust. The glaze will warm and become silky smooth. 💛
Whipped Cream
Whip the cream just before serving to maintain its airy texture. For make-ahead convenience, store the powdered sugar and vanilla in a small container and whip the cream with them when needed. If prepping toppings in advance, keep the whipped cream in a chilled bowl with a tight lid—it holds its shape for up to 6 hours in the fridge. For extra stability, add ½ tsp unflavored gelatin dissolved in 1 tsp cold water before whipping. 🥛
Freezer Storage
For long-term storage, assemble the French toast stacks as directed, then wrap each stack individually in plastic wrap followed by aluminum foil. Place them in a freezer-safe bag and freeze for up to 1 month. To serve, thaw in the fridge overnight, then reheat in a 350°F oven for 12-15 minutes until warmed through. The texture remains tender, though the crust will be slightly less crisp. This method is perfect for brunch prep on busy mornings. ❄️
Nutrition facts
Frequently asked questions
Can I use any angel food cake for this recipe?
Yes, but quality matters! Store-bought angel food cakes like Betty Crocker or homemade versions work best—they're light and crumb-free. Avoid dense cakes or those with added mix-ins like nuts or chocolate, as they won't absorb the batter evenly. For extra fluffiness, let your homemade cake cool completely before slicing.
Why does my French toast turn out soggy?
Over-soaking the cake slices is the #1 culprit! Soak for just 10-15 seconds per side—longer soaking makes the cake absorb too much liquid. Also, ensure your skillet isn't too hot (medium-low heat prevents steam from making the interior soggy). Pat slices dry slightly before cooking if needed.
Can I make this recipe ahead of time?
Assemble the soaked cake slices on a tray, cover, and refrigerate for up to 4 hours. Cook them fresh when ready—this prevents sogginess. The brown butter glaze can be made 2 days ahead and reheated gently. For make-ahead stacks, freeze cooked slices (unassembled) for 1 month and reheat in the oven.
What's the secret to the perfect golden crust?
Three things: medium-low heat, unsalted butter, and patience! Use enough butter to coat the pan (about ½ cup total) and let it foam before adding the cake. Cook until edges are deep golden brown—2-3 minutes per side. Press gently with a spatula to ensure even browning without overcooking.
Can I substitute the brown butter glaze?
Yes! Try a maple syrup glaze (simmer ½ cup maple syrup with 1 tsp lemon juice and ½ tsp vanilla), or a simple powdered sugar glaze (mix ½ cup powdered sugar with 1 tbsp milk). For extra richness, add 1 tbsp melted white chocolate to any glaze. The brown butter adds unique nutty depth, but these alternatives work beautifully too!