
Desserts
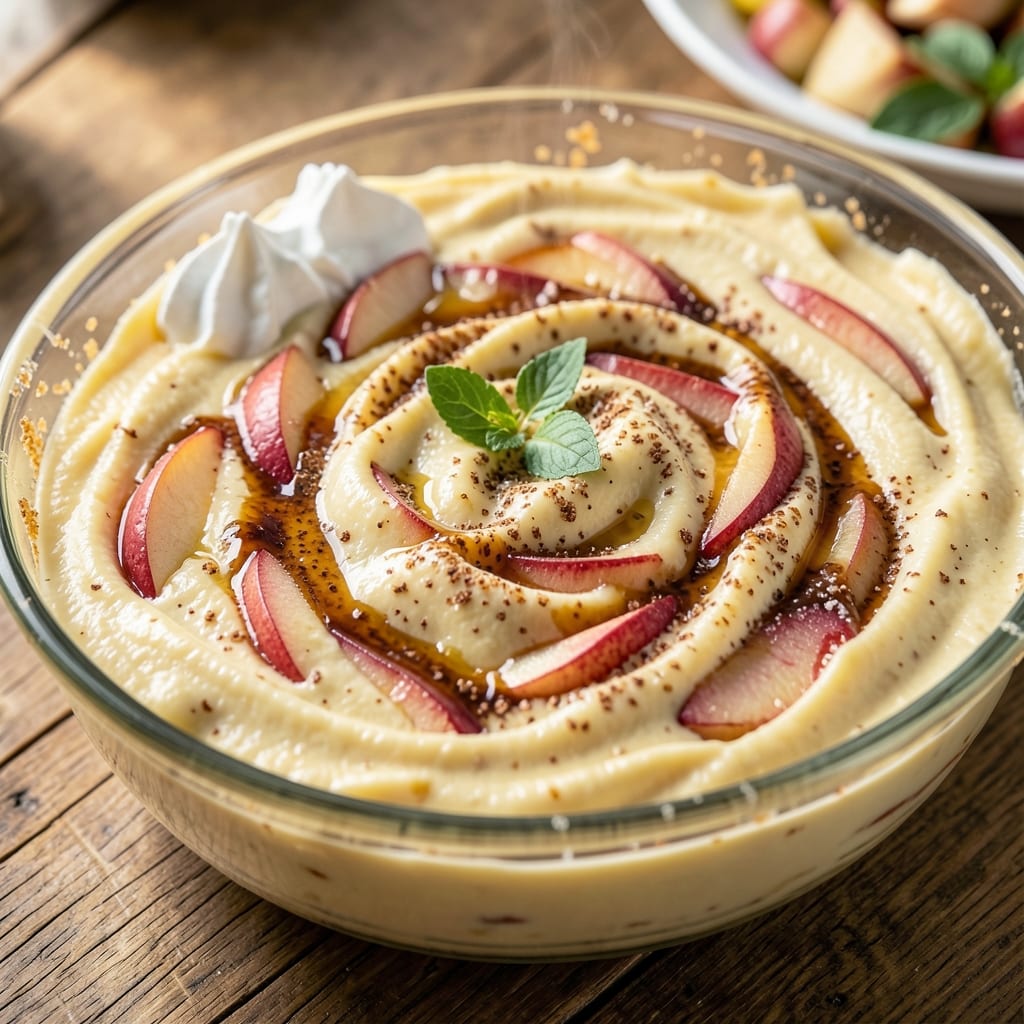
This apple cake batter recipe delivers the cozy flavors of apple pie in every moist, spiced bite—no crust required. The secret lies in blending tender cake layers with a thick, spiced apple filling that stays perfectly balanced between sweet and tart. I developed this after years of testing, ensuring the cake remains tender while the filling caramelizes just enough to create that signature apple pie experience.
The magic happens with a simple technique: mixing the cake batter and apple filling separately, then layering them together in one pan. This approach guarantees a moist crumb that stays soft for days, while the cinnamon, nutmeg, and brown sugar in the filling create deep, warm flavors. The filling thickens as it bakes, forming a luscious topping that's almost like a mini pie inside your cake.
By the time it emerges from the oven, you'll have a cake with golden-brown layers and a filling that's rich and fragrant, as if it's been slow-baked in a pie dish. The texture is what sets this apart—moist enough to cut cleanly but sturdy enough to hold its shape. It's perfect for fall gatherings, holiday desserts, or a comforting treat any time of year.
Serve it warm with vanilla ice cream or a dusting of powdered sugar for an extra touch of elegance. The recipe is designed to be straightforward, with clear steps for achieving that perfect balance of flavors and textures. Let's get started on creating a dessert that tastes like home.
Ingredients for apple cake batter
Simple ingredients that create a dessert with pie-like filling and tender cake layers.
| Ingredient | Amount | Notes |
|---|---|---|
| All-Purpose Flour 🌾 | 2 ½ cups | Sifted for light texture |
| Granulated Sugar 🍚 | 1 ¾ cups | White or light brown |
| Brown Sugar 🍚 | ¾ cup | Packed firmly for filling |
| Unsalted Butter 🧈 | 1 cup | Room temperature, full-fat |
| Large Eggs 🥚 | 2 whole | Room temperature for mixing |
| Baking Powder 🧂 | 2 tsp | Aluminum-free preferred |
| Salt 🧂 | ½ tsp | Fine sea salt |
| Ground Cinnamon 🌿 | 2 tsp | Freshly ground preferred |
| Ground Nutmeg 🌿 | ½ tsp | Freshly grated for warmth |
| Vanilla Extract 🍯 | 1 tbsp | Pure extract, not imitation |
| Apples 🍎 | 4 medium | Honeycrisp or Granny Smith |
| Lemon Juice 🍋 | 1 tbsp | Freshly squeezed |
| Whole Milk 🥛 | ½ cup | Room temperature |
| Powdered Sugar 🍚 | ¼ cup | For dusting (optional) |
The apples are the heart of this recipe—Honeycrisp or Granny Smith are perfect for their balance of sweetness and tartness. Trader Joe's and Whole Foods usually carry Honeycrisp in season, but any crisp apple works. Peel and core them, then slice into 1/4-inch pieces. The filling needs about 4 cups of chopped apples—pack them tightly to ensure enough juice for caramelization. For extra flavor, toss the sliced apples with a pinch of cinnamon and nutmeg before adding them to the filling. If you can't find fresh apples, frozen unsweetened apples thawed and drained work in a pinch, but fresh is ideal for that authentic pie taste.
No vanilla extract? Vanilla bean paste or even a scraped vanilla bean work beautifully. The milk can be swapped for buttermilk or almond milk—just keep the total liquid at half a cup. For a lower-sugar option, reduce the granulated sugar to 1.5 cups and add 1/4 cup unsweetened applesauce to the cake batter. The butter must be full-fat for that rich, moist texture—margarine or low-fat butter will make the cake dry. If you're baking in a high-altitude area, increase the baking powder to 2.5 teaspoons. And don't skip the room-temperature eggs and butter—they mix in more smoothly, ensuring a lighter crumb.
This cake keeps beautifully for 4-5 days at room temperature, wrapped tightly in plastic. For longer storage, freeze the whole cake (unfrosted) for up to 3 months. To reheat, warm slices in a 300°F oven for 5-10 minutes—the filling gets even more luscious. I always bake two cakes at once and freeze one for later. The powdered sugar dusting is optional but adds that final touch of elegance. Serve with vanilla ice cream or whipped cream for the full apple pie experience.
Why You'll Love This Recipe
- No Mixer Needed: I’ll be real—this batter comes together with a wooden spoon and a bowl. Cream the butter and sugars until light, crack in the eggs, then fold in the flour. That’s it. No stand mixer, no fuss, just good old elbow grease.
- Butter-Sugar Magic: The brown sugar keeps it moist while the granulated sugar gives that perfect caramelized bite when baked. And that butter? It’s the secret—rich, tender crumb that makes every slice feel like a hug.
- Breakfast or Dessert: Honestly, I make this for both. Serve it warm with a scoop of vanilla ice cream, or cool it down and slice it for a quick breakfast with yogurt. The apples add that sweet-tart balance that works anywhere.
- Budget-Friendly Stretch: Between us, this recipe uses pantry staples—flour, sugar, butter—so it’s cheap to make. Plus, the leftovers stay fresh for days, meaning fewer grocery runs and more time for actual baking. Win-win.
Step-by-step instructions for apple cake batter
Here's how to create a perfectly balanced batter that delivers tender crumb and rich apple pie flavor.
Prepare the Apples for Maximum Flavor
Peel, core, and slice the 4 medium apples into ¼-inch thick wedges. Toss them immediately with the 1 tablespoon lemon juice to prevent browning and enhance their natural sweetness. I like to work in batches—slice a few apples, toss with lemon juice, then move to the next while I prepare the dry ingredients. This keeps everything fresh and prevents the apples from turning mealy.
Arrange the apple slices on a paper towel-lined plate and sprinkle lightly with 1 teaspoon of the 2 teaspoons ground cinnamon and ¼ teaspoon of the 0.5 teaspoon ground nutmeg. Set aside. The spices will mingle with the apple juices as they sit, creating an aromatic filling that's ready to be folded into the batter later. This step ensures every bite delivers that classic apple pie flavor without needing a separate filling layer.
Cream Butter and Sugars for Light Texture
In a stand mixer fitted with the paddle attachment, beat the 1 cup unsalted butter (at room temperature) with the 1.75 cups granulated sugar and 0.75 cup packed brown sugar on medium speed for 3-4 minutes. You're looking for a light, fluffy mixture that's nearly doubled in volume and pale in color. This creaming process incorporates air, which creates that signature tender crumb in the finished cake.
Here's the thing—don't rush this step. I've found that under-creaming leads to dense cake, while over-creaming can make it too dry. Stop when the mixture looks like pale ribbon when you lift the paddle. Add the 1 tablespoon vanilla extract and mix for another 10 seconds to distribute the flavor evenly.
Combine Wet Ingredients for Perfect Balance
Add the 2 whole large eggs one at a time, mixing on low speed for 30 seconds after each addition until fully incorporated. Then add the 0.5 cup whole milk and mix for another 30 seconds until smooth. The mixture should be thick but pourable—like heavy pudding. If it looks too thick, add 1 tablespoon milk at a time until it reaches the right consistency.
In a separate bowl, whisk together the 2.5 cups all-purpose flour, 2 teaspoons baking powder, 0.5 teaspoon salt, remaining 1 teaspoon ground cinnamon, and remaining ¼ teaspoon ground nutmeg. Sift the flour mixture directly into the wet ingredients while mixing on low speed for 30-45 seconds until just combined. Over-mixing develops gluten, which can make the cake tough—stop as soon as you see no more flour streaks.
Fold in Apples and Prepare for Baking
Using a silicone spatula, gently fold the prepared apple slices into the batter until evenly distributed. You'll notice the apples release their juices as you fold—they should be coated in batter but still visible throughout. Pour the batter into two 9-inch round cake pans lined with parchment paper, dividing evenly between them. The batter should fill the pans about ⅔ full—it won't rise much after baking.
Here's where it gets important: don't overfill the pans. The apples will release moisture as they bake, and you want room for the cake to expand slightly. Sprinkle the tops with the 0.25 cup powdered sugar (if using) for a subtle sweet finish. The sugar will caramelize slightly during baking, adding to the cake's appeal. Let the batter sit at room temperature for 10-15 minutes before baking to allow the flour to fully hydrate and the apples to settle.
Bake for Moist, Evenly Textured Cake
Preheat your oven to 350°F. Place the prepared cake pans on the middle rack and bake for 45-50 minutes, or until a toothpick inserted into the center comes out clean. The cake should be golden brown on top and spring back slightly when pressed gently in the center. If the tops brown too quickly, tent loosely with foil after 25 minutes.
I know it seems counterintuitive, but don't overbake. The cake will continue cooking slightly as it cools, and overbaking leads to dryness. The internal temperature should reach 205-210°F when done. Remove from the oven and let the cakes cool in their pans for 10 minutes before transferring to a wire rack to cool completely. The residual heat ensures even cooking throughout, while the cooling period allows the juices to redistribute for that signature moist texture.
Pro Tips For Making Apple Cake Batter
- Mix Butter and Sugars First: I learned this the hard way—skipping the creaming step means a denser cake. Beat the butter, brown sugar, and granulated sugar together until light and fluffy (about 3-5 minutes). That air gets trapped, making the cake rise better and taste richer.
- Use Room-Temperature Eggs: Cold eggs? They’ll curdle when mixed with butter, leaving streaks in your batter. Take them out 30 minutes before baking (or run them under warm water for 10 seconds). The batter will be smoother, and the cake will hold together better.
- Don’t Overmix the Batter: Once you add the flour, mix just until combined—lumps and all. Overmixing develops gluten, which makes the cake tough. Stir with a spatula until the dry ingredients disappear, then stop. Your cake will stay tender, not chewy.
- Add Apples Last: Toss the apples in a little flour and cinnamon first, but fold them into the batter right before pouring into the pan. This keeps them from sinking to the bottom and turning mushy. If you’re lazy, use pre-sliced apples (just pat them dry first).
Pro cooking tips for great apple cake batter
Creaming Perfection
The butter-sugar creaming step is where the magic happens for that signature tender crumb. Use a stand mixer with paddle attachment (like my KitchenAid Artisan Series) and cream the 1 cup unsalted butter with sugars on medium speed for exactly 3-4 minutes. Stop when you can lift the paddle and see a pale ribbon trail—this means proper air incorporation. I've ruined cakes by under-creaming (dense texture) and over-creaming (dry cake), so trust your eyes and timing. 🌟
Apple Prep Secrets
Slice apples ¼-inch thick using a mandoline for even pieces—this ensures consistent baking. Toss immediately with lemon juice to prevent browning, then sprinkle with 1 tsp cinnamon and ¼ tsp nutmeg while they sit. The spices infuse into the apple juices, creating that authentic pie flavor without needing a separate filling layer. Pro tip: Work in batches to keep apples fresh while you mix the batter.
Batter Consistency
The final batter should be thick but pourable—like heavy pudding. If it looks too stiff, add 1 tbsp milk at a time until it reaches the right consistency. When folding in apples, use a silicone spatula to gently combine—you want visible apple pieces throughout, not a puree. The apples release juices as they bake, so don't overfill the pans (⅔ full max). This prevents overflow and ensures even baking.
Baking Precision
Bake at 350°F for 45-50 minutes until a toothpick comes out clean. The cake continues cooking as it cools, so don't overbake—aim for 205-210°F internal temp. If tops brown too quickly, tent with foil after 25 minutes. Let cakes cool in pans for 10 minutes before transferring to a rack. This resting period lets juices redistribute, resulting in that moist, pie-like texture we're after. ⏰
Equipment Must-Haves
For this recipe, I rely on a few key tools: a stand mixer (KitchenAid or Cuisinart), 9-inch round cake pans (with removable bottoms for easy release), and a mandoline for precise apple slicing. A digital thermometer ensures accurate internal temperature reading. The paddle attachment is critical for creaming—balloon whisks won't incorporate enough air. Don't skimp on quality pans—they conduct heat evenly for perfect results.
Troubleshooting Tips
If your cake turns out dense, you likely under-creamed the butter and sugar or overmixed the batter. For a dry cake, check your butter temperature—it must be room temp (press your finger in; it should leave a slight indent). If the filling is too watery after baking, use Granny Smith apples (more tart = less juice) or reduce lemon juice slightly. For uneven baking, rotate pans halfway through and ensure your oven racks are in the middle position for even heat distribution. 💡
Nutrition facts
Frequently asked questions
Can I make this apple cake in a single 9x13-inch pan instead of two round pans?
Yes, but you'll need to adjust the baking time and temperature slightly. Use the same batter amount and bake in a 9x13-inch pan at 325°F for 50-55 minutes instead of 350°F. The larger surface area means slower cooking, so check for doneness with a toothpick at 45 minutes. The cake will spread more, so line the pan with parchment paper for easy removal.
What's the best way to store leftovers to keep them moist?
Wrap the cooled cake tightly in plastic wrap or aluminum foil, then place it in an airtight container. For short-term storage, keep it at room temperature for up to 4 days. For longer storage, freeze the whole cake (unfrosted) for up to 3 months. To reheat, warm slices in a 300°F oven for 5-10 minutes or microwave for 15-20 seconds to restore moisture.
Can I substitute applesauce for fresh apples in this recipe?
You can try, but the texture and flavor will differ significantly. For a similar effect, use 1.5 cups unsweetened applesauce and reduce the milk to 0.25 cup to maintain proper batter consistency. However, fresh apples provide better texture and caramelization during baking. If you must use applesauce, add 1 teaspoon extra cinnamon to compensate for the lost spice infusion.
Why did my cake turn out dry, even though I followed the recipe?
Dry cake usually results from overbaking, using cold butter, or overmixing. First, check your butter—it must be room temperature (press your finger in; it should leave a slight indent). Second, ensure you baked it until 205-210°F internal temp, not longer. Finally, avoid overmixing the batter after adding flour—stop as soon as no dry streaks remain. If it's still dry, try brushing warm slices with simple syrup before serving.
How can I make this cake gluten-free?
Replace the all-purpose flour with a 1:1 gluten-free baking flour blend (like Bob's Red Mill or King Arthur) and add 1 teaspoon xanthan gum to improve structure. Use 0.5 cup almond milk instead of dairy milk, and consider reducing the sugar by 0.25 cup since gluten-free batters can be denser. You may also need to bake at 325°F for 55-60 minutes to ensure even cooking.