
Desserts
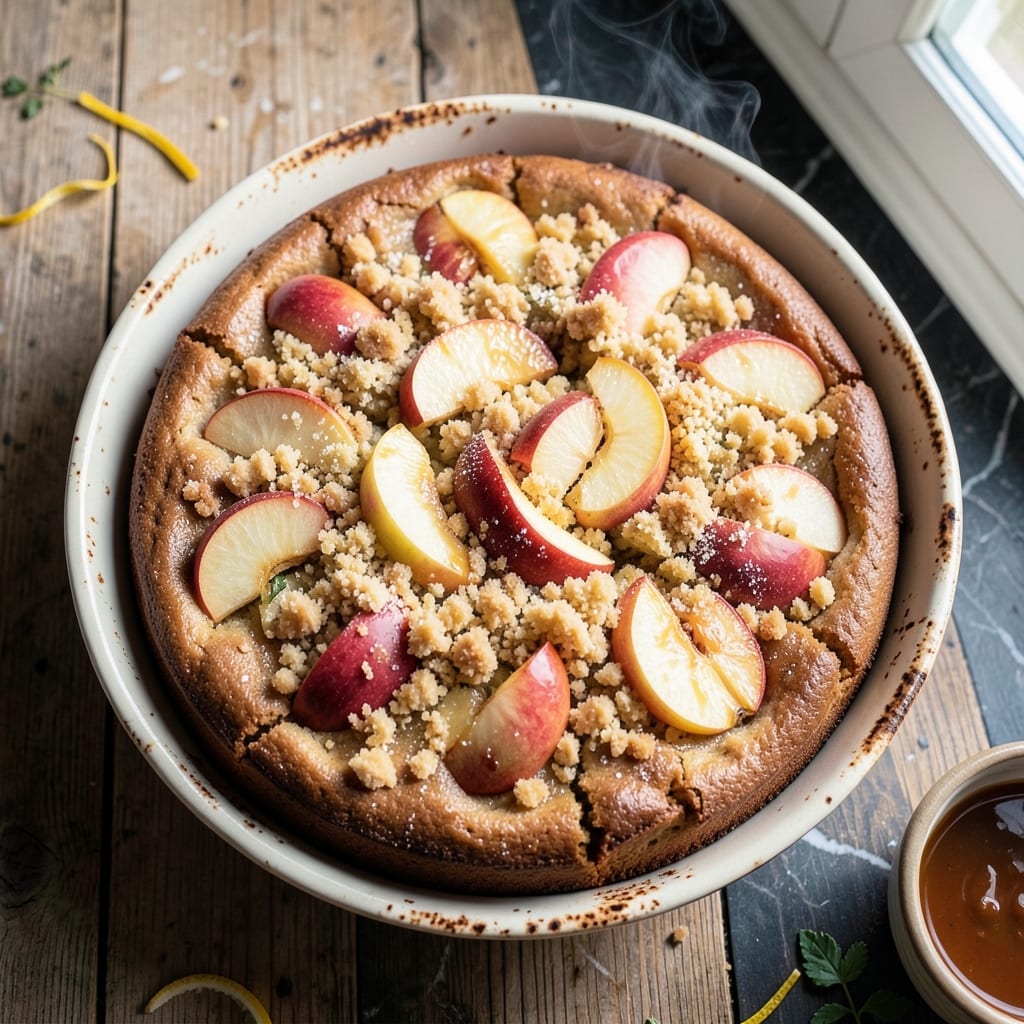
This apple cake tray bake delivers all the cozy comfort of a classic apple cake without the fuss of layers or frosting. The secret lies in a simple one-dish method where tender cake meets caramelized apples in a golden-brown crust—perfect for feeding a crowd with minimal cleanup. 🍏 I developed this recipe after years of perfecting the balance between moist cake and perfectly spiced apples, ensuring every slice is rich, flavorful, and foolproof even for beginners.
The beauty of this tray bake is its simplicity: just mix, pour, and bake. A buttery cake base absorbs the juices from tender apples, cinnamon, and a touch of nutmeg, while the top develops a caramelized crust that’s irresistibly crisp. The best part? It all comes together in a single baking dish, making it ideal for potlucks, family gatherings, or a comforting weekend treat.
What you’ll end up with is a warm, spiced apple cake that’s moist yet firm enough to slice neatly. The apples stay tender and sweet, while the cake remains rich and flavorful—no soggy bottoms or dry crumbs here. Serve it warm with a scoop of vanilla ice cream or a dusting of powdered sugar for an extra touch of elegance.
This recipe is designed to impress with minimal effort, so you can spend less time in the kitchen and more time enjoying the results. Whether you’re baking for a holiday dessert or a casual get-together, this apple cake tray bake is the perfect solution.
Ingredients for apple cake tray bake
Buttery cake base meets caramelized apples in this one-dish wonder—just 13 ingredients for crowd-pleasing magic.
| Ingredient | Amount | Notes |
|---|---|---|
| All-Purpose Flour 🌾 | 2 ½ cups | Sifted for light texture |
| Granulated Sugar 🍚 | 1 ½ cups | White or light brown |
| Packed Brown Sugar 🍚 | ½ cup | For caramelized flavor |
| Unsalted Butter 🧈 | 1 cup | Cold, cubed for flakiness |
| Large Eggs 🥚 | 2 whole | Room temperature preferred |
| Vanilla Extract 🍯 | 1 tbsp | Pure extract, not imitation |
| Baking Powder 🧂 | 2 tsp | Freshly opened package |
| Ground Cinnamon 🌿 | 2 tsp | Freshly toasted preferred |
| Ground Nutmeg 🌿 | ½ tsp | Freshly grated preferred |
| Salt 🧂 | ½ tsp | Fine sea salt preferred |
| Honeycrisp Apples 🍏 | 4 medium | Peeled, cored, sliced thin |
| Lemon Juice 🍋 | 2 tbsp | Freshly squeezed |
| Powdered Sugar 🍚 | ¼ cup | For dusting, optional |
The apples are everything here. Honeycrisp or Gala work best—they hold shape while getting tender. Grab a mix if you're feeding a crowd, but Trader Joe's has the best selection of single varieties. Peel and slice them thin (about 1/8-inch) so they caramelize fast but stay juicy. If you've got time, toss them in lemon juice right away—it keeps them from browning while you prep the rest. Pro tip: slice them right before baking so they don't turn mushy.
No Honeycrisp? Fuji or Pink Lady are solid backups—just slice them a tad thicker. Running low on vanilla? Almond extract at half the amount adds depth. For the butter, I always use Land O'Lakes unsalted because it's reliable, but European-style butter makes this even richer. The powdered sugar is totally optional—skip it if you're serving this warm with ice cream, but dust it on top if you're going for that bakery-style finish. And if you're worried about the cake being too dry, don't be—this method keeps it moist while the apples caramelize on top.
This keeps beautifully for 3 days in an airtight container at room temperature, but honestly? It's even better the second day once all the flavors meld. For make-ahead prep, assemble the whole thing (unbaked) and refrigerate overnight—bake straight from the fridge, adding 10-15 minutes to the cook time. Freezes for 2 months too, though the texture gets slightly denser after thawing. I always bake mine in a 9x13-inch glass dish—it conducts heat better than metal, so the crust gets that perfect caramelized crunch.
Why You'll Love This Recipe
- No Mixer Needed: I swear by this recipe when my mixer’s on the fritz—just toss the dry ingredients, cut in cold butter until it’s pea-sized, then fold in the apples. The texture’s tender without a single electric beat.
- Sweet-Spiced Magic: That combo of brown sugar and granulated sugar? It caramelizes the apples just enough to give you a moist crumb with a subtle chew. Add a pinch of cinnamon, and suddenly you’ve got dessert-level flavor in a cake.
- Weeknight Hero: Slice it warm for breakfast, pack it for lunch, or serve it at a picnic—this holds up like a champ. Honestly, I’ve had it cold the next day with a smear of butter, and it’s still delicious.
- Budget-Friendly Luxury: Five simple ingredients, no specialty items, and it feeds six for under $5. Between us, this is the kind of cake that makes you feel fancy without breaking the bank—especially when you use apples from your own stash.
Step-by-step instructions for apple cake tray bake
Here's how to create a showstopping apple cake with caramelized topping—no fancy pans needed!
👨🍳 Step 1: Prep the Apples and Mix Dry Ingredients
Peel, core, and slice the 4 medium Honeycrisp apples into ¼-inch thick slices. Toss them immediately with the 2 tablespoons lemon juice to prevent browning—this keeps them bright and tender. I like to arrange them in a single layer on a plate while I mix the batter.
In a large bowl, whisk together the 2.5 cups all-purpose flour, 1.5 cups granulated sugar, 0.5 cup packed brown sugar, 2 teaspoons baking powder, 2 teaspoons ground cinnamon, 0.5 teaspoon ground nutmeg, and 0.5 teaspoon salt. Sift the flour first for a light texture—this prevents dense cake. I use my fingers to break up any lumps in the brown sugar for even distribution.
🍳 Step 2: Cream Butter and Eggs for Maximum Flakiness
In a separate bowl, beat the 1 cup cold, cubed unsalted butter with the 2 whole large eggs on medium speed for 2-3 minutes until light and fluffy. The butter should be creamed to the point where it nearly doubles in volume and leaves a ribbon trail when the beaters lift. This step is crucial—it creates those beautiful flaky layers in the cake.
Add the 1 tablespoon vanilla extract and mix for 10 seconds until combined. I like to scrape down the sides of the bowl with a spatula to ensure everything is evenly incorporated. The mixture should look pale and slightly thickened—this ensures a tender crumb.
🥘 Step 3: Combine Wet and Dry Ingredients
Gradually add the dry ingredient mixture to the butter-egg mixture in 3 additions, mixing on low speed after each addition just until combined. Overmixing develops gluten, which makes the cake tough. Stop mixing as soon as you see no more flour streaks—this keeps the texture light and airy.
Fold in the prepared apple slices using a silicone spatula, being careful not to break them up. Arrange them in a single layer on top of the batter, slightly overlapping them like shingles. This creates that gorgeous caramelized apple top we're after. Sprinkle the 0.25 cup powdered sugar evenly over the apples for extra sweetness and a pretty finish.
🔥 Step 4: Bake to Golden Perfection
Preheat your oven to 350°F and grease a 9x13-inch baking dish thoroughly with butter or nonstick spray. Transfer the batter and apple mixture to the prepared dish, pressing down gently to ensure even contact with the bottom of the pan.
Bake for 45-50 minutes until the edges are golden brown and a toothpick inserted in the center comes out clean. The apples should be tender but still hold their shape slightly. If the top browns too quickly, tent loosely with foil after 30 minutes to prevent over-browning while the center finishes baking.
⏰ Step 5: Rest and Serve Warm
Remove the cake from the oven and let it cool in the pan for 10 minutes before transferring to a wire rack. This resting period allows the juices to redistribute, ensuring every slice is moist and flavorful. I know it's tempting to dig in immediately, but patience here makes all the difference.
Serve warm slices straight from the oven for the ultimate experience—the caramelized apples will be tender with a hint of spice, and the cake will be perfectly moist. The combination of warm spiced cake with sweet, tangy apples is pure comfort food magic. Store any leftovers in an airtight container at room temperature for up to 3 days or refrigerate for up to 5 days.
Pro Tips For Making Apple Cake Tray Bake
- Cream Butter Properly: Beat the butter and sugars until it’s pale and fluffy—not just combined. I used to skip this, and the cake turned dense; now I go until the mixture lightens by about 3-4 minutes. That’s the difference between a tender crumb and a brick.
- Use Cold Apples: Slice apples just before folding into the batter and keep them refrigerated until the last step. Warm apples release moisture too fast, making the cake soggy. Trust me, your future self will notice the texture difference.
- Skip Overmixing: Fold in dry ingredients gently—just until no flour streaks remain. I learned this the hard way: overmixing develops gluten, and your tray bake turns out tough instead of light. Think "toss, don’t stir."
- Rotate the Pan: Swap the tray’s position halfway through baking (front to back, then back to front). My first batch had a dark edge and pale center—I was too lazy to move it. Now I set a timer to rotate at 20 minutes, and the cake bakes evenly.
Pro cooking tips for this recipe
Butter Creaming Mastery
The secret to a tender, flaky apple cake starts with perfectly creamed butter and eggs. Use cold, cubed butter straight from the fridge—this ensures maximum air incorporation. Beat on medium speed for 2-3 minutes until the mixture is pale and nearly doubles in volume. I like to test by lifting the beaters: if the ribbon holds for a few seconds, you're golden. 🍳
Never skip this step! Under-creamed butter creates dense cake, while over-creaming adds too much gluten. Stop mixing as soon as the butter is fluffy—this keeps your cake light. Pro tip: Use a stand mixer with the paddle attachment for best results, but a hand mixer works too if you mix on high for an extra minute.
Apple Placement Technique
Arranging the apples properly creates that stunning caramelized topping. After folding them into the batter, spread them in a single overlapping layer like roof shingles. This ensures even caramelization while keeping the center moist. I like to press down gently on the apples to make contact with the batter underneath—this prevents sinking during baking.
For extra visual appeal, sprinkle the apples with powdered sugar before baking. This creates a delicate, snowy finish that contrasts beautifully with the golden crust. If your apples are very juicy, pat them dry slightly with a paper towel to prevent a soggy bottom.
Oven Temperature Control
Bake at 350°F for consistent results—any hotter and the top burns before the center sets. I always preheat my oven for 15 minutes before baking to ensure even heat distribution. Place your 9x13-inch baking dish on the middle rack for even baking.
Watch for the 30-minute mark—if the edges are browning too quickly, loosely tent with foil. This prevents over-browning while the center finishes cooking. The cake is done when a toothpick comes out clean (or with a few moist crumbs). Let it rest for 10 minutes before slicing—this prevents crumbling.
Caramelization Secrets
For deeper apple flavor, toss the sliced apples with lemon juice immediately after cutting. This brightens their natural sweetness and prevents premature browning. I also recommend using Honeycrisp apples—their crisp texture holds up beautifully during baking while developing rich caramelized notes.
For extra depth, sprinkle a pinch of cinnamon directly on the apples before baking. This intensifies the spice flavor and creates beautiful color contrast. The apples should be tender but still slightly firm when done—this ensures they hold their shape in each slice.
Nutrition facts
Frequently asked questions
Can I use any type of apple for this tray bake?
Honeycrisp or Gala apples work best—they stay tender while caramelizing beautifully. For a crowd, mix varieties like Fuji or Pink Lady (slice them slightly thicker). Avoid mealy apples like Granny Smith—they won't caramelize as nicely.
How do I prevent a soggy bottom?
Pat apple slices dry with a paper towel before folding them into the batter. Also, press the apples gently into the cake base to ensure contact with the batter—not the pan. Baking in a glass dish (instead of metal) helps distribute heat evenly.
Can I make this ahead of time?
Yes! Assemble the unbaked tray bake and refrigerate overnight. Bake straight from the fridge, adding 10-15 minutes to the cook time. For make-ahead serving, store baked cake in an airtight container for 3 days at room temperature or 5 days refrigerated.
Why did my cake turn out dense?
Overmixing develops gluten, making the cake tough. Stop mixing as soon as flour disappears. Also, ensure butter is cold when creaming—room-temperature butter creates dense texture. Use a stand mixer paddle attachment for best results.
Can I add nuts or raisins?
Fold in ½ cup chopped walnuts or pecans with the apples, or add ½ cup raisins for extra sweetness. Toast nuts first for enhanced flavor. Just reduce powdered sugar to ¼ cup to balance the extra richness.