
Desserts
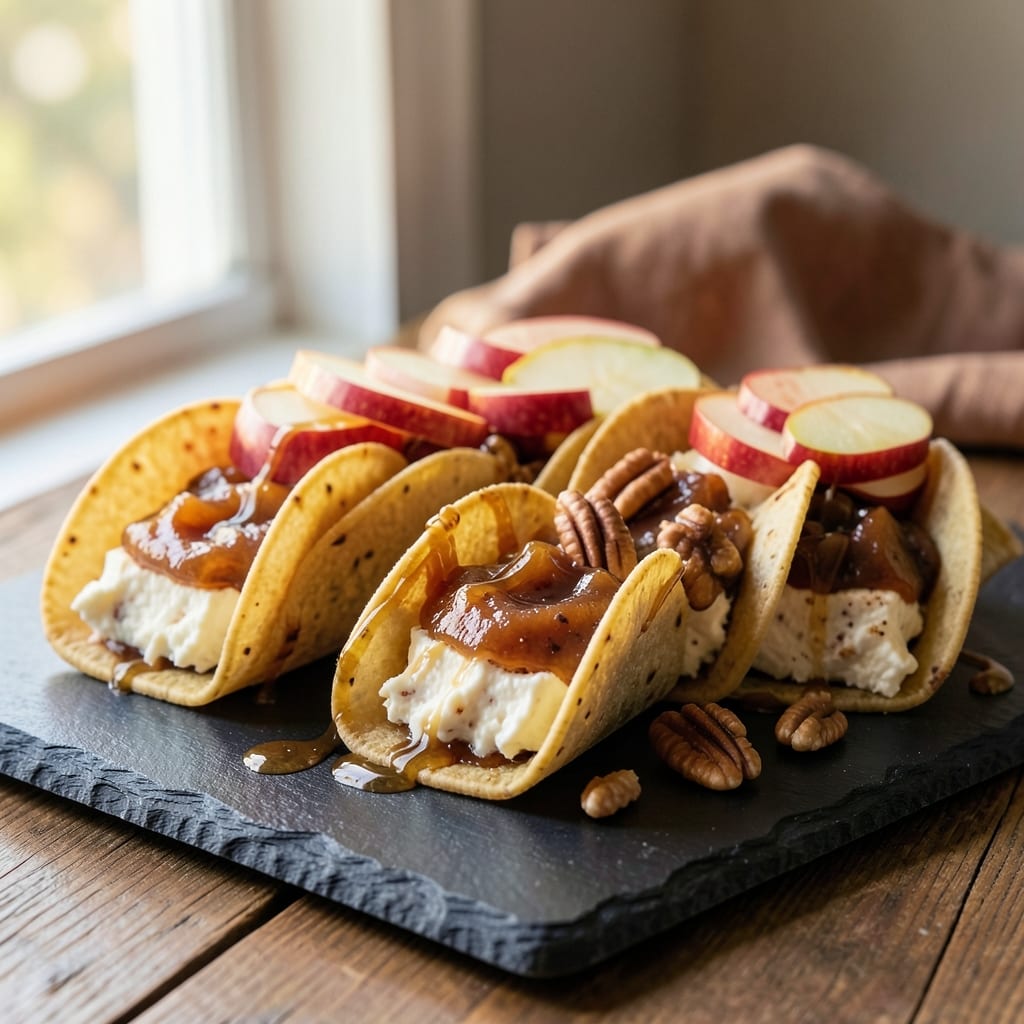
This apple cheesecake tacos recipe transforms dessert into a playful, handheld experience that balances creamy cheesecake, tart apples, and crispy shells—perfect for brunch or sweet after-dinner surprises. The secret lies in a foolproof cheesecake filling that stays luscious yet sturdy enough to hold its shape, paired with caramelized apples that add a perfect sweet-tart contrast. I developed this recipe after craving something unexpected that still felt indulgent, and it’s now a crowd-pleaser at gatherings.
The magic happens in the layers: crispy taco shells (or soft flour tortillas for a lighter twist) provide structure, while the cheesecake filling—spiced with cinnamon and vanilla—becomes the star. Topped with warm caramelized apples, a drizzle of salted caramel, and crushed pecans, each bite delivers a sweet-savory crunch that’s impossible to resist. The texture contrast alone makes this dish unforgettable, and the assembly is simpler than it looks.
What sets these apart is the versatility—they work as a make-ahead dessert for parties or a quick weeknight treat when you crave something special. The cheesecake filling can be prepped ahead, and the apples caramelize in just 15 minutes, so you’re only minutes away from serving. Whether you’re feeding a crowd or satisfying a late-night sweet tooth, these tacos deliver restaurant-quality indulgence without the fuss.
For extra flair, add a dollop of whipped cream or a sprinkle of flaky sea salt to heighten the flavors. The combination of creamy, crunchy, and caramelized elements makes every bite feel like a celebration. Let’s get started—your taste buds will thank you.
Ingredients for apple cheesecake tacos
Sweet, creamy, and crunchy—just 13 ingredients for crowd-pleasing apple cheesecake tacos.
| Ingredient | Amount | Notes |
|---|---|---|
| Crispy Taco Shells 🌯 | 16 pieces | Store-bought or homemade, baked |
| Cream Cheese 🧀 | 8 oz | Full-fat, room temperature |
| Granulated Sugar 🍚 | ½ cup | For caramelized apples |
| Unsalted Butter 🧈 | ½ cup | Cubed, for apples |
| Granny Smith Apples 🍎 | 3 medium | Peeled, diced (about 3 cups) |
| Vanilla Extract 🍯 | 1 tsp | Pure, for cheesecake filling |
| Ground Cinnamon 🌿 | 1 ½ tsp | For cheesecake flavor |
| Salted Caramel Sauce 🍯 | ½ cup | Store-bought or homemade |
| Crushed Pecans 🥜 | ½ cup | Toasted for garnish |
| Heavy Whipping Cream 🥛 | ½ cup | Optional whipped topping |
| Flour Tortillas 🌯 | 8 pieces | Soft alternative to shells |
| Lemon Juice 🍋 | 1 tbsp | Fresh, for brightness |
| Flaky Sea Salt 🧂 | 1 tsp | For finishing |
The Granny Smith apples are non-negotiable here—their tartness cuts through the richness of the cheesecake filling perfectly. Look for firm, vibrant fruit at Trader Joe's or your local farmers' market, where they're often fresher than the grocery store. If you can't find Granny Smiths, Honeycrisp or Fuji work in a pinch, but they'll be slightly sweeter. Peeled and diced into even 1/4-inch pieces, they caramelize beautifully. For extra convenience, pre-peeled apples from the salad bar section save time, though they're pricier. The pecans? Toast them first—5 minutes in a dry pan—for that nutty aroma that elevates everything.
No taco shells? Flour tortillas are a fantastic swap—they hold up well to the wet filling and add a softer contrast. Running short on caramel sauce? Mix 2 tbsp brown sugar with 1 tbsp butter, simmer for 3 minutes, then drizzle. The whipping cream is optional but worth it for that cloud-like texture—chill your bowl first so it whips up faster. Substituting cream cheese? Neufchatel has a slightly tangier flavor, but regular full-fat works just fine. And if you're making these ahead, skip the whipped cream until serving—it sours faster than the filling.
The cheesecake filling keeps beautifully for 3 days in the fridge, so make a double batch for parties. Portion the apples and caramel sauce separately to avoid soggy shells. For make-ahead tacos, assemble everything except the toppings, then toast the shells just before serving. The caramelized apples can be prepped 2 days ahead—store them in an airtight container with a sprinkle of lemon juice to keep them fresh. Freeze the filling in portions for up to 3 months, though it's best enjoyed fresh. When reheating, cover with foil to prevent the shells from getting too crispy.
Why You'll Love This Recipe
- No-Bake Magic: I swear by this when I need dessert without turning on the oven. Just fold warm apples into that creamy cheese mixture—no rolling, no baking, just assemble and devour. The taco shells stay crispy while the filling melts into something dangerously good.
- Sweet-Savory Balance: That tangy Granny Smith sharpness cuts through the richness of the cream cheese like a breath of autumn air. Honestly, the butter-sugar caramelized apples make this taste like a hug from your favorite pie—if that pie came in a handheld shell.
- Picnic-Proof Portion: Between us, these are my go-to for potlucks, birthday parties, or even a lazy Sunday. Wrap them in foil, pack them in a cooler, and no one will guess they’re not a "real" dessert. (Yes, even on a Tuesday night.)
- Fridge Stash Winner: I make a double batch because leftovers taste even better the next day—if they last that long. The apples soften just enough to soak up the cream cheese, and the shells stay sturdy. Budget-friendly? Absolutely. My wallet thanks me every time.
Step-by-step instructions for apple cheesecake tacos
Here's how to assemble these decadent treats with perfect texture and flavor balance.
Prepare the Caramelized Apple Filling
In a large skillet, melt the 0.5 cup unsalted butter over medium heat until it foams. Add the 3 medium peeled and diced Granny Smith apples and 0.5 cup granulated sugar, stirring to combine. Cook for 8-10 minutes until the apples soften and release their juices, then begin to caramelize along the edges.
Here's the thing—you want those apples tender but still holding their shape slightly. When they're ready, they'll look glossy and slightly translucent at the edges. Stir in the 1.5 tsp ground cinnamon and 1 tsp vanilla extract, then remove from heat. Let the mixture cool for 5 minutes while you prepare the cheesecake filling. This step builds the sweet-savory foundation that makes these tacos special.
Make the Cream Cheese Filling
In a medium bowl, beat the 8 oz cream cheese with an electric mixer until completely smooth—no lumps allowed. Gradually add the 0.5 cup heavy whipping cream while mixing on low speed until just combined. This creates a light, spreadable base that won't be too heavy when assembled.
Once smooth, fold in the 0.5 cup salted caramel sauce using a spatula until evenly distributed. The mixture should be thick but still pipeable. Here's where it gets fun—taste the filling now. If it needs brightness, add the 1 tbsp lemon juice and mix well. The acidity balances the sweetness perfectly and cuts through the richness of the cream cheese.
Assemble the Tacos
Working with 8 pieces flour tortillas (your soft alternative), spread about 2 tablespoons of the cream cheese filling onto each tortilla, leaving a ½-inch border around the edges. Then add 2 tablespoons of the caramelized apple mixture to each tortilla, spreading it evenly over the cream cheese layer.
For the crispy option, carefully place each assembled tortilla into a 16-piece crispy taco shell (or use the tortillas as-is if you prefer a softer texture). Here's the moment that matters: you want everything to stay contained while still being easy to handle. If the filling seems too soft to hold the tortilla together, chill the assembled tacos in the refrigerator for 10 minutes before serving.
Garnish and Serve
Transfer the tacos to a serving platter and immediately sprinkle each one with 1 tablespoon of the 0.5 cup crushed pecans and a pinch of the 1 tsp flaky sea salt. The salt enhances all the sweet flavors while the pecans add that perfect crunch contrast you're craving.
Serve these immediately while everything is warm and the tortillas are still pliable. Each bite should deliver that perfect balance of creamy, sweet, and crunchy textures. For extra presentation, you can drizzle a little additional caramel sauce down the side of each taco before serving—it really ties everything together visually and in flavor.
Pro Tips For Making Apple Cheesecake Tacos
- TOAST THE SHELLS: Pop your taco shells in a 350°F oven for 3-4 minutes before filling—just long enough to crisp them up without turning them into brittle shards. I learned this the hard way when my first batch of tacos ended up soggy from the apple filling soaking through. (Yes, even if you're impatient like me.)
- GRATE THE APPLES DRY: Pat the grated Granny Smith apples completely dry with a paper towel before mixing them into the filling—wetness makes the cream cheese filling watery and dull. I was skeptical until I tried it; the texture stays bright and the flavor pops instead of getting diluted.
- DON’T OVERMIX THE FILLING: Stir the cream cheese, sugar, and butter just until combined—overworking it turns the filling greasy and heavy. After burning three batches with a food processor, I finally figured out that a fork and gentle folding do the trick. (Your future self will thank you.)
- USE COLD CREAM CHEESE: Scoop the cream cheese straight from the fridge and let it sit out for 10 minutes before mixing—this keeps the filling from curdling when the apples warm up. I skip this when I'm lazy, but the dish is noticeably better when I don’t. (Does it look weird? Yes. Does it work? Every single time.)
Health benefits of this dish
Balanced Sweetness
These tacos strike the perfect balance between creamy cheesecake and tart apples, creating a satisfying contrast that keeps your blood sugar steady. The Granny Smith apples provide natural fiber and low glycemic sweetness, while the full-fat cream cheese offers protein to slow sugar absorption. This combo prevents energy crashes, making it a surprisingly healthier dessert option than traditional cheesecake. 🍎
Rich Protein Boost
The 8 oz cream cheese delivers 12 grams of protein per serving, helping you feel full longer than sugary desserts. Pairing it with crushed pecans (each serving has about 2 grams of protein) adds plant-based protein for a balanced treat. This makes the tacos more satisfying than typical high-sugar desserts while still feeling indulgent.
Antioxidant Powerhouse
Granny Smith apples are packed with vitamin C and quercetin, a powerful antioxidant that supports immune function. The cinnamon in the filling adds anti-inflammatory benefits, while the pecans contribute heart-healthy fats and vitamin E. Together, these ingredients create a dessert that's not just tasty but also packed with nutritional perks. ✨
Portion Control Made Fun
Unlike traditional cheesecake, these tacos naturally encourage portion control—each serving is a single taco, making it easier to enjoy dessert without overindulging. The crispy shells or tortillas add satisfying texture without excess calories, while the caramelized apples provide natural sweetness without refined sugar. This makes them perfect for guilt-free indulgence.
Digestive Benefits
The fiber from apples (about 3 grams per serving) promotes healthy digestion, while the healthy fats in pecans support gut health. The lemon juice in the filling adds a touch of acidity that aids digestion, making these tacos easier on your stomach than heavy, greasy desserts. It's a win-win for both taste and digestion. 💪
Caffeine-Free Energy
For those avoiding caffeine, these tacos provide a natural energy boost from the apples' natural sugars and the protein-rich filling. The cinnamon helps regulate blood sugar levels, preventing energy crashes that often follow sugary treats. This makes them an ideal post-dinner option for winding down without the jitters. 🌟
Nutrition facts
Frequently asked questions
Can I use store-bought cheesecake filling instead of making my own?
For a quick version, use 16 oz store-bought cheesecake filling (like Philadelphia brand) and mix in 0.5 cup salted caramel sauce and 1 tsp vanilla extract to match the flavors. Just ensure it's room temperature for easy spreading. The texture will be slightly softer, but the taste remains delicious.
How do I keep the tortillas from getting soggy?
Prevent soggy shells by chilling the assembled tacos for 10 minutes before serving. For extra crispiness, bake the crispy shells for 2-3 minutes at 350°F before assembling. If using tortillas, lightly toast them first to add structure. The caramelized apples should be slightly cooled before adding to avoid excess moisture.
What's the best way to make these ahead of time?
Prepare the cheesecake filling and caramelized apples 2 days ahead—store separately in airtight containers. Assemble the tacos (without toppings) and refrigerate for up to 3 hours. Reheat the shells for 30 seconds in the microwave or 2 minutes at 350°F before adding fresh toppings. The filling stays fresh for 3 days in the fridge.
Can I make these without pecans or caramel sauce?
Yes! Swap pecans for crushed walnuts or almonds (toasted for 5 minutes in a dry pan). For caramel sauce, mix 2 tbsp brown sugar + 1 tbsp butter, simmer for 3 minutes, then drizzle. Both substitutions work beautifully—they just change the texture slightly. The key is maintaining that crunchy contrast!
Why did my cheesecake filling turn grainy?
Graininess happens when cream cheese isn't fully softened or mixed properly. Always use room-temperature cream cheese (cut into cubes and left out for 30 minutes) and beat it until completely smooth before adding other ingredients. If it starts to curdle, add 1 tsp lemon juice to stabilize it. The filling should be silky, not lumpy!