
Desserts
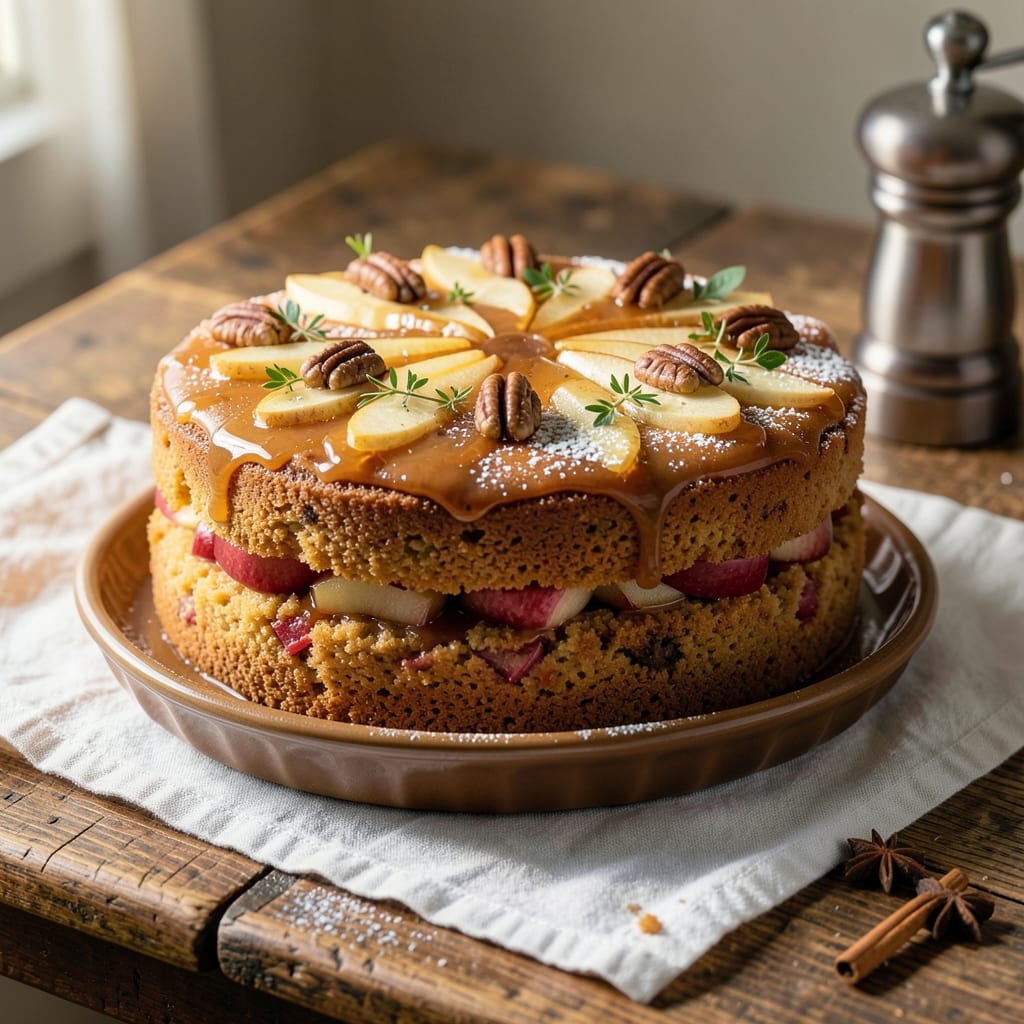
This apple fall harvest cake captures the essence of autumn in every bite—spiced apple layers with a crispy streusel top that crumbles perfectly. 🍏 The secret to its success lies in balancing tender cake layers with a filling that’s just sweet enough to complement the warm cinnamon and nutmeg flavors. I’ve perfected this recipe over years of baking for harvest festivals, where it always disappears first.
The cake itself is light and buttery, designed to hold up to the weight of the spiced apple filling without becoming soggy. The streusel topping, made with oats, brown sugar, and melted butter, bakes to a golden, crispy finish that adds texture and depth. What makes this recipe special is how the flavors develop as the cake cools—each slice offers a harmonious blend of tender cake, jammy apple, and buttery crunch.
Baking this cake is straightforward, with clear steps for mixing, layering, and baking at 350°F for about 40 minutes. The filling comes together in minutes, and the streusel topping requires minimal effort but delivers maximum flavor. Once cooled, the cake is ready to be sliced, drizzled with caramel, and garnished with a sprinkle of cinnamon for that quintessential fall touch.
This recipe is perfect for holiday gatherings, potlucks, or even a cozy weekend treat. The combination of warm spices, tender apples, and a crispy streusel top makes it a standout dessert that feels both comforting and impressive. Let’s get baking!
Ingredients for apple fall harvest cake
Pantry staples plus seasonal apples—this cake smells like autumn before it even bakes.
| Ingredient | Amount | Notes |
|---|---|---|
| All-Purpose Flour 🌾 | 2 ½ cups | Sifted for light texture |
| Granulated Sugar 🍚 | 1 ½ cups | White or light brown |
| Light Brown Sugar 🍚 | 1 cup | Packed firmly |
| Unsalted Butter 🧈 | 1 cup | Cold, cubed for streusel |
| Large Eggs 🥚 | 2 whole | Room temperature |
| Apple Cider 🍎 | ½ cup | For moisture and flavor |
| Ground Cinnamon 🌿 | 2 tsp | Freshly ground preferred |
| Ground Nutmeg 🌿 | ½ tsp | Freshly grated |
| Baking Powder 🍞 | 2 tsp | Aluminum-free preferred |
| Salt 🧂 | ½ tsp | Fine sea salt |
| Old-Fashioned Rolled Oats 🌾 | 1 cup | Blended into flour |
| Pecans 🥜 | ½ cup | Chopped for topping |
| Apples 🍎 | 4 medium | Honeycrisp or Granny Smith |
| Lemon Juice 🍋 | 1 tbsp | Freshly squeezed |
| Vanilla Extract 🍯 | 1 tsp | Pure vanilla preferred |
The apples are non-negotiable—Honeycrisp or Granny Smith (the crisp ones hold up best). Local farmers markets often have perfect ones in fall, but the grocery store works too. Peel and core them, then slice into 1/4-inch pieces—thicker slices stay too firm. For the streusel, I always grab old-fashioned oats (not quick oats) from Bob's Red Mill or the bulk section. The pecans? Toast them first—they add a whole new flavor dimension. If you're in a rush, skip the toasting, but trust me on this.
No apple cider? Unsweetened applesauce works in a pinch, but it'll be less aromatic. Short on pecans? Walnuts or almonds are great swaps. The brown sugar should be packed firmly—don't scoop it. For the streusel, if you don't have a food processor, pulse the oats in a blender until they're fine. The butter needs to stay cold for that perfect crumble—don't let it melt while mixing. And if you're feeling fancy, add a pinch of cardamom to the cake batter—it's a secret autumn spice that pairs beautifully with apple.
This cake keeps for 5 days in an airtight container, though I've never had any left that long. Wrap it loosely with plastic wrap if you're storing it longer than 2 days. For the streusel topping, make it fresh the day you bake—it loses its crunch if made ahead. If you have leftovers, rewarm slices in the oven for 5 minutes to restore that crispy texture. Freezes beautifully for 3 months too—just thaw at room temperature before serving.
Why You'll Love This Recipe
- No Mixer Needed: I swear by this recipe when I’m in a hurry—just cream the butter and sugars by hand (or use a fork if you’re really lazy), then fold in the dry ingredients. The eggs bind everything together without requiring fancy techniques.
- Spiced Warmth in Every Bite: That combo of brown sugar and cinnamon? Chef’s kiss. The apples get tender but hold their shape, and the butter keeps the crumb moist—like a hug from autumn in cake form. (Yes, even on a Tuesday night.)
- Weeknight Dinner Side: Slice it warm with vanilla ice cream for dessert, or serve it cold with yogurt for breakfast the next morning. Honestly, it’s my go-to when I need something that feels special but doesn’t take all day.
- Budget-Friendly Crowd Pleaser: Uses pantry staples—flour, sugar, butter—and stretches to feed 8–10 people for under $10. Leftovers? They last 5 days in the fridge, and I’ve even reheated slices in the oven for a quick snack. (My kids beg for seconds.)
Step-by-step instructions for apple fall harvest cake
Here's how to bake layers of spiced apple perfection with a crunchy streusel topping.
👨🍳 Step 1: Prepare the Apples and Streusel Topping
Peel, core, and slice the 4 medium apples into ¼-inch thick rounds. Toss them with 1 tablespoon lemon juice to prevent browning—this keeps them vibrant and bright. Place them in a bowl and set aside.
In a food processor, pulse the 1 cup old-fashioned rolled oats until they resemble coarse flour. Transfer to a mixing bowl and combine with the 1 cup cold cubed unsalted butter, 1 cup light brown sugar, 2 teaspoons ground cinnamon, ½ teaspoon ground nutmeg, ½ teaspoon salt, and ½ cup chopped pecans. Use your fingers to work the mixture until it resembles coarse crumbs with pea-sized butter pieces—this creates that perfect crispy texture.
🍳 Step 2: Mix the Cake Layers and Apple Filling
Preheat your oven to 350°F and grease two 9-inch round cake pans. In a large mixing bowl, whisk together the 2.5 cups sifted all-purpose flour, 1.5 cups granulated sugar, 2 teaspoons baking powder, and ½ teaspoon salt. In a separate bowl, beat the 2 room-temperature large eggs until smooth, then mix in the ½ cup apple cider and 1 teaspoon vanilla extract.
Gradually pour the wet ingredients into the dry ingredients, mixing on low speed until just combined—don't overmix. This batter should be thick but pourable. For the apple filling, combine the prepared apples with 2 tablespoons of the cake batter to help them hold together when baking.
🥘 Step 3: Assemble and Bake the Cake Layers
Divide the cake batter evenly between the two prepared pans, spreading it out to create even layers. Spoon half of the apple filling onto each cake layer, pressing down gently to create an even distribution. The apples should be visible but not overcrowded.
Bake for 25-30 minutes or until a toothpick inserted into the center comes out clean. Rotate the pans halfway through baking for even browning. Once done, let the layers cool in the pans for 10 minutes before transferring to a wire rack to cool completely.
🔥 Step 4: Add the Streusel Topping and Final Bake
Place one cake layer on a serving plate and spread a thin layer of apple butter or jam (optional) if you prefer extra moisture. Top with the second layer and spread another thin layer of apple butter if desired. Sprinkle half of the streusel topping evenly over the cake.
Place the cake under the broiler for 1-2 minutes until the streusel begins to brown and crisp. Watch it closely—it should turn a beautiful golden color. Remove from the oven and add the remaining streusel topping, pressing down lightly to adhere. Let the cake cool for 10 minutes before slicing to allow the layers to set.
Pro Tips For Making Apple Fall Harvest Cake
- Cream Butter Properly: Use a wooden spoon or your hands to mix the butter and sugars until it’s pale and fluffy—about 3-4 minutes. I learned this the hard way when my cake turned out dense; the butter wasn’t emulsified enough with the sugars. This step guarantees a tender crumb.
- Use Cold Apples: Slice your apples just before folding them into the batter and keep them in the fridge until ready to mix. Warm apples release moisture too quickly, making the cake soggy. Cold apples stay crisp and distribute evenly.
- Don’t Overmix Dry Ingredients: Mix the flour, spices, and leavening agents just until combined—about 10-12 strokes. Overmixing develops gluten, which makes the cake tough. My grandmother swore by this, and she was right: less mixing means a lighter texture.
- Test for Doneness Early: Start checking the cake at 25 minutes, even if the recipe says 30-35. Ovens vary, and overbaking dries out the apples and makes the cake dense. A toothpick should come out with a few moist crumbs, not wet batter.
Storing and reheating this dish
Room Temp Revival
If your cake has been stored at room temperature for a day or two, bring it back to life with a quick 5-minute warm-up. Wrap the cake tightly in aluminum foil and place it in a 350°F oven for just enough time to restore that tender crumb—about 5-7 minutes. The warmth will soften the streusel slightly, making it crisp again without drying out the layers. 🔥
Refrigerator Refresh
Cake stored in the fridge for up to 5 days? Let it sit at room temperature for 30-45 minutes before serving to prevent condensation from making the layers soggy. For extra crispness, rewarm slices individually in a 300°F oven for 3-4 minutes—this works especially well for the streusel topping. Always use an airtight container with parchment paper between layers to maintain moisture balance.
Freezer Thawing
Thaw frozen cake overnight in the fridge to preserve texture. If you're in a hurry, place the unwrapped cake on a wire rack and microwave on low power (30%) for 1-2 minutes, then let it rest for 10 minutes before slicing. For the best results, freeze the cake unfrosted—this prevents freezer burn and keeps the streusel crunch intact for up to 3 months.
Streusel Crunch Fix
The streusel topping loses its crispness when reheated? No problem! Sprinkle a light dusting of powdered sugar over the cake before serving—it adds sweetness and temporarily restores texture. For a more dramatic fix, broil the cake for 30 seconds right before serving to reactivate the crunch. Just watch it like a hawk to avoid burning! 💫
Make-Ahead Magic
Prep the streusel topping and apple filling a day ahead—they keep well in separate airtight containers in the fridge. The cake layers can be baked and cooled completely, then stored in the fridge for 2 days before assembling. This is my secret for stress-free holiday baking—everything comes together in minutes on the day of serving. Just let the cake sit at room temp for 1 hour before adding the streusel topping for the final bake.
Nutrition facts
Frequently asked questions
Can I use any apples for this cake?
For the best texture and flavor, stick with Honeycrisp or Granny Smith apples—they hold their shape well during baking and provide that perfect balance of sweet and tart. If you only have softer varieties like Gala, toss them with an extra 1 teaspoon lemon juice to prevent mushiness. Avoid overly mealy apples like Red Delicious.
How do I prevent the cake layers from getting soggy?
Bake the layers just until a toothpick comes out clean (25-30 minutes at 350°F), then let them cool completely before adding the filling and streusel. For extra insurance, bake the cake layers the day before and store them in an airtight container—this helps them set properly. Also, don't overmix the batter!
Can I make this cake in a single layer instead of two?
Use one 9-inch pan and reduce the batter by half. Spread the filling evenly and top with all the streusel before baking. The baking time will be 30-35 minutes—check for doneness with a toothpick. This version works great for smaller gatherings or when you prefer a taller cake.
What's the best way to store leftovers?
Wrap individual slices in plastic wrap and store in an airtight container for up to 5 days. For longer storage, freeze slices (unfrosted) for 3 months300°F oven for 3-4 minutes—this restores the streusel's crunch without drying the cake.
How can I make this cake gluten-free?
Replace the all-purpose flour with a 1:1 gluten-free baking flour blend (like Bob's Red Mill) and add ½ teaspoon xanthan gum. For the streusel, use gluten-free oats and check that your baking powder is labeled gluten-free. The texture will be slightly denser, but the flavor will still shine!