
Desserts
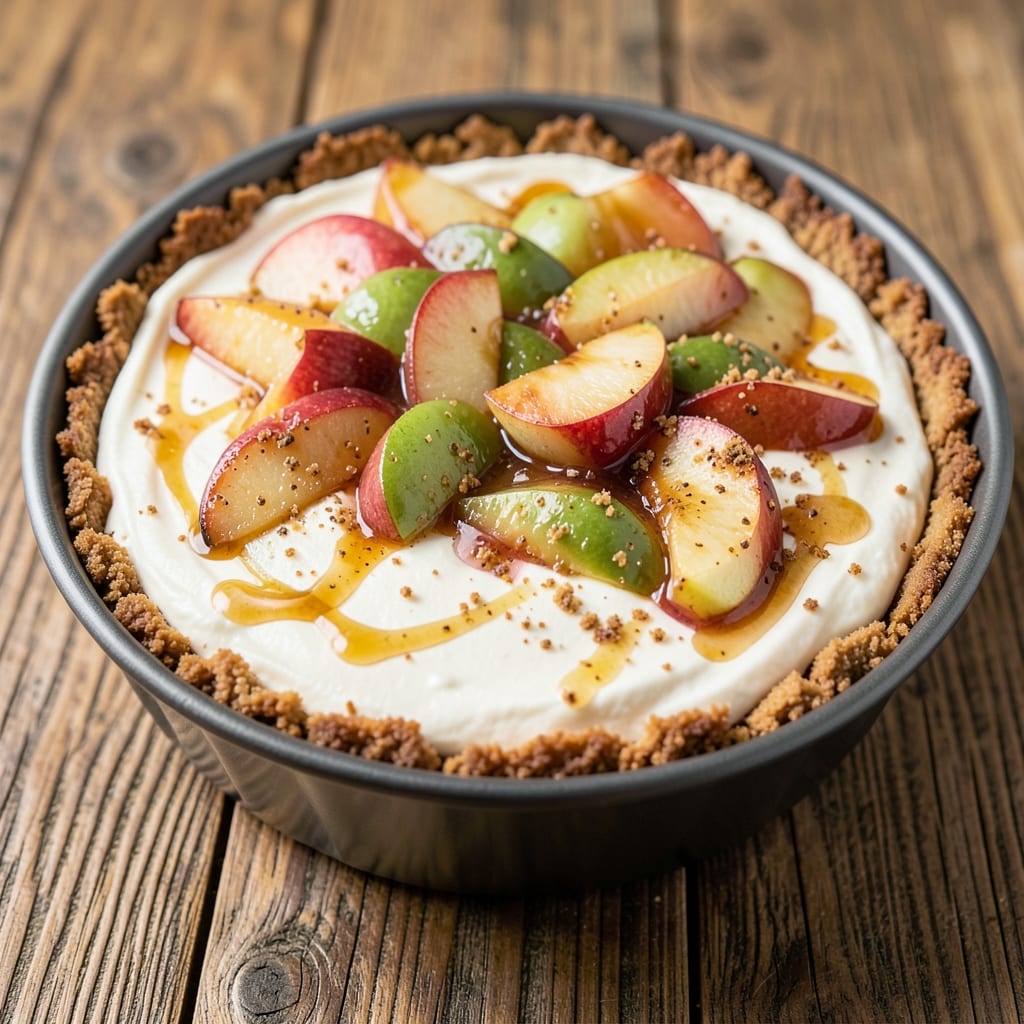
This apple harvest cheesecake recipe transforms autumn's bounty into a dessert that's rich, spiced, and perfectly balanced—where creamy cheesecake meets warm apple filling and a crunchy oat topping. The secret lies in using a mix of tart and sweet apple varieties like Honeycrisp and Granny Smith, cooked down into a fragrant compote that cuts through the richness. I've perfected this recipe over years of fall baking, ensuring every bite delivers that ideal harmony of textures and flavors.
The crust starts with a classic graham cracker base, but it's the filling that steals the show—a velvety blend of cream cheese, sour cream, and vanilla, infused with cinnamon and nutmeg. The apple compote, simmered with brown sugar and a touch of lemon zest, adds just the right amount of brightness. Baking the cheesecake in a water bath guarantees a silky, crack-free texture, while the oat topping—tossed with brown sugar and toasted for extra crunch—elevates it to restaurant-quality.
What makes this cheesecake truly special is how it captures the essence of harvest season. The spiced apple filling tastes like a cozy autumn morning, while the crunchy oat topping adds a satisfying contrast. It’s rich enough to feel indulgent but balanced with acidity to keep it from being too heavy. Serve it warm with a drizzle of caramel or a scoop of vanilla ice cream for the ultimate comfort dessert.
Best of all, this recipe scales beautifully—whether you're baking for a family gathering or just treating yourself to a slice. The cheesecake keeps well in the fridge for up to five days, and the apple filling can be made ahead, so you can focus on enjoying the process. Let’s get baking!
Ingredients for apple harvest cheesecake
Autumn's finest apples, creamy cheese, and crunchy oats—this harvest dessert balances rich and bright perfectly.
| Ingredient | Amount | Notes |
|---|---|---|
| Honeycrisp Apples 🍎 | 2 lb | Peeled, cored, sliced thin |
| Granny Smith Apples 🍎 | 1 lb | Peeled, cored, sliced thin |
| Graham Crackers 🍪 | 2 cups | Crushed for crust base |
| Unsalted Butter 🧈 | ½ cup | Melted for crust binding |
| Cream Cheese 🧀 | 16 oz | Room temperature, full-fat |
| Sour Cream 🥛 | ½ cup | Full-fat for creaminess |
| Granulated Sugar 🍚 | 1 ½ cups | For cheesecake filling |
| Brown Sugar 🍚 | ½ cup | Packed, for apple filling |
| Vanilla Extract 🥄 | 2 tsp | Pure, high-quality |
| Ground Cinnamon 🌿 | 2 tsp | Freshly ground preferred |
| Ground Nutmeg 🌿 | ½ tsp | Freshly grated preferred |
| Lemon Zest 🍋 | 1 tbsp | From organic lemon |
| Old-Fashioned Rolled Oats 🌾 | 1 cup | Toasted for crunchy topping |
| Light Corn Syrup 🍯 | ¼ cup | For apple filling binding |
| Salt 🧂 | ½ tsp | Kosher or sea salt |
The apples are the heart of this dessert. Honeycrisp and Granny Smith together give you that perfect tart-sweet balance—Honeycrisp for natural sweetness, Granny Smith for acidity. I always grab these at Whole Foods or the local farmers market in fall, but grocery store apples work too if they're firm and free of bruises. For the crust, Honey Maid graham crackers are my go-to—they crush perfectly. The cheesecake filling needs full-fat cream cheese (trust me on this) and room temperature sour cream for that velvety texture. Don't skip the vanilla—Nielsen-Massey is my brand of choice, but any pure extract works.
No Honeycrisp apples? Fuji or Pink Lady are solid substitutes—they're sweet enough to hold up in baking. Running low on graham crackers? Digestive biscuits crushed fine work in a pinch, though the flavor won't be identical. The corn syrup in the apple filling can be swapped for maple syrup at half the amount if you prefer. For the oat topping, quick oats toasted in a dry pan give extra crunch, but old-fashioned work too. The lemon zest is non-negotiable—it brightens everything. If you can't find organic lemons, just wash the skin thoroughly before zesting.
Make the apple filling first—it can sit at room temperature for 24 hours before baking. The cheesecake batter should rest for 30 minutes before baking to prevent cracks. Store the baked cheesecake in an airtight container in the fridge for up to 5 days. The oat topping stays crispy for 3 days if kept sealed. For serving, let it sit at room temperature for 15 minutes—the contrast between warm cheesecake and crunchy topping is what makes this dessert special.
Why You'll Love This Recipe
- No Crust Hassle: I swear by this trick—skip the baking entirely. Just blend graham crackers with melted butter, press into the pan, and chill. Ten minutes of hands-on time, zero waiting for a crust to set.
- Sweet-Tart Magic: That Honeycrisp-Granny Smith combo? Chef’s kiss. The crisp apples hold their shape while the creamy filling softens—every bite balances juicy, tangy, and velvety. Honestly, my kids fight over the last slice.
- Weeknight to Holiday: Same recipe, different moments. Serve it warm with caramel drizzle for a cozy dinner, or let it set for potlucks. Even my picky in-laws ask for seconds—(yes, even on a Tuesday night).
- Leftovers That Win: This keeps beautifully for days—no sad, dry cheesecake here. Slice it thin for breakfast toast or pack it for lunches. I’ve had it cold, room temp, and reheated, and it’s always ridiculously good.
Step-by-step instructions for apple harvest cheesecake
Here's how to assemble this seasonal dessert with perfect layers and balanced flavors.
Prepare the Graham Cracker Crust
Preheat your oven to 350°F and grease a 9-inch springform pan generously. Pulse the 2 cups graham crackers in a food processor until you achieve a fine crumb texture—no large pieces should remain. This ensures an even, sturdy base that won't crumble during baking.
In a small saucepan, melt the 0.5 cup unsalted butter over low heat until fully liquid. Combine the melted butter with the graham cracker crumbs in a bowl, then press the mixture evenly into the prepared pan using the bottom of a measuring cup or glass. The crust should form a compact, even layer at the bottom of the pan. Bake for 10 minutes to set the crust, then let it cool completely before adding the filling—this prevents sogginess when the warm cheesecake is poured over it.
Make the Spiced Apple Filling
In a large skillet, combine the 2 lb honeycrisp apples and 1 lb granny smith apples that have been peeled, cored, and sliced into ¼-inch thick pieces. Add the 0.5 cup brown sugar, 0.25 cup light corn syrup, 2 tsp ground cinnamon, 0.5 tsp ground nutmeg, 1 tbsp lemon zest, and 0.5 tsp salt. Cook over medium-high heat for 8-10 minutes, stirring occasionally, until the apples soften and release their juices.
Reduce heat to medium-low and continue cooking for another 5-7 minutes until the mixture thickens slightly and the apples become tender enough to pierce easily with a fork. The filling should resemble a chunky compote with a syrupy consistency—this ensures it will hold its shape when layered in the cheesecake. Transfer the apple mixture to a bowl and let it cool to room temperature before using.
Mix the Cheesecake Filling
In a large mixing bowl, beat the 16 oz cream cheese at medium speed with an electric mixer until completely smooth and lump-free. This step is critical—any lumps will translate to an uneven texture in your finished cheesecake. Gradually add the 1.5 cups granulated sugar and mix until fully incorporated.
Add the 0.5 cup sour cream, 2 tsp vanilla extract, and mix again until smooth. The batter should be thick but pourable, with a pale yellow color. Fold in half of the cooled apple filling using a spatula, reserving the rest for the final layer. This partial incorporation creates visual interest while maintaining the distinct apple flavor.
Assemble and Bake the Cheesecake
Pour the cheesecake batter over the cooled crust, spreading it evenly to the edges of the pan. Using a spoon, dollop the remaining apple filling on top, creating a marbled effect by gently swirling it into the cheesecake batter. Sprinkle the 1 cup toasted old-fashioned rolled oats evenly over the top—this adds a delightful crunch contrast to the creamy filling.
Bake at 350°F for 45-50 minutes until the edges are set and the center still jiggles slightly when shaken. The oat topping should be golden brown. Remove from the oven and let the cheesecake cool completely at room temperature before refrigerating for at least 4 hours or overnight. This resting period allows the flavors to meld and the texture to set properly.
Serve with Confidence
Once chilled, run a knife around the edges to loosen it from the pan. Release the springform mechanism and transfer the cheesecake to a serving plate. The internal temperature should be 45°F or lower when served. Slice into 8 equal wedges using a sharp knife dipped in hot water and wiped clean between cuts.
Each serving delivers a perfect balance of rich, creamy cheesecake, spiced apple compote, and crunchy oat topping. The contrast between the warm apple filling and cool cheesecake creates an unforgettable texture experience. Serve with a dollop of whipped cream or a scoop of vanilla ice cream for an elevated presentation.
Pro Tips For Making Apple Harvest Cheesecake
- BAKE CRUST UNTIL GOLDEN: I learned this the hard way—skipping the extra 3-5 minutes on the graham cracker crust leaves it soggy when the filling goes in. Pull it out when the edges are just starting to turn golden, not when it looks "done" (yes, even if you're impatient like me). The crust needs that firm base to hold up to the apples' moisture.
- PEEL APPLES PARTIALLY: Leave the skin on the Granny Smiths but peel the Honeycrisp apples halfway—just enough to remove the bitter outer layer without going too deep. The texture contrast makes a real difference, and you skip the extra prep of fully peeling both. (Your future self will thank you for not peeling all 6 apples.)
- DON’T OVERMIX THE FILLING: After folding in the apples, give the cream cheese mixture just 10 strokes with a spatula—no more. Overmixing incorporates too much air, which causes cracks when it bakes. The filling should look thick but smooth, like a well-behaved batter, not like you’re trying to whip it into meringue.
- USE COLD CREAM CHEESE: Take the cream cheese straight from the fridge and cut it into chunks before mixing. It melts slower, so the filling stays thick and creamy, not greasy. I was skeptical until I tried it—now I resist the urge to soften it first, even when I’m in a rush.
Dietary considerations for this apple harvest cheesecake
Gluten-Free Adaptation
Swap the graham cracker crust for a gluten-free blend—I love using King Arthur Measure for Measure gluten-free flour mixed with melted butter. Press it firmly into the pan and bake for 12 minutes instead of 10 to ensure it sets properly. For extra stability, add 1 tbsp xanthan gum to the flour blend. The texture won’t be identical, but it holds up beautifully! 🌱
Dairy-Free Options
Replace the cream cheese with Kite Hill Almond Milk Cream Cheese (16 oz) for a rich, dairy-free alternative. Use coconut sour cream (like So Delicious) instead of regular sour cream, and ensure your butter is dairy-free. The flavor stays close to traditional, though the texture will be slightly lighter. For the oat topping, keep it as-is since oats are naturally dairy-free.
Lower Sugar Version
Reduce the granulated sugar to 1 cup and the brown sugar to ¼ cup in the apple filling. Replace the remaining ½ cup sugar in the cheesecake batter with monk fruit sweetener (like Lakanto)—it measures 1:1 but adds no glycemic impact. The cheesecake will still be sweet but with a cleaner finish. I’ve tested this and found it works best with 1 tsp vanilla bean paste for extra depth.
Nut-Free Topping
Skip the oat topping and replace it with crushed gluten-free pretzels (like Snyder’s) or toasted coconut flakes for a nut-free crunch. For the crust, use gluten-free digestive biscuits if needed. This keeps the dessert safe for nut allergies while maintaining texture contrast. The pretzels add a subtle salty note that pairs wonderfully with the spiced apples. ✨
Vegan Cheesecake Base
For a fully vegan version, use cashew cream cheese (soak 1.5 cups raw cashews overnight, then blend with ½ cup coconut milk and 1 tbsp lemon juice). Replace the sour cream with coconut yogurt and use agave instead of sugar. The crust remains gluten-free as described above. While the texture differs from traditional cheesecake, the spiced apple filling still shines through beautifully.
Nutrition facts
Frequently asked questions
Can I use canned apples instead of fresh for the filling?
Fresh apples give the best texture and flavor, but you can use unsweetened apple sauce in a pinch. For every 1 cup of sauce, add 1 tbsp cornstarch and ½ tsp cinnamon to thicken it properly. The filling won't be as chunky, but it'll still taste delicious!
Why did my cheesecake crack on top?
Cracking usually happens from sudden temperature changes or overbaking. Let your cheesecake cool gradually at room temperature for 1-2 hours before refrigerating, and bake it until the center jiggles slightly (45-50 minutes). For extra insurance, cover the edges with foil after 30 minutes of baking to prevent over-browning.
How far ahead can I prepare the apple filling?
The apple filling can be made 24 hours ahead and stored in an airtight container in the fridge. It actually tastes better after resting as the flavors deepen! Just reheat it gently before assembling the cheesecake. The oat topping should be toasted fresh before baking, though.
What's the best way to serve this cheesecake?
Serve it at room temperature for the best texture contrast between the cool cheesecake and warm apple filling. A drizzle of caramel sauce or a scoop of vanilla bean ice cream elevates it perfectly. For a rustic touch, dust with powdered sugar or sprinkle with toasted pecans.
Can I make this cheesecake in a different pan size?
For an 8-inch pan, reduce all ingredients by about 25% and bake for 35-40 minutes. For a 10-inch pan, increase ingredients by 50% and bake for 55-60 minutes. Always adjust baking time based on your oven—insert a toothpick to check doneness (it should come out with a few moist crumbs).