
Desserts
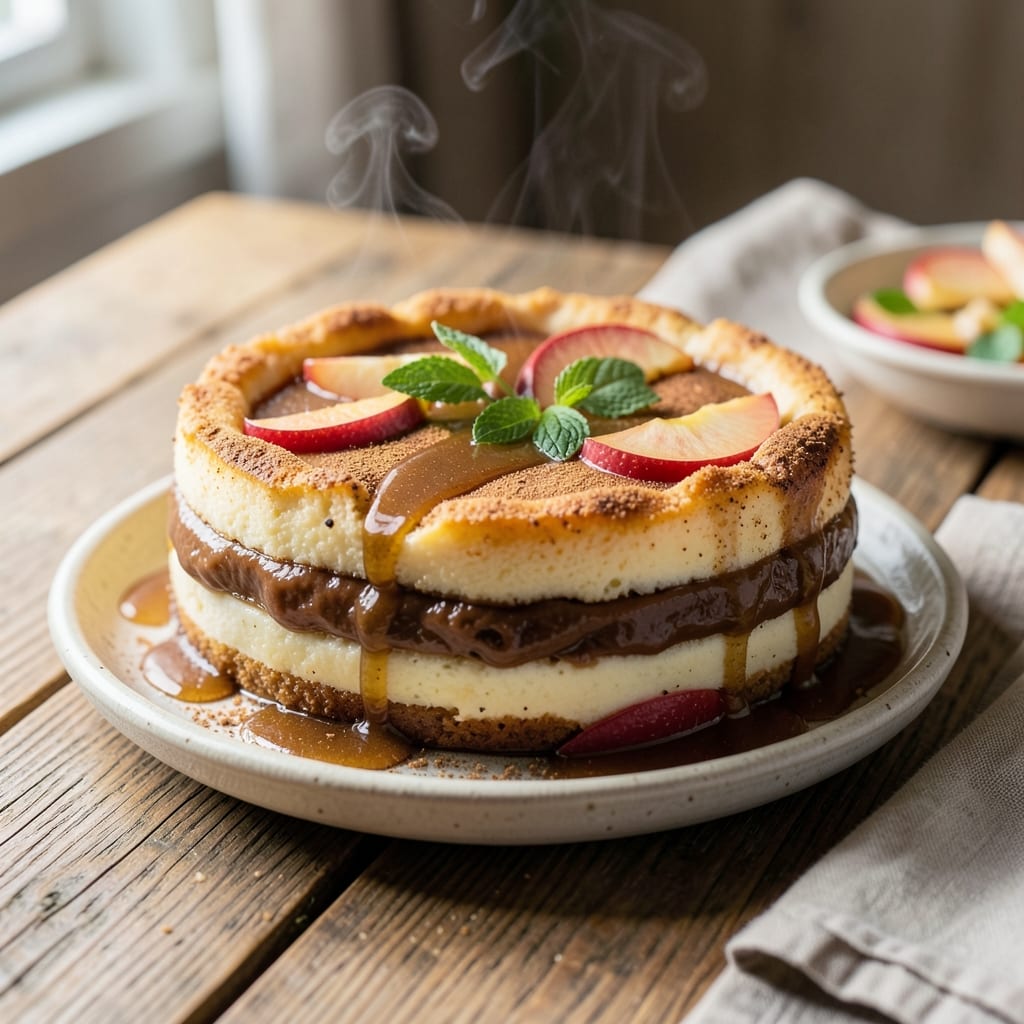
This apple sticky pudding cake delivers the perfect balance of tender cake and caramelized apple filling—every bite is a warm hug of spiced apples and buttery richness. The secret lies in layering moist cake with a sticky topping that transforms into golden perfection as it bakes, creating a texture that’s impossible to resist. I’ve perfected this recipe over years of baking, ensuring the apples stay tender while the caramelized sugar creates that signature sticky contrast.
The foundation starts with a simple yet foolproof cake batter, infused with cinnamon and nutmeg to complement the spiced apple filling. While the cake bakes, the apples caramelize beautifully, releasing their natural sweetness and creating a glossy, irresistible topping. This isn’t just dessert—it’s a showstopper that pairs perfectly with vanilla ice cream or a dusting of powdered sugar for an elegant finish.
What makes this recipe truly special is how effortlessly it comes together. With just a few key ingredients—flour, sugar, butter, eggs, and apples—you’ll achieve restaurant-quality results that taste even better the next day. The cake stays moist, the apples remain tender, and the caramelized topping delivers that signature stickiness that makes this dessert legendary.
Whether you’re baking for a family gathering or treating yourself to a cozy dessert night, this apple sticky pudding cake is a game-changer. The combination of warm spices, tender apples, and buttery layers creates a dessert that’s both comforting and impressive. Ready to bake?
Ingredients for apple sticky pudding cake
The perfect blend of tender cake and caramelized apple filling awaits with these quality ingredients.
| Ingredient | Amount | Notes |
|---|---|---|
| All-Purpose Flour 🌾 | 2 ½ cups | Sifted for even texture |
| Granulated Sugar 🍚 | 1 ½ cups | White or light brown |
| Unsalted Butter 🧈 | 1 cup | Cold, cubed for mixing |
| Large Eggs 🥚 | 2 whole | Room temperature |
| Baking Powder 🍞 | 2 tsp | Aluminum-free preferred |
| Ground Cinnamon 🌿 | 1 ½ tsp | Freshly ground |
| Ground Nutmeg 🌿 | ½ tsp | Freshly grated |
| Salt 🧂 | ½ tsp | Fine sea salt |
| Vanilla Extract 🌸 | 1 tsp | Pure alcohol-free preferred |
| Caramelized Apples 🍎 | 4 cups | Peeled, cored, diced small |
| Brown Sugar 🍚 | 1 cup | Packed firmly |
| Light Corn Syrup 🍯 | ½ cup | Or honey for depth |
| Lemon Juice 🍋 | 1 tbsp | Freshly squeezed |
| Powdered Sugar 🍚 | ¼ cup | For dusting |
The apples are the heart of this dessert, so choose Honeycrisp or Granny Smith—they hold up beautifully to baking. Local farmers markets often have the freshest varieties, but any firm, unbruised apples work. If you're using pre-sliced apples from the grocery store, pat them dry thoroughly before dicing to prevent a soggy cake. For the caramelized topping, brown sugar is essential—it creates that signature sticky texture. Domino or C&H brands are reliable choices, but any light or dark brown sugar will do. The corn syrup adds that glossy finish; if you prefer a more natural option, substitute with maple syrup at the same amount.
No corn syrup? Maple syrup or agave nectar works perfectly—just reduce the liquid slightly since they're thicker. Short on brown sugar? Mix white sugar with a splash of molasses for depth. The apples can be prepped ahead: peel, core, and dice them up to 24 hours in advance, storing in an airtight container in the fridge. For the cake batter, sift the flour and baking powder together to avoid lumps. The vanilla extract should be pure—Nestlé or McCormick are solid brands, but any high-quality extract will work. If you're using honey instead of corn syrup, reduce the oven temperature by 25°F to prevent over-browning.
The cake keeps beautifully at room temperature for 3 days in an airtight container, but it's best enjoyed within 24 hours for maximum moisture. For longer storage, wrap tightly in plastic wrap and refrigerate for up to 5 days. The caramelized topping hardens as it cools, so reheat slices in the oven for 10-15 seconds to restore that gooey texture. Freezing isn't recommended for this recipe, as the texture can become grainy. If you're making this ahead for a gathering, assemble the cake and filling up to a day in advance, then bake just before serving—this ensures the filling stays perfectly caramelized.
Why You'll Love This Recipe
- No Mixer Needed: I swear by this one—just fold the dry ingredients into the butter and apples with a spatula. The baking powder does all the work, so you’re not stuck creaming butter and sugar for hours.
- Caramel-Kissed Magic: That sticky top? It’s the sugar and butter melting into a glossy, buttery layer that tastes like dessert but counts as cake. Honestly, the first time I cut into it, I nearly licked the knife.
- Weeknight to Brunch: Make it for dinner with a scoop of vanilla ice cream, or bake it the night before and serve it cold with coffee. My kids ask for it on school mornings—yes, even when I’m running late.
- Half the Cost: Flour, sugar, and butter stretch far here, and you’re not buying fancy ingredients. I’ve made this for 12 people for under $10—plus, leftovers reheat perfectly in the microwave. (Between us, it’s my secret for potlucks.)
Step-by-step instructions for apple sticky pudding cake
Master the art of balancing moist cake layers with caramelized apple filling for a dessert that's both rustic and refined.
Prepare the Cake Batter for Optimal Texture
In a stand mixer fitted with the paddle attachment, combine the 1 cup unsalted butter and 1.5 cups granulated sugar. Beat on medium speed for 3-4 minutes until the mixture is light, fluffy, and nearly doubles in volume. This creaming process incorporates air, which is essential for that tender cake texture we're after.
Add the 2 whole large eggs, one at a time, mixing just until each is fully incorporated. Scrape down the sides of the bowl as needed to ensure even mixing. Then add the 1 tsp vanilla extract and mix for 10 seconds to combine. The mixture should be pale yellow and ribbon-like when you lift the paddle.
In a separate bowl, whisk together the 2.5 cups all-purpose flour, 2 tsp baking powder, 1.5 tsp ground cinnamon, 0.5 tsp ground nutmeg, and 0.5 tsp salt. With the mixer on low speed, gradually add the dry ingredients to the wet mixture, mixing just until combined. Avoid overmixing—you should still see a few flour streaks. This ensures a tender cake rather than a dense one.
Fold in the Caramelized Apples and Prepare the Pan
Gently fold in the 4 cups caramelized apples using a silicone spatula, being careful not to deflate the batter. The apples should be evenly distributed throughout. In a 9-inch round cake pan, combine the 1 cup brown sugar, 0.5 cup light corn syrup, and 1 tbsp lemon juice. Stir until the brown sugar is fully dissolved, creating a syrupy mixture that will soak into the cake layers.
Pour half of the cake batter into the prepared pan, spreading it evenly. Spoon half of the caramelized apples over the batter, pressing down gently to create an even layer. Repeat with the remaining batter and apples, finishing with a smooth top. The apples should be fully submerged in the batter, ensuring even distribution throughout the cake.
Bake Until Golden and Set
Preheat your oven to 350°F. Place the cake pan on a baking sheet lined with parchment paper to catch any potential spills. Bake for 45-50 minutes, or until a toothpick inserted into the center comes out clean. The top should be golden brown, and the edges should be pulling away slightly from the pan.
During the last 10 minutes of baking, you'll notice the caramelized apples bubbling up through the cake. This is a good sign—the filling is releasing its flavor and creating that signature sticky texture. If the top browns too quickly, tent the pan with aluminum foil to prevent over-browning while still allowing the cake to cook through.
Rest and Serve with Powdered Sugar Dusting
Remove the cake from the oven and let it cool in the pan for 10 minutes. Then, carefully invert the cake onto a serving plate. The caramelized apples and syrup should release from the pan, creating a beautiful, sticky glaze on the outside of the cake. Allow the cake to cool completely before slicing—this ensures clean cuts and prevents the filling from oozing out.
Once fully cooled, dust the top generously with 0.25 cup powdered sugar using a fine-mesh sieve. This adds a delicate, sweet finish that complements the warm spices and caramelized apples. Serve slices warm or at room temperature, and enjoy the perfect balance of moist cake and rich, spiced apple filling.
Pro Tips For Making Apple Sticky Pudding Cake
- Cream Butter Properly: Beat the butter and sugar until it’s light and fluffy—not just pale, but ribbony when you lift the beaters. I learned this the hard way: skipping this step makes the cake dense, and the apples get lost in a heavy texture. Take the extra 2 minutes; your cake will thank you.
- Core the Apples: Remove the cores before slicing, or you’ll end up with a mouthful of tough pith and uneven pieces. Use a small melon baller or a paring knife—whatever gets the job done cleanly. Trust me, no one wants to chew through apple scraps while eating dessert.
- Don’t Overmix the Batter: Fold in the apples and flour just until combined—lumpy is fine, overmixing makes the cake tough. I used to panic and stir like my life depended on it, but the second I stopped, the texture improved instantly. Think "gentle but thorough," not "aggressive."
- Test for Doneness Early: This cake looks underdone when it’s actually perfect—pull it out when the edges are set but the center still jiggles slightly. Tent with foil the last 10 minutes if the top browns too fast; the apples need time to soften, not burn. (Yes, even if you’re impatient like me.)
Serving suggestions for this dish
Classic Ice Cream Pairing
Vanilla bean ice cream is my go-to pairing—its creamy texture contrasts beautifully with the warm, spiced cake. Scoop a generous ball onto each slice and watch the caramelized apples melt into the cold cream. For extra indulgence, drizzle with warm caramel sauce before serving. 🍦
Whipped Cream & Berries
Fresh whipped cream adds a light, airy element that balances the dense cake. Top with raspberries or blackberries for a pop of color and tartness that cuts through the sweetness. I like to fold 1 tsp powdered sugar into the whipped cream for subtle sweetness without overpowering the cake.
Caramel Drizzle Finish
Elevate your serving with a simple caramel drizzle. Heat ½ cup heavy cream and ½ cup brown sugar until bubbly, then swirl into the cake's warm filling. Let it cool slightly before drizzling over slices. This adds that restaurant-quality touch with minimal effort. 🍯
Spiced Whiskey Sauce
For adults, a warm spiced whiskey sauce takes this dessert to the next level. Simmer ½ cup apple cider, 2 tbsp bourbon, 1 tsp cinnamon, and 1 tbsp brown sugar until reduced by half. Drizzle over slices for a sophisticated flavor boost. Serve with vanilla ice cream for the ultimate pairing.
Toasted Nuts Garnish
Add crunch and texture with toasted pecans or walnuts. Toast ½ cup chopped nuts in a dry skillet over medium heat for 3-4 minutes** until golden. Sprinkle over slices just before serving to keep them crisp. This adds a delightful contrast to the soft cake and sticky filling.
Coffee or Tea Pairing
Serve with a cup of chai tea or espresso to complement the warm spices. The caffeine helps cut through the richness, making each bite even more satisfying. A small espresso martini also pairs wonderfully for a festive touch. ☕
Nutrition facts
Frequently asked questions
Can I make this apple dessert in a different pan shape?
This recipe works beautifully in 8-inch round or 9x9-inch square pans. For round pans, reduce baking time by 5-7 minutes—the center will cook faster. Square pans may require 3-5 extra minutes to ensure even doneness. Always use the toothpick test to check doneness.
How do I prevent the cake from being too dry?
Moisture comes from two key elements: proper mixing and apples. First, avoid overmixing the batter—just combine until flour disappears. Second, use firm apples like Honeycrisp (they release moisture as they bake). For extra insurance, brush the warm cake with 2 tbsp warm apple juice before serving.
Can I substitute apples with other fruit?
While apples are ideal for their texture and flavor, you can try peaches or pears in season. Use 4 cups diced fruit and reduce the baking time by 5-10 minutes—stone fruits cook faster. For a tropical twist, pineapple works but may require adding ½ tsp extra cinnamon to complement the flavor.
Why did my cake stick to the pan?
This usually happens from one of three issues: greasing, temperature, or cooling. First, ensure you greased the pan with butter and dusted with flour. Second, check your oven temperature—350°F is critical. Finally, let the cake cool 10 full minutes in the pan before inverting. If it still sticks, try lining the pan with parchment paper next time.
How do I make this ahead for a party?
Assemble the cake 24 hours ahead—pour the batter into the pan, add the apples, and refrigerate uncovered. When ready to bake, remove from the fridge and bake as directed (add 5 extra minutes to account for the cold start). The cake will keep at room temperature for 3 days in an airtight container, though it's best enjoyed within 24 hours.