
Desserts
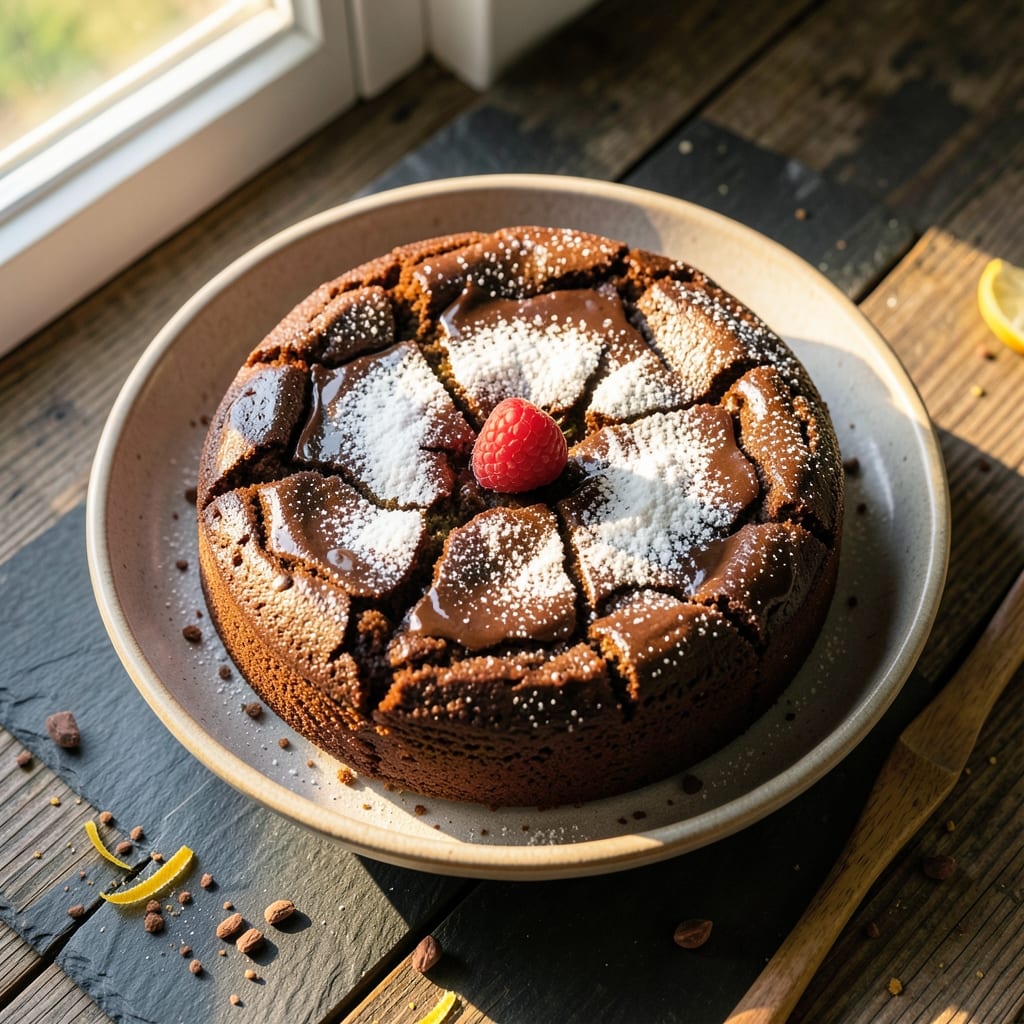
This aquafaba chocolate cake recipe delivers all the richness of classic chocolate cake without a single egg—just fluffy layers and a velvety fudge-like crumb. The secret lies in properly whipped chickpea brine, which replaces eggs entirely while creating that signature tender yet sturdy texture. After years of testing plant-based baking, I finally cracked the code for a cake so moist it rivals traditional recipes, with a deep chocolate flavor that satisfies even non-vegans.
The magic happens in two key steps: whipping the aquafaba to stiff peaks (like meringue) and using a combination of melted coconut oil and applesauce for butter and eggs. This creates a cake that's both light and dense, with a subtle crunch from the cocoa powder that keeps every bite interesting. The recipe also includes a simple vegan chocolate ganache for frosting that's just as decadent as its dairy-based counterparts.
What you'll end up with is a three-layer cake with perfectly moist crumb and none of the dryness common in egg-free baking. The aquafaba gives it that signature lift while maintaining a tender, almost fudgy texture that melts in your mouth. Each layer is separated by the rich chocolate ganache, creating a dessert that looks impressive but comes together with simple techniques.
Perfect for birthdays, holidays, or whenever you crave chocolate cake without the eggs. The recipe scales easily for larger gatherings, and the frosting can be adjusted for different textures—whether you prefer smooth, swirled, or even a simple dusting of powdered sugar. Let's get baking!
Ingredients for aquafaba chocolate cake
Just 14 ingredients transform chickpea brine into decadent, fluffy chocolate cake layers.
| Ingredient | Amount | Notes |
|---|---|---|
| Aquafaba (chickpea brine) 🥜 | 1 ½ cups | From 2 cans chickpeas, drained |
| Unsweetened Applesauce 🍎 | ¾ cup | Unsweetened for neutral flavor |
| Melted Coconut Oil 🥥 | ¾ cup | Unrefined for flavor, melted |
| All-Purpose Flour 🌾 | 2 ½ cups | Sifted for light texture |
| Unsweetened Cocoa Powder 🍫 | 1 cup | Dutch-processed preferred |
| Granulated Sugar 🍚 | 2 cups | White or organic cane |
| Baking Soda 🧪 | 1 tsp | Pure baking soda |
| Salt 🧂 | ½ tsp | Fine sea salt |
| Vanilla Extract 🌿 | 2 tsp | Pure vanilla extract |
| Espresso Powder ☕ | 1 tsp | Enhances chocolate depth |
| Vegan Chocolate Chips 🍫 | 1 ½ cups | Enjoy Life brand preferred |
| Vegan Chocolate Bars 🍫 | 12 oz | For ganache, 70% cacao |
| Coconut Cream 🥥 | 1 cup | Full-fat for richness |
| Powdered Sugar 🍚 | 2 cups | For dusting layers |
The aquafaba is your secret weapon here—save the brine from two cans of chickpeas (drain them first). Trader Joe's sells chickpeas with the highest brine yield, and if you're feeling fancy, Banza brand has a dedicated aquafaba line. For the cocoa powder, Dutch-processed (like Ghirardelli) gives that smooth, velvety texture. I always grab extra chocolate chips—half go in the batter, half get sprinkled on top for crunch. The coconut oil needs to be melted but not hot—microwave for 40 seconds, then let it cool slightly before mixing.
No aquafaba? Flax eggs (3 tbsp ground flax + 9 tbsp water per egg) work in a pinch, but the texture won't be quite as light. Swap the cocoa powder for natural unsweetened cocoa if that's what you have, but Dutch-processed is worth hunting down. Running low on coconut cream? Full-fat coconut milk works too—just use the thick cream from the top of the can. The espresso powder might sound odd, but it deepens the chocolate flavor without adding bitterness. If you can't find it, instant espresso powder at Starbucks works perfectly.
This cake keeps beautifully—3 days in the fridge covered tightly, or 3 months frozen in layers with parchment between them. The ganache hardens at room temp, so store it in the fridge and let it sit at room temp for 10 minutes before frosting. I always make a double batch of ganache and freeze half—perfect for last-minute touch-ups. The powdered sugar dusting? Use a fine-mesh sieve for that cloud-like finish. Trust me, it makes all the difference.
Why You'll Love This Recipe
- No Eggs, No Problem: I swear by this trick—aquafaba (that chickpea brine) whips up like magic, giving you a light, fluffy texture without a single egg. Honestly, I keep a can of chickpeas on hand just for this.
- Rich Without Guilt: The cocoa and applesauce team up for a decadent flavor that still feels lighter than most cakes. That melted coconut oil? It keeps it moist without the heaviness of butter.
- Birthday or Breakfast: This cake’s your go-to for celebrations or a sneaky treat when you’re craving chocolate. Between us, I’ve served it at potlucks and eaten it straight from the pan—no judgment.
- Budget-Friendly Indulgence: Pantry staples do the heavy lifting here. No specialty ingredients, no fancy equipment—just a bowl, a whisk, and a craving. Leftovers? They disappear faster than you can say "second slice."
Step-by-step instructions for aquafaba chocolate cake
Here's how to make a decadent, egg-free chocolate cake with layers so light they'll surprise you.
Whip the Aquafaba to Stiff Peaks
Pour the 1.5 cups aquafaba into a clean, grease-free mixing bowl. Using a stand mixer fitted with the whisk attachment, beat on high speed for 8-10 minutes until the aquafaba forms stiff peaks that hold their shape when the whisk is lifted. You'll know it's ready when the mixture looks glossy and holds a peak that doesn't flatten immediately.
I like to wipe down the bowl and whisk with a damp towel first—any grease will prevent the aquafaba from whipping properly. If the mixture doesn't come together after 10 minutes, chill the bowl in the freezer for 10 minutes and try again. This step is crucial because the whipped aquafaba replaces eggs, giving the cake its signature fluffy texture.
Mix Wet Ingredients for a Smooth Batter
In a separate large bowl, combine the 0.75 cup unsweetened applesauce, 0.75 cup melted coconut oil, 2 cups granulated sugar, 2 tsp vanilla extract, 1 tsp espresso powder, 1 tsp baking soda, and 0.5 tsp salt. Whisk until the sugar dissolves completely and the mixture is smooth—this prevents grainy texture in the finished cake.
Gently fold the whipped aquafaba into the wet mixture in three additions, using a spatula to cut through the center and fold until just combined. Be careful not to deflate the aquafaba—overmixing will make the cake dense. The batter should be thick but still pourable. This is where the magic happens—the aquafaba creates air pockets that make the cake light as air.
Fold in Dry Ingredients and Chocolate
In a medium bowl, sift together the 2.5 cups all-purpose flour and 1 cup unsweetened cocoa powder. Gently fold this dry mixture into the wet batter in three additions, again using a spatula to cut through the center and fold until just combined. You'll see some flour streaks remaining—that's normal and ensures the cake stays tender.
Finally, fold in the 1.5 cups vegan chocolate chips by hand using a silicone spatula. Make sure they're evenly distributed throughout the batter. The chocolate chips will melt slightly during baking, creating pockets of molten chocolate in every bite. Divide the batter evenly between two 8-inch round cake pans lined with parchment paper and greased with coconut oil.
Bake Until Springy and Set
Preheat your oven to 350°F. Bake the cakes for 30-35 minutes, or until a toothpick inserted into the center comes out with a few moist crumbs but no wet batter. The edges should be set, and the tops should look dry to the touch. If the tops brown too quickly, tent the pans with aluminum foil after 20 minutes of baking.
Let the cakes cool in the pans for 10 minutes, then transfer to a wire rack to cool completely. This resting period prevents the cakes from cracking as they cool. The cakes should be moist but not gummy—if they're still warm, they'll continue cooking slightly on the rack.
Make the Silky Chocolate Ganache
While the cakes cool, make the ganache by chopping the 12 oz vegan chocolate bars into small pieces. Place them in a heatproof bowl set over a saucepan of simmering water (double boiler method). Add the 1 cup coconut cream and let it sit for 5 minutes, stirring occasionally, until the chocolate and coconut cream melt into a smooth, glossy sauce.
Let the ganache cool slightly until it's thick enough to spread but still pourable—about 10 minutes. This ganache is what gives the cake its signature fudge-like texture between layers. Once the cakes are completely cool, spread a thin layer of ganache over the first cake layer, then add the second layer on top. Spread the remaining ganache over the top and sides of the cake, creating a smooth, chocolatey shell.
Dust with Powdered Sugar and Chill
Sift 2 cups powdered sugar over the entire cake, gently tapping the pan to help it settle evenly. This dusting adds a delicate, sweet finish that balances the rich chocolate flavor. Place the cake in the refrigerator for at least 2 hours (or up to 24 hours) to let the ganache set completely. This chilling step ensures clean slices and a firm texture.
Slice and serve at room temperature. Each bite should deliver a perfect balance of fluffy cake, rich chocolate ganache, and a hint of espresso depth. The aquafaba keeps the texture light, while the ganache adds that luxurious fudge-like quality you'd expect from a classic chocolate cake.
Pro Tips For Making Aquafaba Chocolate Cake
- Whisk Aquafaba Until Stiff: I learned this the hard way—skipping the whisking step leaves your cake dense and gummy. Use a hand mixer to whip the aquafaba (strained, no pulp) into stiff peaks, just like egg whites, before folding in the applesauce. This is the thing that makes the texture light, not just fluffy.
- Strain That Aquafaba: Don’t just pour the brine straight from the can—strain it through a fine-mesh sieve or cheesecloth to remove even the tiniest chickpea bits. I used to skip this, and my cake always had a weird, gritty texture. Takes 30 seconds, saves you from chewing on surprises.
- Melt Coconut Oil Slowly: Pour the coconut oil into a heatproof bowl over barely simmering water (double boiler) and let it melt completely before mixing it into the dry ingredients. If you microwave it, it’ll cool too fast and leave lumps in your batter—trust me, you’ll taste the difference.
- Sift the Cocoa-Flour Mix: Combine the cocoa powder and flour in a bowl first, then sift the mixture directly into the wet ingredients. This prevents clumps and ensures an even distribution, which keeps your cake from turning out patchy or overly dense. (Yes, even if you’re impatient like me—just do it.)
Pro cooking tips for great aquafaba chocolate cake
Whipped Aquafaba Secrets
Your aquafaba needs to reach stiff peaks—like meringue—to mimic egg whites. I use a KitchenAid stand mixer with the whisk attachment on high for 8-10 minutes, but if it doesn't come together, chill the bowl for 10 minutes before trying again. A grease-free bowl is non-negotiable—even a trace of oil prevents proper whipping. For extra insurance, I wipe the whisk with a damp towel before starting. 🥜
Batter Consistency Matters
When folding the whipped aquafaba into the wet ingredients, work in three additions to maintain air pockets. Use a silicone spatula to gently cut through the center and fold—overmixing deflates the aquafaba and results in a dense cake. The batter should look thick but still pourable, like pancake batter. I always check consistency by lifting the spatula: if the batter slides off smoothly, it's ready. 🥄
Dry Ingredient Technique
Sift the all-purpose flour and cocoa powder together to prevent lumps, then fold them into the wet mixture in three additions. You'll see streaks of flour—this is normal and ensures a tender crumb. For even distribution, I use a folding motion (cut through the center, then fold over) rather than stirring. The goal is to combine without deflating the aquafaba. 🌾
Baking Time Precision
Bake at 350°F for 30-35 minutes, or until a toothpick comes out with moist crumbs (not wet batter). If the tops brown too quickly, tent with aluminum foil after 20 minutes. Let the cakes cool in the pans for 10 minutes before transferring to a wire rack—this prevents cracking. The internal temperature should reach 205-210°F for perfect doneness. ⏰
Ganache Temperature Control
For the ganache, melt the vegan chocolate bars and coconut cream in a double boiler until smooth, then let it cool to 85-90°F before spreading. Too hot, and it'll melt the cake layers; too cool, and it won't set properly. I test by dipping a spoon in cold water—if it hardens slightly, it's ready. Spread quickly to avoid air bubbles. 🍫
Chilling for Clean Slices
Refrigerate the cake for at least 2 hours (or up to 24 hours) to let the ganache set. This step is critical for clean slices and a firm texture. For extra stability, I place the cake on a cooling rack in the fridge to prevent soggy bottoms. Slice with a hot knife (dipped in hot water and wiped dry) for smooth cuts every time. ✨
Nutrition facts
Frequently asked questions
Why does aquafaba need to be whipped to stiff peaks?
The whipped aquafaba replaces eggs by creating air pockets that give the cake its signature light, fluffy texture. When whipped to stiff peaks (like meringue), it mimics the structure eggs provide in traditional baking. Skipping this step or under-whipping results in a denser, heavier cake. Think of it as the secret to achieving that classic cake lift without any animal products!
Can I substitute aquafaba with another egg replacement?
While possible, aquafaba is ideal for this recipe because it provides both structure (when whipped) and moisture. For a quick substitute, use 3 flax eggs (3 tbsp ground flax + 9 tbsp water), but the texture won't be as light. Commercial aquafaba (like Just Egg) works too, though homemade brine yields better results. The espresso powder and coconut oil in this recipe also help enhance the chocolate flavor when eggs aren't present.
How do I fix a cake that's too dense or dry?
Dense cake usually means the aquafaba wasn't whipped enough or the batter was overmixed. For next time, whip the aquafaba longer (up to 12 minutes) and fold gently in three additions. If your cake turned out dry, try brushing the layers with a simple syrup (equal parts sugar and water, heated until dissolved) before adding ganache. This adds moisture without altering the flavor.
Can I make this cake in a different pan size?
Yes! For an 8-inch round pan, this recipe makes perfect layers. For a 9-inch pan, reduce baking time by about 3-5 minutes (check at 25 minutes). For cupcakes, divide batter into 12 lined muffin tins and bake for 18-20 minutes. Always adjust baking time based on your oven's hot spots—insert a toothpick to test doneness. The key is moist crumbs, not wet batter.
How long will the cake keep, and can I freeze it?
Store the fully assembled cake in an airtight container in the fridge for up to 3 days, or freeze individual layers (wrapped in plastic + parchment) for 3 months. To serve frozen layers, thaw at room temperature for 1 hour before reassembling. The ganache may soften slightly when thawed, so let it sit at room temp for 10 minutes before slicing. Freezing works best before adding the powdered sugar dusting.