
Desserts
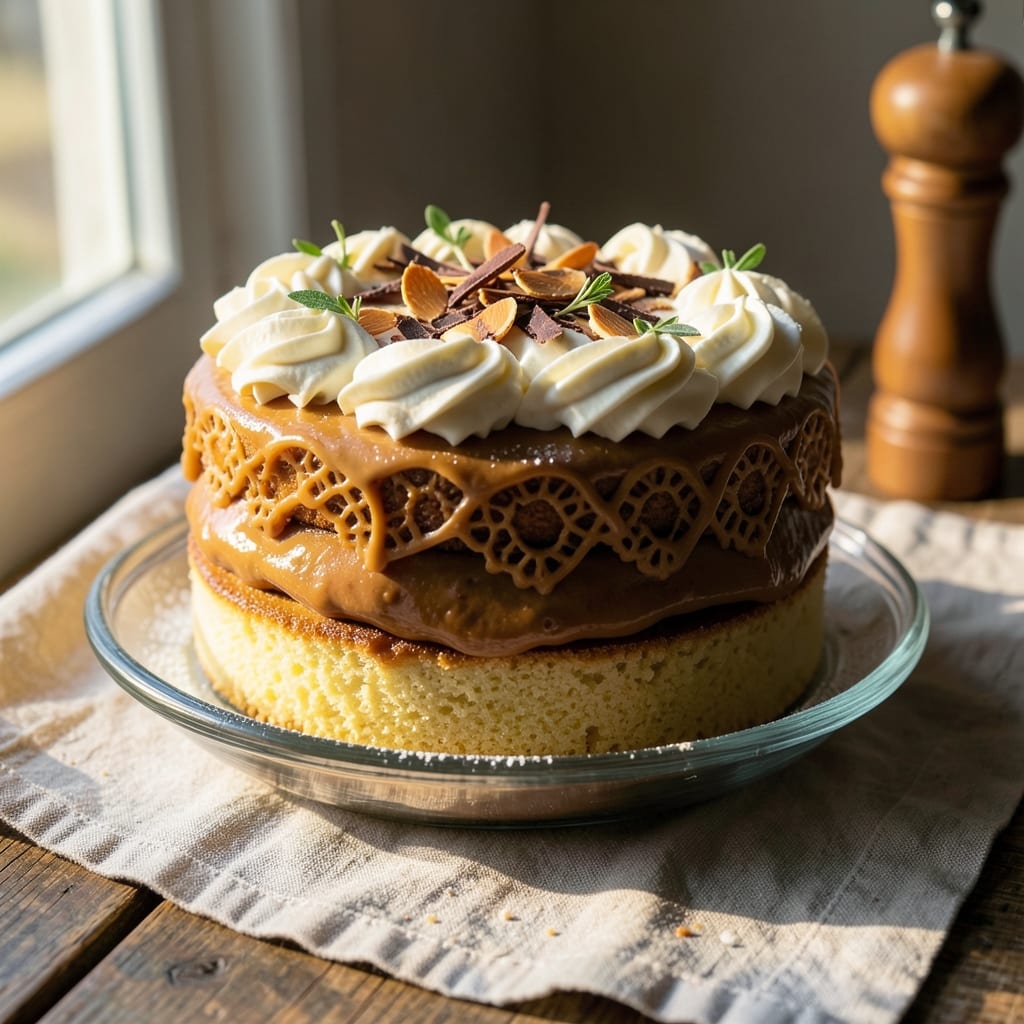
This Argentina dulce de leche cake recipe brings a taste of Buenos Aires straight to your kitchen, with layers of tender cake and that unmistakable caramelized filling. 💛 I've perfected the balance between fluffy cake layers and the rich, velvety dulce de leche that makes this dessert legendary—every bite is pure comfort in cake form.
The secret lies in the cake batter itself: a delicate blend of flour, sugar, and eggs that bakes up light yet sturdy enough to hold the dulce de leche filling without falling apart. You'll spread the filling between layers while the cake is still warm, letting it melt into the perfect consistency—no soggy bottoms here. The whole process takes about 1 hour 15 minutes, including baking and cooling.
What you'll end up with is a showstopper dessert that's just as beautiful as it is delicious: golden layers separated by glossy dulce de leche, all topped with a simple dusting of powdered sugar for that final touch. The flavor is a perfect mix of sweet, creamy, and slightly caramelized—like a hug from Argentina in every forkful.
This recipe works beautifully for special occasions or when you just need a little treat. Serve it at room temperature with a scoop of vanilla ice cream or enjoy it as-is for a dessert that feels like a warm embrace. Here's how to make it!
Ingredients for argentina dulce de leche cake
Eight simple ingredients create layers of heaven with caramelized dulce de leche filling.
| Ingredient | Amount | Notes |
|---|---|---|
| All-Purpose Flour 🌾 | 2 ½ cups | Sifted for fluffy layers |
| Granulated Sugar 🍚 | 2 cups | White or light brown |
| Large Eggs 🥚 | 6 whole | Room temperature preferred |
| Unsalted Butter 🧈 | 1 ½ cups | Room temperature, full-fat |
| Vanilla Extract 🌿 | 2 tsp | Pure vanilla preferred |
| Baking Powder 🧂 | 2 tsp | Aluminum-free recommended |
| Salt 🧂 | ½ tsp | Fine sea salt |
| Whole Milk 🥛 | 1 cup | Room temperature |
| Dulce De Leche 🍯 | 2 cups | Store-bought or homemade |
| Powdered Sugar 🍚 | ½ cup | For dusting |
| Vanilla Ice Cream 🍦 | 2 cups | Optional serving suggestion |
The dulce de leche is the star—store-bought works fine, but homemade takes this to the next level. If you're making your own, start with a can of sweetened condensed milk and simmer it in water for about 2.5 hours until it thickens and darkens. La Serenísima is my go-to brand if you're buying it. The eggs need to be room temperature for even baking, so take them out 30 minutes before mixing. For the butter, Land O'Lakes or Plugrá melt beautifully without graininess. The vanilla extract should be pure—Nielsen-Massey or McCormick are solid choices.
No dulce de leche? Caramel sauce or salted caramel ice cream can mimic that rich flavor, though nothing beats the real thing. Short on vanilla extract? Vanilla bean paste works too—just use half the amount. The milk can be swapped for heavy cream for extra richness, but whole milk gives the perfect balance. For a gluten-free version, use a 1:1 flour blend like Bob's Red Mill. The powdered sugar dusting is optional but adds that final elegant touch—Confectioners' sugar from Domino dissolves smoothly.
This cake keeps beautifully—3 days at room temperature covered loosely, or 1 week refrigerated in an airtight container. For longer storage, freeze individual layers with filling between parchment paper for up to 3 months. I always make a double batch—one for guests and one for me to enjoy over the next few days. The filling softens slightly at room temperature, so bring it out 30 minutes before serving for that perfect melt-in-your-mouth texture. Pair it with vanilla ice cream for the ultimate indulgence.
Why You'll Love This Recipe
- No Stand Mixer Needed: I swear by this recipe because it’s all done by hand—no fancy equipment, just a bowl and a whisk. That rich butter-egg base comes together in minutes, and the flour just needs a quick sift. Honestly, I’ve made it in my tiny apartment kitchen with zero fuss.
- Dulce De Leche Magic: That caramelized sweetness isn’t just good—it’s dangerously good. The vanilla extract ties it all together, making every bite taste like a hug from Argentina. Between us, the first slice disappears faster than I can say “more coffee.”
- Weeknight or Celebration: Same batter, endless uses. Crumbly layers for a quick breakfast, sliced for a dessert that feels fancy, or even stuffed with fruit for a brunch star. I’ll be real: my kids beg for it on random Tuesday nights, but it’s also the showstopper at holiday dinners.
Step-by-step instructions for Argentina dulce de leche cake
Here's how to create layers of buttery cake drenched in rich dulce de leche filling.
👨🍳 Step 1: Prepare the Cake Batter
Preheat your oven to 350°F. In a large mixing bowl, cream together the 1.5 cups unsalted butter and 2 cups granulated sugar on medium speed until light and fluffy—about 3-4 minutes. This step is crucial for creating that tender, melt-in-your-mouth texture we're after.
Add the 6 whole large eggs one at a time, mixing well after each addition. Then stir in the 2 teaspoons vanilla extract. In a separate bowl, whisk together the 2.5 cups all-purpose flour, 2 teaspoons baking powder, and 0.5 teaspoon salt. Gradually add the dry ingredients to the wet mixture, alternating with the 1 cup whole milk, beginning and ending with the flour. Mix just until combined—overmixing develops gluten and makes the cake tough.
🍳 Step 2: Bake the Cake Layers
Divide the batter evenly between two 9-inch round cake pans lined with parchment paper. Bake for 25-30 minutes or until a toothpick inserted into the center comes out clean. The edges should be golden brown, but the tops might look slightly underdone—this is normal and will even out as the cake cools.
Once baked, remove the cakes from the oven and let them cool in their pans for 10 minutes. Then transfer them to a wire rack to cool completely. This cooling step is important—it prevents the layers from becoming soggy when we add the dulce de leche filling later.
🥘 Step 3: Assemble the Cake
Place the first cake layer on a serving plate. Spread 1 cup dulce de leche evenly over the top, leaving a ½-inch border around the edges. This border prevents the filling from oozing out when we add the second layer. Repeat with the second cake layer and the remaining 1 cup dulce de leche.
Here's the thing—don't rush this step. Make sure the dulce de leche is spread evenly so every bite has that perfect balance of cake and caramelized goodness. If you're feeling fancy, you can also add a thin layer of the dulce de leche between the layers for extra flavor.
🔪 Step 4: Dust and Serve
Once the cake is fully assembled, dust the top and sides generously with the 0.5 cup powdered sugar using a fine-mesh sieve. This adds a beautiful finishing touch and balances the rich flavors of the dulce de leche. For an extra indulgent touch, serve with 2 cups vanilla ice cream on the side.
Let the cake sit at room temperature for at least 30 minutes before serving. This allows the layers to fully meld together and the flavors to meld beautifully. The cake should be moist, the dulce de leche should be oozing slightly, and every bite should be pure comfort in cake form.
Pro Tips For Making Argentina Dulce De Leche Cake
- Whisk Eggs Cold: Crack eggs straight into the mixing bowl over ice water—keeps yolks from cooking into scrambled bits when they hit warm butter. I learned this the hard way after one batch turned into eggy scrambled cake batter.
- Sift That Flour: Don’t just scoop flour from the bag—sift it into the dry ingredients first. This aerates the batter and prevents dense, heavy layers. (Yes, it’s extra work, but your cake will thank you.)
- Butter Must Be Soft: Unsalted butter should be just soft enough to press a thumbprint into—no melting, no cold lumps. If it’s too warm, the cake will sink; too cold, and it won’t mix smoothly. Room temp is your friend here.
- Fold, Don’t Stir: When adding dulce de leche or whipped cream layers, use a spatula to fold gently—cut through the center, scoop up the bottom, and turn. Stirring deflates the air bubbles and ruins the light texture. (I used to overmix and wondered why my cake was brick-heavy.)
Essential equipment for this dish
Must-Have Mixing Tools
Start with a stand mixer like the KitchenAid Artisan Series—its powerful motor handles the dense cake batter effortlessly. For hand mixing, a sturdy whisk attachment or hand mixer with a 5-quart bowl (like the Hamilton Beach 6-Speed) works well. I swear by my OXO Good Grips silicone spatulas for scraping every last bit of batter from the bowl. 💛
Baking Essentials
Two 9-inch round cake pans with removable bottoms (I use Wilton Perfect Results) are non-negotiable—they ensure even baking and easy release. Line them with parchment paper cut to fit snugly, leaving an overhang for easy removal. A digital oven thermometer (like the Thermoworks Oven Thermometer) guarantees your oven is at the correct 350°F—critical for consistent results.
Dulce De Leche Handling
If using homemade dulce de leche, a heavy-bottomed saucepan (like All-Clad Stainless) prevents scorching during the 2.5-hour simmer. For spreading, a small offset spatula (I love Mercer Culinary Genius) gives you precision control. Store-bought La Serenísima comes in a squeeze bottle—perfect for even distribution between layers. Keep extra in the fridge for future desserts!
Assembly Tools
A long serrated knife (like Victorinox 8-inch) makes clean cuts for level layers, while a fine-mesh sieve (I use OXO Good Grips) ensures powdered sugar dusts beautifully. For presentation, a round cake stand (like West Elm's Acacia) elevates the dessert dramatically. Don’t skip the wire rack—it’s essential for cooling layers properly before assembly.
Optional Upgrades
For a professional touch, invest in a cake turntable (like Wilton’s 12-inch) to rotate your cake smoothly during powdered sugar dusting. A pastry brush (I prefer Westbloc’s silicone) helps spread any extra dulce de leche between layers. And if you’re freezing layers, quart-sized freezer bags (like Ziploc) save space and prevent freezer burn. 💡
Nutrition facts
Frequently asked questions
Can I use store-bought dulce de leche instead of making it from scratch?
Store-bought dulce de leche works perfectly—brands like La Serenísima are widely available and maintain that rich, caramelized flavor. Just ensure it's at room temperature before spreading for easier application. The texture might be slightly firmer than homemade, but it still delivers that signature Argentine taste.
Why does my cake turn out dense instead of light and fluffy?
Overmixing the batter or using cold ingredients (like butter or eggs) are the most common culprits. Whisk just until combined, and always use room-temperature ingredients. Also, make sure your baking powder is fresh—old leavening agent won't create enough lift. For extra fluffiness, sift the flour before measuring.
How do I prevent the dulce de leche from leaking out of the sides?
Leave a ½-inch border around the edges when spreading the filling between layers. This creates a natural dam that keeps the dulce de leche contained. For extra insurance, chill the cake in the fridge for 15 minutes after assembly—it helps the filling set slightly before serving.
Can I make this cake gluten-free or without eggs?
Yes! For gluten-free, swap the all-purpose flour for a 1:1 blend like Bob's Red Mill. For egg-free, use ½ cup applesauce or flaxseed meal mixed with 3.5 tablespoons water per egg. The texture will be slightly denser, but the dulce de leche flavor will still shine through.
How long can I store the assembled cake?
Keep it covered at room temperature for 3 days or refrigerated for 1 week in an airtight container. For longer storage, freeze individual layers with parchment between them—thaw overnight in the fridge before assembling. The filling softens slightly when chilled, so bring it to room temperature before serving for that perfect melt-in-your-mouth experience.