
Desserts
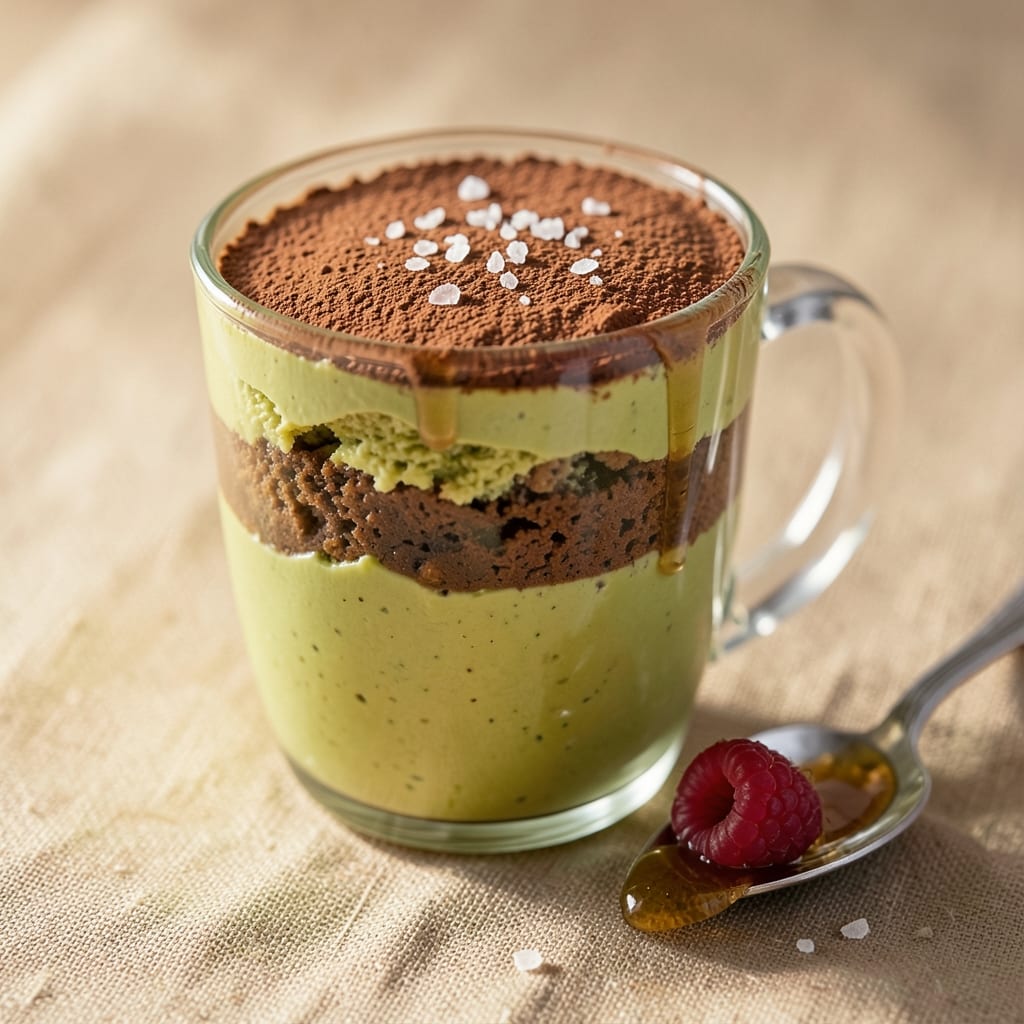
This avocado mug cake recipe delivers creamy, rich dessert in just minutes—no mixer, no oven, and no guilt. ✨ The secret lies in ripe avocado replacing butter, creating a velvety texture that's surprisingly decadent. I developed this recipe during a particularly busy week when I needed dessert without the fuss, and it's been my go-to ever since.
The magic happens in the microwave, where simple ingredients transform into a warm, gooey cake with a chocolate swirl running through the center. This vegan version uses pantry staples like flour, cocoa powder, and a touch of maple syrup, making it both healthy and indulgent. The result is a single-serving dessert that's perfect for satisfying cravings without the mess of traditional baking.
What you'll end up with is a melt-in-your-mouth cake with a tender crumb and that signature chocolate swirl that makes every bite feel like a treat. The avocado adds natural creaminess while keeping the cake moist, and the microwave method ensures you're ready to enjoy it in just a few minutes. It's the kind of dessert that feels special but requires almost no effort.
Top it with fresh berries, a sprinkle of nuts, or a dollop of coconut whipped cream for extra flair. This recipe is perfect for busy weeknights, meal prep desserts, or when you're craving something sweet but don't want to turn on the oven. Let's make this mug cake!
Ingredients for avocado mug cake
Pantry staples plus one creamy avocado—just 12 ingredients for two decadent mug cakes.
| Ingredient | Amount | Notes |
|---|---|---|
| Ripe Avocado 🥑 | 1 whole | Pitted and scooped, ripe but firm |
| All-Purpose Flour 🌾 | ½ cup | Sifted for light texture |
| Unsweetened Cocoa Powder 🍫 | ¼ cup | Natural or Dutch-processed |
| Granulated Sugar 🍚 | ¼ cup | Or coconut sugar for refined-free |
| Maple Syrup 🍯 | ⅛ cup | Pure grade B preferred |
| Vanilla Extract 🌸 | 1 tsp | Pure alcohol-free if preferred |
| Baking Powder 🧂 | ½ tsp | Aluminum-free recommended |
| Salt 🧂 | ¼ tsp | Fine sea salt preferred |
| Unsweetened Almond Milk 🥛 | ¼ cup | Or any plant-based milk |
| Melted Cocoa Butter 🧈 | 1 tbsp | Or coconut oil in pinch |
| Dark Chocolate Chips 🍫 | ¼ cup | Vegan, 70% cocoa minimum |
| Vanilla Protein Powder 🥛 | 1 tbsp | Optional for extra protein |
The avocado is your secret weapon here—ripe but firm is key. Grab one from the produce section that yields slightly to gentle pressure. Trader Joe's and Whole FoodsNavitas Organics is my go-to—it's unsweetened and dissolves smoothly. The chocolate chips? Enjoy Life brand is my vegan staple, but any dairy-free chips with 70% cocoa or higher work. If you're watching sugar, swap half the granulated sugar for monk fruit sweetener—it blends perfectly.
No cocoa butter? Coconut oil works in a pinch, though it has a slightly different melt point. Short on almond milk? Oat milk or soy milk both work well—just don't use nut milks if you're allergic. The vanilla protein powder is optional but adds a nice boost if you're making this for breakfast. For a nut-free version, swap the almond milk for coconut milk and use sunflower seed butter in place of any nut-based ingredients. The baking powder is crucial—don't skip it or your cake will be dense. And if you can't find Dutch-processed cocoa, regular natural cocoa works too, just add a pinch more baking soda.
This batter keeps in the fridge for 2 days if you want to prep ahead—just microwave for 60-75 seconds when ready. For extra flair, store the chocolate chips separately and swirl them in right before microwaving. The leftovers? Freeze for 3 months in a single layer before transferring to a bag. Pro tip: Use ramen bowls for microwaving—they're nonstick and perfect for mug cake portions. And if your microwave isn't powerful? Cover with a damp paper towel to help steam and prevent dryness.
Why You'll Love This Recipe
- No Mixer Needed: I swear by this recipe on days when I’m too tired to pull out the stand mixer. Just mash the avocado with a fork, stir in the flour and cocoa, and boom—done. The batter’s thick enough to hold its shape without overmixing, and honestly? I’ve made it in a mug while chatting on the phone.
- Rich Without Guilt: Between us, this cake tastes like a decadent chocolate dessert—but the avocado keeps it secretly healthy. The cocoa powder adds that deep, fudgy bite, while the maple syrup balances it with just enough sweetness. I’ll be real: my husband doesn’t even know it’s not loaded with butter.
- Microwave Magic: Need dessert in five minutes flat? This is my go-to for last-minute cravings, movie nights, or even a quick office treat. The mug size means it’s portion-controlled (no sad leftovers), and the texture—creamy outside, slightly gooey inside—is exactly what you need when you’re desperate for something sweet.
- Budget-Friendly Indulgence: I stockpile ripe avocados for this recipe because they’re cheap and versatile. A single avocado stretches into two cakes, and the cocoa and sugar are pantry staples. Plus, no fancy mix-ins—just what you’ve got. My college-aged kid makes this all the time when he’s broke but still wants dessert. (Yes, even on a Tuesday night.)
Step-by-step instructions for avocado mug cake
Here's how to make this rich, creamy chocolate avocado cake in minutes—no mixer needed!
👨🍳 Step 1: Scoop and Mash the Avocado
Start by pitting the ripe avocado and scooping out all the flesh into a microwave-safe mug. Use a fork to mash it until completely smooth with no lumps—this ensures your cake will be light and creamy. I press the fork against the sides of the mug to scrape up every bit of avocado, making sure to get all that good moisture.
Here's the thing—avocado ripeness matters. If your avocado has dark spots or smells funky, it won't give you that perfect creamy texture. We're aiming for that slightly firm but still yielding fruit that leaves a clean pit when you twist it. The mashed avocado should look like thick, dark green pudding at this stage.
👨🍳 Step 2: Mix in Dry Ingredients
Add the 0.5 cup all-purpose flour, 0.25 cup unsweetened cocoa powder, 0.25 cup granulated sugar, 0.5 tsp baking powder, and 0.25 tsp salt to the mug with the mashed avocado. Use a whisk to combine everything until just mixed—you should still see some flour streaks. Overmixing develops gluten and can make your cake dense.
I like to give the mug a quick swirl between each addition to distribute the ingredients evenly. The cocoa powder will darken the mixture significantly, turning it into a rich chocolate color. This is where the magic happens—the cocoa and sugar dissolve into the avocado's natural oils, creating that velvety base for our cake.
🍳 Step 3: Add Wet Ingredients and Fold Gently
Pour in the 0.125 cup maple syrup, 1 tsp vanilla extract, and 0.25 cup unsweetened almond milk all at once. Then add the 1 tbsp melted cocoa butter and 1 tbsp vanilla protein powder (if using). Use a spoon to fold everything together until the batter is smooth and well combined—about 20-30 seconds of gentle stirring.
The protein powder gives this cake a nice boost without altering the texture. If you're not using it, just skip this step. The batter should be thick but pourable—like a very rich brownie batter. If it's too thick, add an extra tablespoon of almond milk. If it's too thin, stir in an extra tablespoon of flour.
🥘 Step 4: Create the Chocolate Swirl
Scoop out about half of the batter and set it aside in a small bowl. To the remaining batter in the mug, add 0.25 cup dark chocolate chips and fold them in until evenly distributed. Then, using a spoon, create a well down the center of the batter. Pour the reserved batter into the well and gently swirl it together with a toothpick or skewer to create marbled streaks.
This is where the visual magic happens—those beautiful chocolate swirls throughout the cake. Don't overmix after adding the chocolate chips, or you'll break them up too much. Just a few gentle swirls will give you that professional-looking marbled effect that makes this cake look as good as it tastes.
🔥 Step 5: Microwave to Golden Perfection
Microwave the mug on high for 60-75 seconds, or until the top is set and springy to the touch. I've found that 60 seconds works for most microwaves, but if yours runs hot, you might need the full 75 seconds. The cake should pull away from the sides of the mug slightly and have a slightly domed top.
Here's the crucial part: don't open the microwave immediately after the time is up. Let it sit for 30 seconds first—this prevents the cake from sinking in the middle. When you do open it, you'll see that beautiful golden-brown top with a crackly texture. The sides should be set but still slightly moist, and the chocolate swirls should be visible through the cake.
Pro Tips For Making Avocado Mug Cake
- MASH THE AVOCADO SMOOTH: The pit’s your enemy here—scoop the flesh into a bowl first, then mash it with a fork until it’s completely free of lumps. I used to leave tiny chunks in there, and the cake turned out dense instead of light. Take the extra 30 seconds to get it silky.
- MICROWAVE IN BURSTS: Don’t blast it on high for 60 seconds straight—your mug cake will end up gummy or cracked. Hit 30 seconds at 70% power, then rotate the mug 180 degrees and do another 30 seconds. The even heat keeps the texture tender, not rubbery.
- SIFT THE COCOA: That cocoa powder isn’t just for flavor—it’s for air. Sift it directly into the mug before adding wet ingredients to break up clumps and lighten the batter. I skipped this once and ended up with a brick instead of a fluffy cake.
- SWAP MAPLE FOR MELTED BUTTER: If you’re in a pinch, replace half the maple syrup with melted butter (same quantity). The fat keeps the cake moist longer, and the flavor’s richer—no one will guess it’s not the original recipe. (Yes, even if you’re impatient like me.)
Pro cooking tips for great avocado mug cake
Microwave Power Mastery
Every microwave cooks differently, so start with 60 seconds on high power and check immediately. If the cake isn't set, add 10-second increments until the top springs back when touched. I've seen cakes go from undercooked to overdone in just 5 seconds—this is where timing becomes an art. 🌡️
Pro tip: Use a ramen bowl instead of a mug for more even cooking. The wider surface area prevents hot spots that can create dry patches. If your microwave has a turntable, rotate the bowl halfway through cooking for perfect evenness. And never microwave on full power if your appliance is older than 10 years—opt for medium-high to prevent burning.
Batter Consistency Secrets
The ideal batter should be thick like brownie batter but still pourable. If yours is too thick after mixing, add 1 tablespoon almond milk at a time until it reaches the right consistency. Too thin? Stir in 1 tablespoon flour until it thickens slightly. I've ruined cakes by getting this wrong—once I added too much milk and ended up with a sad, gooey mess instead of a cake. 🥄
For extra insurance, let the batter sit for 2-3 minutes after mixing. This allows the flour to fully hydrate and the cocoa to dissolve completely, preventing lumps. The batter should coat the back of a spoon but still flow easily when poured. If you're using coconut oil instead of cocoa butter, chill the batter for 10 minutes first—it firms up better and prevents excessive spreading.
Swirl Perfection Techniques
To create those professional-looking swirls, use a skewer or toothpick instead of a spoon. Dip it in hot water first to help it glide through the batter smoothly. The key is gentle pressure—press down and twist just enough to create marbling without breaking the chocolate chips. I like to do 3-4 swirls in a circular motion, then stop while the pattern is still visible. 🎨
For an extra decadent touch, reserve 2 tablespoons of chocolate chips and press them into the top of the cake before microwaving. They'll melt slightly and create a crunchy, molten center when you cut in. If you're feeling fancy, sprinkle crushed freeze-dried raspberries on top before microwaving—they'll add a fruity contrast that balances the richness.
Post-Microwave Handling
Never open the microwave door immediately after cooking—wait 30 seconds to let the steam escape gradually. This prevents your cake from collapsing in the middle. When you do open it, let it cool for 1 full minute before attempting to remove it from the mug. I've learned this the hard way: pulling too soon results in a cake that sticks and tears. 🏔️
For the cleanest removal, run a thin metal spatula around the edges of the mug before lifting. If it still sticks, place the mug under cool running water for 5 seconds—the heat difference helps release it. And here's a secret: If your cake sticks badly, just eat it straight from the mug. The extra warmth makes it even more decadent, and honestly, who wants to wait for fancy plating when you can dive in immediately?
Nutrition facts
Frequently asked questions
Why does my avocado mug cake turn out dense?
Overmixing the batter develops gluten, which makes cakes dense. Stir just until combined—about 20-30 seconds—and use a whisk instead of a spoon. Also, ensure your avocado is ripe but firm, and don't skip the baking powder. If your cake still turns out dense, try adding 1 extra tablespoon of almond milk to lighten the texture.
Can I make this mug cake without cocoa powder?
Yes! Replace the 0.25 cup cocoa powder with 0.25 cup melted dark chocolate (70% cocoa or higher) or 0.25 cup unsweetened applesauce for a lighter flavor. The texture will be slightly different, but it’ll still taste delicious. For a vanilla version, reduce the sugar to 0.125 cup and add 1 tsp vanilla bean paste for extra richness.
How do I fix a sunken middle in my mug cake?
A sunken middle usually means undercooking or opening the microwave too soon. Start with 60 seconds and check immediately—if it’s not set, add 10-second increments. Let it sit for 30 seconds after microwaving before opening. For extra insurance, chill the batter for 5 minutes before microwaving to help it hold its shape.
Can I use this recipe for a larger cake?
This recipe is designed for single-serving mug cakes, but you can scale it up for a 6-inch cake pan by doubling the ingredients. For best results, bake at 350°F (175°C) for 18-20 minutes instead of microwaving. Line the pan with parchment paper for easy removal, and let it cool for 10 minutes before slicing. The texture will be slightly denser than the mug version but still delicious!
What’s the best way to store leftovers?
Store in an airtight container in the fridge for up to 3 days, or freeze for 3 months. To reheat, microwave for 10-15 seconds to restore moisture. For extra freshness, wrap the mug cake tightly in plastic wrap before storing. If freezing, let it cool completely first to prevent condensation.