
Desserts
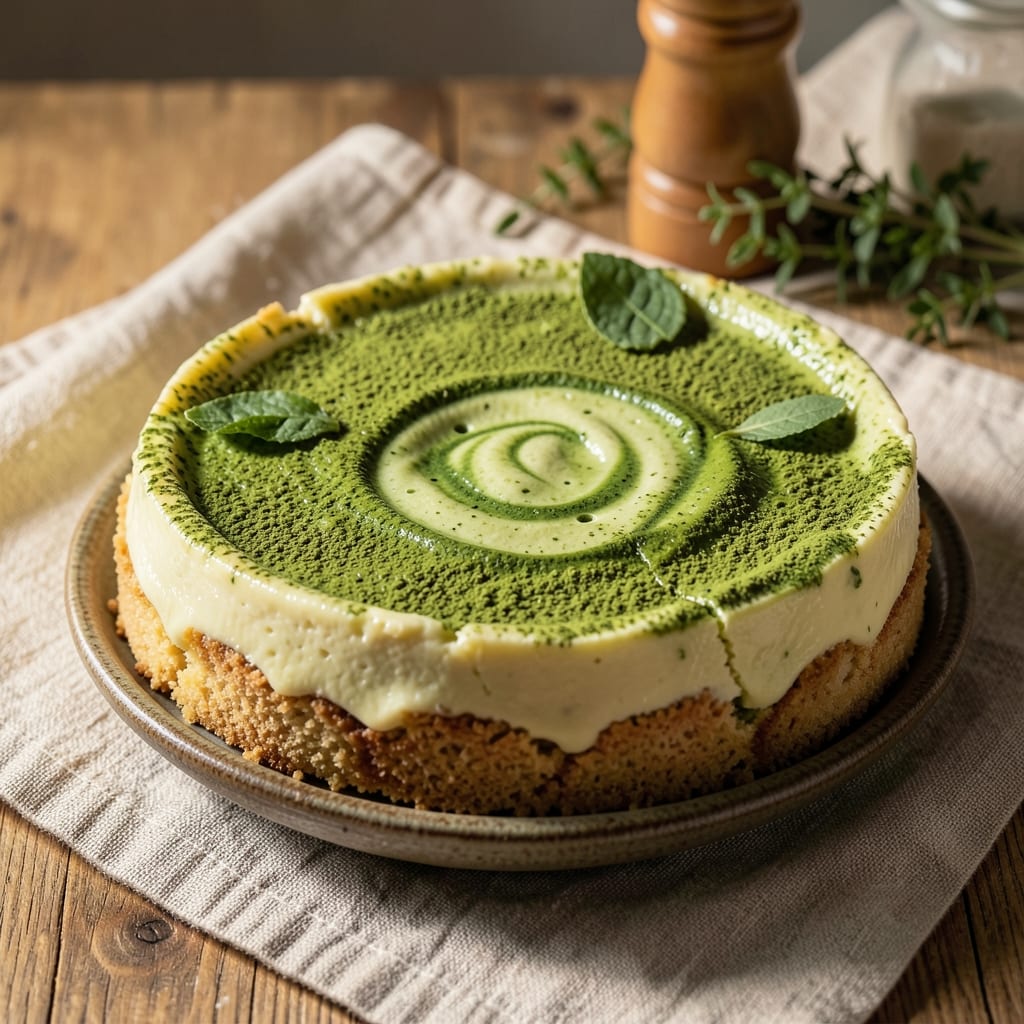
This baked matcha cheesecake recipe delivers a perfect balance of earthy green tea flavor and silky, crack-free texture—ideal for those who crave something sophisticated yet approachable. 💛 The matcha powder infuses the filling with a delicate bitterness that pairs beautifully with the creamy cheesecake base, creating a dessert that feels both indulgent and refined. What sets this recipe apart is the careful technique to prevent common baking pitfalls like sinking or cracking, ensuring a flawless finish every time.
The secret to achieving that signature matcha flavor without overpowering the sweetness lies in the precise ratio of matcha to cream cheese and the method of incorporating it into the batter. You'll start with a classic graham cracker crust, then layer the matcha-infused filling, which bakes up with a smooth, velvety texture and just the right amount of green tea brightness. This recipe is designed for those who want restaurant-quality results at home, with minimal fuss and maximum impact.
By the time you pull it from the oven, you'll have a cheesecake that's rich, creamy, and subtly aromatic—with a vibrant green hue that makes it as visually stunning as it is delicious. The matcha doesn't just flavor the filling; it enhances the overall experience, offering a sophisticated twist on a classic dessert. Whether you're serving it at a dinner party or treating yourself to a special dessert, this cheesecake is sure to impress.
For an extra touch of elegance, consider garnishing with a dusting of matcha powder, fresh berries, or a dollop of whipped cream. The key to success is patience—allowing the cheesecake to cool gradually and then chilling it thoroughly in the refrigerator. This ensures the perfect texture and prevents any unwanted cracks. Let's get started on creating this showstopper dessert!
Ingredients for baked matcha cheesecake
Sophisticated yet approachable ingredients for a silky matcha cheesecake with restaurant-quality texture.
| Ingredient | Amount | Notes |
|---|---|---|
| Graham Crackers 🍪 | 2 cups | Crushed into fine crumbs |
| Unsalted Butter 🧈 | ½ cup | Melted for crust binding |
| Granulated Sugar 🍚 | ¼ cup | For crust sweetness |
| Large Eggs 🥚 | 4 whole | Room temperature preferred |
| Cream Cheese 🧀 | 32 oz | Full-fat, room temperature |
| Culinary-Grade Matcha Powder 🍵 | 2 tbsp | Ceremonial grade preferred |
| Sour Cream 🥛 | ½ cup | Full-fat for creaminess |
| Vanilla Extract 🌿 | 1 tbsp | Pure Madagascar preferred |
| Granulated Sugar 🍚 | 1 cup | For filling sweetness |
| Heavy Whipping Cream 🥛 | 1 cup | Chilled for topping |
| Powdered Sugar 🍚 | ¼ cup | For dusting |
| Fresh Berries 🍓 | 1 cup | Optional garnish |
| Kosher Salt 🧂 | ½ tsp | Fine grain preferred |
| Cornstarch 🌾 | 1 tbsp | Prevents cracking |
The matcha powder is non-negotiable here—ceremonial grade from Ippodo or Jade Leaf delivers the most vibrant flavor without bitterness. Room-temperature cream cheese is crucial; it blends smoothly and prevents lumps. For the crust, Honey Maid graham crackers (the classic flavor) crush better than others, and unsalted butter ensures no competing saltiness. If you can't find ceremonial matcha, culinary-grade works, but expect slightly more bitterness. The key to the filling's texture lies in the cornstarch, which acts as a stabilizer—don't skip it.
No matcha powder? One tablespoon of instant espresso powder can mimic some of the earthy notes, though it won't replicate the vibrant green hue. Substituting full-fat sour cream with Greek yogurt at half the amount works in a pinch, but the texture will be slightly tangier. For the crust, digestive biscuits can replace graham crackers if needed—just crush them finer. The vanilla extract is essential; imitation vanilla won't cut it here. If you're serving this at room temperature, add an extra tablespoon of cornstarch to the filling to prevent any potential cracks during cooling.
The crust mixture should be pressed firmly into the pan—use a glass to compact it evenly. Bake the crust for 10 minutes before adding the filling to prevent sogginess. Once assembled, the cheesecake needs 45-50 minutes in the oven, but the real magic happens during the 2-hour chill in the fridge. For garnish, fresh berries add a pop of color, while a dusting of matcha powder enhances the visual appeal. Store leftovers in the fridge for up to 5 days, covered tightly with plastic wrap. The texture actually improves after the first 24 hours—patience is key.
Why You'll Love This Recipe
- No-Fuss Assembly: I swear, this cheesecake comes together faster than takeout. Crush graham crackers, mix cream cheese and sugar in one bowl—no food processor, no fuss. Even my lazy Sunday mornings can handle it.
- Earthy Matcha Magic: That first bite of matcha-infused cream cheese? It’s like dessert woke up. The graham crust adds a buttery crunch, but the real star is how the matcha’s grassy notes balance the sweetness without tasting like green chalk.
- Party or Pajamas: Slice it for a dinner party or grab a fork straight from the fridge at midnight—no judgment. The texture holds up for days, and honestly? It’s the kind of dessert that makes even your least-impressed friend pause mid-bite.
- Leftovers That Don’t Suck: Most cheesecakes turn to sad rubber after day two. Not this one. The baked texture stays firm, and the matcha keeps it interesting. I’ve had it cold, room temp, and even reheated (yes, really)—still delicious. Budget win: cream cheese and graham crackers stretch further than you’d think.
Step-by-step instructions for baked matcha cheesecake
Here's how to create a perfectly silky matcha-infused cheesecake with a delicate crust.
👨🍳 Step 1: Prepare the Matcha-Infused Crust
Preheat your oven to 325°F and grease a 9-inch springform pan thoroughly with butter. In a food processor, pulse the 2 cups Graham Crackers into fine crumbs—you want them to resemble sand. Mix these crumbs with the 0.5 cup Unsalted Butter (melted and cooled slightly) and 0.25 cup Granulated Sugar until evenly combined.
Press this mixture firmly into the bottom of your prepared pan, creating an even layer. Use the bottom of a glass to compact it well—this prevents crumbling later. Bake the crust for 10 minutes until it's set and just beginning to turn golden. Let it cool while you prepare the filling.
🍳 Step 2: Whip the Matcha Cheesecake Filling
In a large mixing bowl, beat the 32 oz Cream Cheese (at room temperature) on medium speed until completely smooth—about 3-4 minutes. Add the 2 tbsp Culinary-Grade Matcha Powder and mix until fully incorporated. The color should turn a vibrant green, but don't worry if it looks too intense—it'll mellow in the oven.
Gradually add the 1 cup Granulated Sugar while mixing, then incorporate the 4 whole Large Eggs one at a time, mixing just until each is fully combined. Add the 0.5 cup Sour Cream and 1 tbsp Vanilla Extract, mixing until smooth. Finally, fold in the 1 tbsp Cornstarch—this helps prevent cracking. The batter should be thick but pourable.
🥘 Step 3: Bake the Cheesecake to Perfection
Pour the matcha filling over the cooled crust, spreading it evenly. Place the springform pan inside a larger baking dish and carefully pour hot water into the dish until it reaches halfway up the sides of the springform pan. This water bath helps create a smooth top and prevents cracking.
Bake at 325°F for 50-60 minutes—the center should be just set when you gently shake the pan. It's done when the edges are slightly pulled away from the pan and the center doesn't jiggle much. Turn off the oven, crack the door open, and let the cheesecake cool inside for 1 hour to prevent sudden temperature changes that could cause cracks.
⏰ Step 4: Chill and Prepare the Topping
Remove the cheesecake from the water bath and cool it completely at room temperature. Then, refrigerate uncovered for 4 hours or overnight—this step is crucial for developing the proper texture. While it chills, whip the 1 cup Heavy Whipping Cream with the 0.25 cup Powdered Sugar until soft peaks form. Fold in the 0.5 tsp Kosher Salt for balance.
Once the cheesecake is fully chilled, spread the whipped cream evenly over the top. Press the 1 cup Fresh Berries gently into the cream for decoration. Use a skewer to create holes in the cream layer if you prefer a more rustic presentation. Serve chilled, allowing the matcha's earthy notes to shine through the creamy texture.
Pro Tips For Making Baked Matcha Cheesecake
- Preheat Pan and Oven Together: I learned this the hard way—matcha cheesecake is delicate. Place your springform pan inside the oven while it preheats to 325°F (165°C) for 10 minutes. This guarantees the crust sets immediately when you pour in the batter, preventing any sinking or soggy bottoms.
- Use Room-Temperature Cream Cheese: Cold cream cheese is the enemy of smooth filling. Take the blocks out of the fridge 24 hours ahead, or at least 4-6 hours before mixing. Lumps in your batter mean lumps in your cheesecake—no amount of whisking will fix it once it’s in the oven.
- Don’t Overmix the Batter: After folding in the matcha powder, stop mixing the second everything is just combined. Overworking the eggs adds air, which causes cracks. Two minutes max—your cheesecake will thank you with a silky texture instead of a cracked top.
- Bake in a Water Bath: Wrap the springform pan in heavy-duty foil, leaving the top open, and place it in a larger roasting pan. Add hot water halfway up the sides before baking. This creates a steamy environment that keeps the center moist and prevents the edges from drying out too fast—critical for matcha’s bold flavor to shine.
Storing and reheating your baked matcha cheesecake
Refrigerator Storage
Store your baked matcha cheesecake in an airtight container covered with plastic wrap to maintain moisture and prevent drying. Keep it refrigerated at 40°F or below for up to 5 days—the flavors actually deepen as it rests. The matcha's earthy notes become more pronounced over time, making it taste even better on day 2 or 3. 💛
Freezer Storage
For longer storage, wrap the cheesecake tightly in plastic wrap, then place it in a freezer-safe bag with all excess air removed. Freeze for up to 3 months—the texture remains silky when thawed properly. To serve, let it thaw in the fridge overnight, then bring to room temperature before slicing. The whipped cream topping may soften slightly but can be refreshed with a quick chill.
Reheating Slices
To revive individual slices, microwave them on medium power (50%) for 10-15 seconds—just enough to warm through without melting the filling. For a smoother texture, cover the slice with a damp paper towel to prevent drying. Alternatively, warm in a 350°F oven for 5-8 minutes for a more even heat distribution. Always serve chilled for the best matcha flavor experience.
Reviving Texture
If your cheesecake loses its firmness after storage, place it uncovered in the fridge for 1-2 hours to firm up. For extra stability, sprinkle a thin layer of powdered sugar over the top before refrigerating—it creates a protective barrier. The matcha's vibrant color may fade slightly over time, but the flavor remains rich and satisfying. 🌱
Garnish Refresh
Before serving stored cheesecake, refresh the whipped cream topping by whipping it again briefly with a splash of heavy cream if needed. Add a new dusting of matcha powder or fresh berries to restore visual appeal. The contrast between the creamy filling and bright garnishes makes every slice feel special, even after days in storage.
Portioning Tips
Slice the cheesecake into 1-inch wedges for easy portioning. Store slices in single-serving containers to maintain freshness—this prevents cross-contamination of flavors. Label containers with dates to track freshness. When reheating, always prioritize slices from the outer edges first, as they firm up more quickly during storage. ✨
Nutrition facts
Frequently asked questions
Why does my matcha cheesecake turn out too bitter?
The bitterness likely comes from using too much matcha powder or low-quality matcha. Stick to 2 tablespoons of ceremonial-grade matcha—it's less bitter than culinary-grade. Also, balance the flavor by ensuring you've added enough sugar (the recipe calls for 1 cup total) and let the cheesecake chill fully before tasting. The flavors meld better after 4 hours in the fridge.
Can I make this cheesecake without a water bath?
A water bath isn't strictly necessary, but it dramatically reduces cracking risks. Without it, bake at 325°F for 55-60 minutes and avoid opening the oven door during baking. For extra insurance, place the springform pan on a baking sheet to catch any potential drips. The texture won't be quite as smooth, but it'll still be delicious!
How do I prevent cracks in the cheesecake?
Cracks usually happen from sudden temperature changes or overmixing. First, ensure your cream cheese is fully room temperature before mixing. Second, don't overmix the batter after adding eggs—just combine until smooth. Third, let the cheesecake cool gradually in the oven after baking (leave it in the turned-off oven with the door cracked open for 1 hour). Finally, chill it uncovered in the fridge for 4+ hours before serving.
Can I use almond flour instead of graham crackers for the crust?
Yes, but you'll need to adjust the texture. Replace the graham crackers with 2 cups almond flour plus 1 tablespoon xanthan gum to help bind it. Add 1-2 tablespoons of cold water to the mixture to form a workable dough. The crust will be denser but still delicious. For extra flavor, add 1 teaspoon matcha powder to the crust mixture to complement the filling.
What's the best way to serve this cheesecake at room temperature?
Let the cheesecake sit at room temperature for 30-45 minutes before serving to soften slightly while maintaining its structure. For extra stability, chill it for 1 hour first, then let it warm up gradually. Serve with a dusting of matcha powder and fresh berries to enhance both flavor and presentation. The matcha's earthy notes taste best when the cheesecake isn't ice-cold!