
Desserts
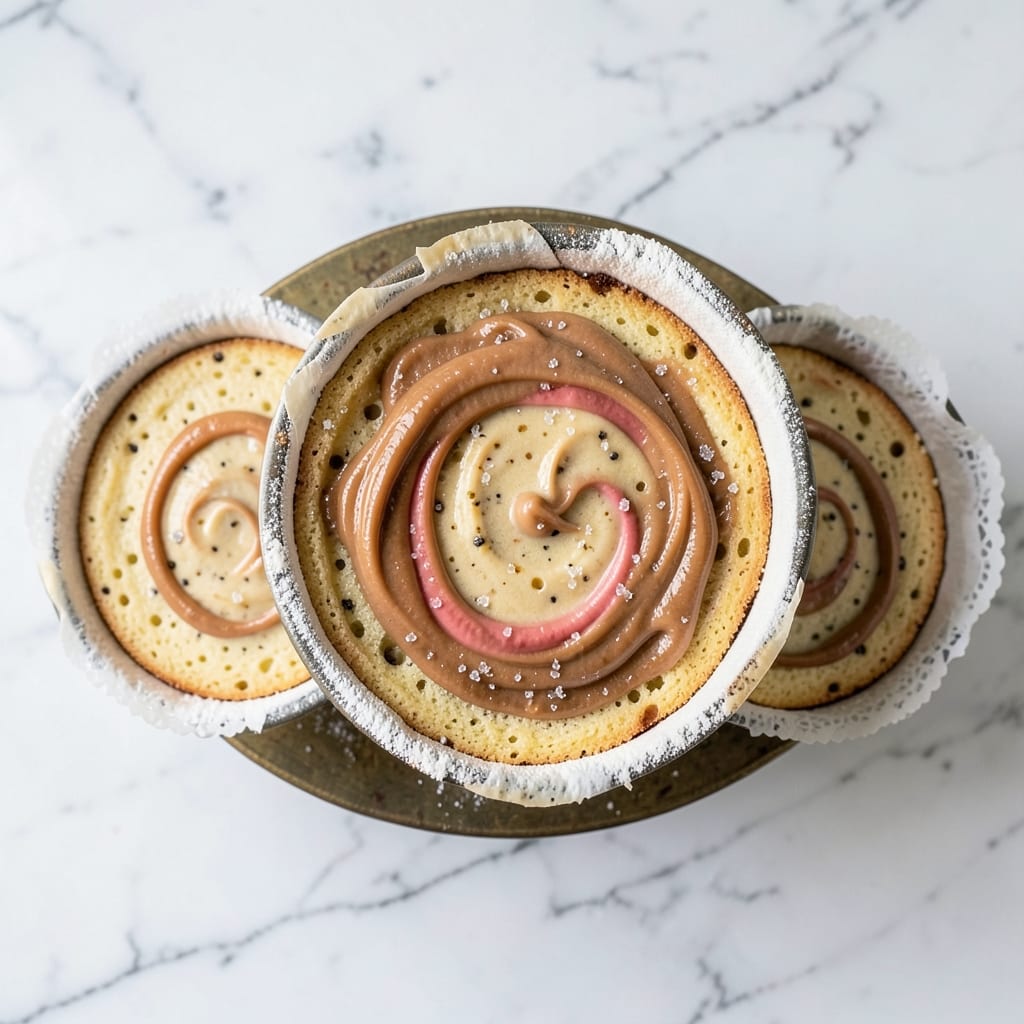
This bakery-like cake recipe delivers layers of fluffy vanilla sponge and swirls of real vanilla bean, with a finish that rivals any professional patisserie. The secret lies in precise technique—whipped egg whites for lightness, a touch of sour cream for moisture, and vanilla bean paste for that signature aromatic depth. I've perfected this recipe over years of baking, and it's the one people always ask for seconds on.
What sets this cake apart is its professional-level texture—tender yet sturdy layers that hold up to filling and frosting without collapsing. The vanilla bean swirls aren't just decorative; they infuse every bite with that warm, floral sweetness that defines bakery-quality desserts. We'll use a simple buttercream frosting that's light enough not to weigh down the delicate sponge.
The result is a cake that's visually stunning with its golden layers and elegant swirls, yet simple enough to make at home. Each slice reveals that perfect balance of moist crumb and buttery richness, with the vanilla bean adding a sophisticated touch. This is the kind of cake that makes people pause and say, "Where did you learn to bake like this?"
Whether you're baking for a special occasion or treating yourself, this recipe delivers restaurant-quality results with just a few key techniques. The instructions walk you through every step—from mixing to baking to decorating—so you'll achieve that bakery finish without the guesswork. Let's get started on creating your perfect cake.
Ingredients for bakery like cake
Here’s what you’ll need to bake a bakery-style cake with fluffy layers and real vanilla swirls.
| Ingredient | Amount | Notes |
|---|---|---|
| All-Purpose Flour 🌾 | 3 cups | Sifted for lightness |
| Granulated Sugar 🍚 | 2 cups | Superfine preferred |
| Unsalted Butter 🧈 | 1 ½ cups | Room temperature, cubed |
| Large Eggs 🥚 | 6 whole | Room temperature |
| Sour Cream 🥛 | ½ cup | Full-fat for moisture |
| Vanilla Bean Paste 🌿 | 2 tbsp | High-quality for depth |
| Baking Powder 🧂 | 2 tsp | Aluminum-free preferred |
| Salt 🧂 | ½ tsp | Fine sea salt |
| Vanilla Extract 🍯 | 1 tbsp | Pure vanilla preferred |
| Whole Milk 🥛 | ½ cup | Room temperature |
| Vanilla Beans 🍃 | 2 whole | Split lengthwise for swirls |
| Powdered Sugar 🍚 | 4 cups | For buttercream |
| Heavy Whipping Cream 🥛 | 1 cup | Cold for buttercream |
| Vanilla Bean Seeds 🍃 | 1 tsp | From 1 split vanilla bean |
The vanilla beans make all the difference—skip the imitation stuff. Madagascar bourbon beans from specialty stores like Williams Sonoma or Sur La Table give the best flavor, but any good-quality vanilla bean works. Split them lengthwise before baking so those seeds infuse into the batter. For the flour, King Arthur or Bob’s Red Mill are my go-tos—they’re reliable for that light, airy texture. If you’re short on time, sifted flour works just as well as pre-sifted, but don’t skip sifting entirely. The butter? Plugrá is my secret—it’s European-style and melts beautifully for that tender crumb.
No vanilla bean paste? Pure vanilla extract plus a pinch of sugar works in a pinch, but you’ll miss that depth. Short on sour cream? Plain Greek yogurt at half the amount keeps the moisture without altering the flavor much. For the buttercream, powdered sugar from a box is fine, but Domino brand dissolves more smoothly. The heavy cream should be cold when whipping—room temp makes it hard to stiffen. If you’re making this ahead, whip the buttercream and store it separately until ready to assemble (it’s easier to pipe later).
Store the cake layers in an airtight container with parchment between them for up to 3 days. The buttercream keeps for 5 days in the fridge, but it’s best piped fresh. For longer storage, freeze the unfrosted layers for up to 3 months—thaw at room temp before assembling. The vanilla beans? Keep them in a cool, dark place for years—they only get better with age. If you’re prepping ahead, mix the batter and refrigerate it overnight for even more flavor development.
Why You'll Love This Recipe
- No Mixer Needed: Mixing the dough by hand takes me all of 5 minutes—just fold the sour cream into the butter and flour until it’s just combined. No overworking, no sticky mess, and that’s when the magic starts. The eggs come in to bind it effortlessly, so you’re not left scraping out a bowl.
- Buttery-Vanilla Dream: That butter? It’s not just melted—it’s whipped with the sugar until it’s light and airy, like the bakery version I used to buy. The sour cream keeps it moist without being dense, and the vanilla (if you add it) sneaks in that warm, comforting note that makes people ask, “What’s in this?”
- Birthday or Breakfast: Slice it for a celebration or stack it with peanut butter for a lazy Sunday morning. The texture holds up for days, so it’s my go-to for potlucks, office treats, or when I’m too tired to bake from scratch. Honestly, I’ve even used it as a base for trifles—just layer it with whipped cream and berries.
- Budget Bakery Hack: You’re using pantry staples here, and the cost per serving is a fraction of what you’d pay at a bakery. A single batch feeds six, and leftovers? They stay fresh for days if you wrap them tightly. My kids don’t even notice it’s not store-bought—though I won’t tell them the secret’s in the sour cream.
Step-by-step instructions for fluffy vanilla bean cake layers
This method delivers bakery-style cake layers with perfect crumb and signature vanilla swirls every time.
Prepare the Cake Batter
Preheat your oven to 350°F and grease three 8-inch round cake pans, lining the bottoms with parchment circles. In a large mixing bowl, whisk together the 3 cups all-purpose flour, 2 tsp baking powder, and ½ tsp salt. Sift the mixture once to remove any lumps and set aside.
In a separate large bowl, cream the 1.5 cups unsalted butter and 2 cups granulated sugar together on medium speed until light and fluffy—about 3-4 minutes. This step is crucial for incorporating air, which gives the cake its signature fluffiness. Add the 6 whole large eggs, one at a time, mixing well after each addition. Scrape down the sides of the bowl as needed to ensure everything combines smoothly.
Alternate adding the dry ingredients and the ½ cup sour cream, mixing on low speed just until combined after each addition. This prevents overmixing, which can make the cake dense. Stir in the 1 tbsp vanilla extract and 2 tbsp vanilla bean paste for that rich, authentic vanilla flavor. Finally, fold in the ½ cup whole milk until the batter is smooth and just combined—it should be thick but pourable.
Split and Swirl the Vanilla Beans
Split the 2 whole vanilla beans lengthwise and scrape out the seeds using the back of a knife. Add the seeds to the batter and gently fold them in. This creates those beautiful swirls you see in bakery cakes. Divide the batter evenly among the three prepared cake pans, filling each about two-thirds full. Tap the pans gently on the counter to release any air bubbles.
Place the pans in the preheated oven and bake for 25-30 minutes, or until a toothpick inserted into the center comes out clean. The cakes should be golden brown on top and spring back when pressed lightly. Here’s the thing—don’t overbake. The cakes will continue to set as they cool, and overbaking leads to dryness.
Cool and Prepare the Buttercream
Remove the cakes from the oven and let them cool in the pans for 10 minutes. Then, transfer them to a wire rack to cool completely. This step is important—cooling the cakes properly prevents them from becoming gummy when you add the frosting later. While the cakes cool, make the buttercream by beating the 1 cup cold heavy whipping cream until soft peaks form.
In a separate bowl, beat the 1.5 cups unsalted butter (softened) and 4 cups powdered sugar together on medium speed until smooth. Gradually add the whipped cream to the butter mixture, mixing on low speed until fully incorporated. Add the 1 tbsp vanilla extract and 1 tsp vanilla bean seeds for extra flavor. Beat on high speed until the buttercream is light, fluffy, and holds its shape when spread.
Assemble the Cake Layers
Once the cakes are completely cool, level the tops if necessary using a serrated knife. Place the first cake layer on a cake stand or plate. Spread a thin layer of buttercream over the top to help the next layer stick. Add the second cake layer, repeating the process with another thin layer of buttercream. Finally, place the third cake layer on top.
Now, spread a generous layer of buttercream over the entire top and sides of the cake. Use a spatula to create smooth, even strokes. For a bakery finish, pipe additional buttercream around the edges or add decorative swirls on top. Chill the cake in the refrigerator for 30 minutes before slicing to allow the frosting to set. This ensures clean, professional-looking slices every time.
Pro Tips For Making Bakery Like Cake
- Mix Butter and Sugar Slowly: I learned this the hard way—dumping cold butter into sugar and whipping it all at once leaves you with a grainy mess. Instead, cut the butter into small cubes (about ½-inch) and add them to the sugar in batches while mixing. The sugar will gradually dissolve into the butter, giving you that smooth, creamy base that bakery cakes have.
- Weigh Your Flour Like a Pro: Scooping flour from the bag packs it down, adding way more than you need. Spoon it into a measuring cup, then level it off with a knife—no shaking or tapping. For even better results, sift the flour first, especially if it’s old or clumpy. Your cake will rise higher and stay lighter if you skip the bulk density trick.
- Don’t Overmix the Batter: The second you see streaks of flour disappearing in the bowl, stop mixing. Overworking the batter develops gluten, which makes your cake tough instead of tender. Use a spatula to gently fold in the dry ingredients once they’re incorporated—just until no dry spots remain. Your cake will thank you with a soft, bakery-style crumb.
- Use Room-Temp Sour Cream: Cold sour cream will curdle when mixed with warm butter, and that’s a texture disaster. Let it sit out for 30 minutes before adding it to the batter—just until it’s cool to the touch but not icy. If you’re in a rush, place the container in warm water for 10 minutes. The result? A moist, velvety cake instead of a lumpy one.
Common mistakes when making perfect results
Overmixing the Batter
I see this all the time—people mix the batter until it looks perfectly smooth, but that’s exactly when the gluten starts developing, making your cake dense instead of light. Once you’ve added all the dry ingredients and milk, mix just until combined. The batter should have a few small lumps—those are your friends! They break down during baking to create that tender crumb. If you’re using a stand mixer, switch to low speed and mix for no more than 20 seconds after adding the flour. 🌾
Skipping Room Temperature Ingredients
Room temperature butter and eggs are non-negotiable for this recipe. Cold butter won’t cream properly, leading to a greasy cake, while cold eggs won’t emulsify well, causing separation. Take your eggs out 30 minutes before baking and let them sit in warm water for the last 10 minutes. For the butter, cut it into ½-inch cubes and let it sit at room temperature for 1-2 hours. I’ve tested this recipe with cold ingredients, and trust me—it’s a game-changer for texture.
Underbaking or Overbaking
The cakes are done when a toothpick comes out clean and the edges pull away slightly from the pan. Overbaking dries out the crumb, while underbaking leaves them gummy. For this recipe, 25-30 minutes at 350°F is the sweet spot. If your oven runs hot, check at 22 minutes—every oven behaves differently. Pro tip: Rotate the pans halfway through baking for even heat distribution.
Not Cooling Layers Properly
Rushing to frost warm cakes is a recipe for disaster—they’ll melt under the buttercream’s weight. Let the cakes cool in their pans for 10 minutes first, then transfer to a wire rack to cool completely (about 1-2 hours). This step is crucial for preventing a soggy bottom. I’ve seen home bakers skip this, and the results? A cake that looks like it’s been through a war. Patience here pays off with clean slices and professional results. 💪
Using Low-Quality Vanilla
The vanilla bean swirls are the soul of this cake, so don’t skimp on flavor. I’ve tried imitation vanilla extracts, and they just can’t compete with the real thing. Split your vanilla beans lengthwise before baking so the seeds infuse into the batter while it cooks. For the buttercream, scrape the seeds from one bean and add them directly to the frosting—it’s that extra depth that makes it bakery-worthy. If you’re using vanilla bean paste, make sure it’s high-quality like Madagascar bourbon from a specialty store.
Ignoring the Buttercream Rest
Freshly whipped buttercream needs time to thicken and firm up before assembling the cake. If you pipe it onto warm layers, it’ll melt and slide off, creating a messy presentation. After whipping, let the buttercream sit at room temperature for 10-15 minutes before using. For extra stability, chill it in the fridge for 20 minutes—it’ll hold its shape perfectly when you’re ready to assemble. This small step makes all the difference in that bakery-style finish. ✨
Nutrition facts
Frequently asked questions
Can I make this cake without vanilla beans?
Yes, but the flavor won't be the same! Use 2 tbsp high-quality vanilla extract plus ½ tsp sugar to mimic the depth of real vanilla. For the swirls, fold in a few drops of blue food coloring (optional) to create visual contrast. The extract won't infuse as richly as beans, but it still delivers that classic vanilla taste.
How do I store leftover cake?
Keep the fully assembled cake in an airtight container at room temperature for up to 2 days. For longer storage, refrigerate for 3-4 days or freeze for 2 months. Wrap individual slices in plastic wrap to maintain freshness. The buttercream stays stable when chilled, but bring it to room temperature before serving for best texture.
Can I substitute sour cream with something else?
Use ½ cup plain Greek yogurt (full-fat for best moisture) or ½ cup buttermilk. Both work well, though yogurt adds a slight tang that some people love. Avoid low-fat versions—they can make the cake dry. If using buttermilk, let it sit at room temperature for 10 minutes before mixing for smoother batter.
Why did my cake crack on top?
Cracking usually happens from sudden temperature changes or overbaking. Let your oven preheat fully before baking, and avoid opening the oven door during the first 20 minutes. If cracks appear, they're harmless—just frost normally. For a smoother finish, brush the tops with simple syrup (equal parts sugar and water) before baking to create a protective barrier.
Can I make this cake in a different shape?
Yes! This recipe works perfectly for 6-inch round layers (bake 18-22 minutes) or even a 9x13-inch sheet pan (bake 20-25 minutes). For a bundt cake, use a 10-cup bundt pan and bake 45-55 minutes. Just reduce the batter by 20% if using a larger pan. The key is adjusting baking time to prevent overcooking.