
Desserts
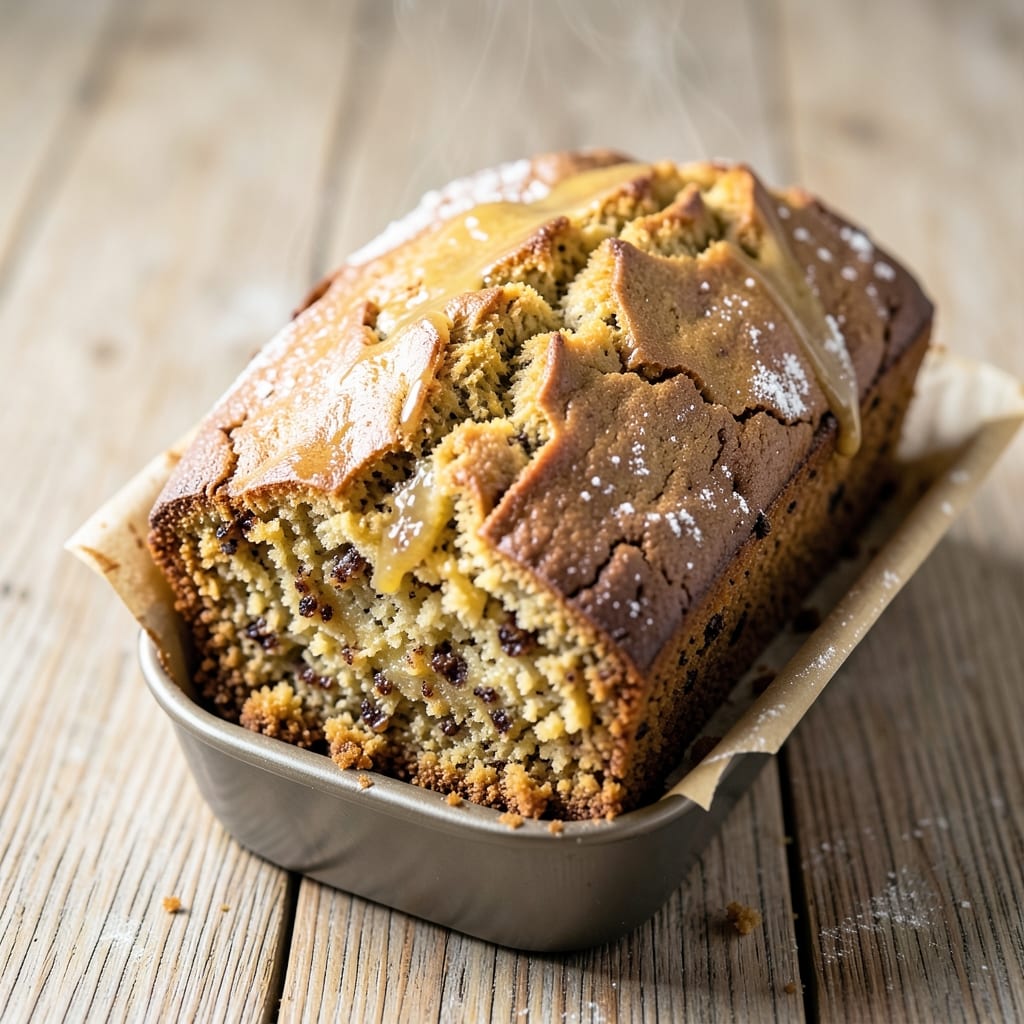
This banana bread recipe in a cake pan delivers the perfect balance of a golden, crackly crust and a moist, tender center—the kind that disappears faster than you can say "second slice." 🌟 The secret lies in using ripe bananas, precise mixing ratios, and baking in a standard 9x13-inch cake pan for even heat distribution that transforms simple ingredients into something extraordinary.
What sets this recipe apart is its foolproof technique: no overmixing, no guesswork, and no dry crumbly texture. You’ll start with mashed bananas that add natural sweetness and moisture, then combine them with just the right amount of flour, eggs, and butter to create a batter that’s light yet substantial. The cake pan ensures even baking, giving you that coveted crisp exterior while keeping the inside soft and flavorful.
By the time it emerges from the oven, you’ll have a loaf with a caramelized crust that’s irresistibly crisp and a center so moist it practically melts in your mouth. The aroma alone will have everyone gathering around the kitchen, and the texture—neither too dense nor too cakey—makes it a crowd-pleaser for breakfast, dessert, or anytime snack cravings.
Whether you’re baking for a family gathering or simply treating yourself, this recipe scales beautifully and can be customized with nuts, chocolate chips, or a swirl of cinnamon sugar. Ready to bake the perfect loaf? Here’s everything you need to get started.
Ingredients for banana bread recipe in a cake pan
Simple ingredients transform into a golden-crusted, moist banana bread loaf perfect for any occasion.
| Ingredient | Amount | Notes |
|---|---|---|
| Ripe Bananas 🍌 | 3 medium | Mashed to 1.5 cups |
| All-Purpose Flour 🌾 | 2 ½ cups | Sifted for even texture |
| Granulated Sugar 🍚 | 1 cup | White or light brown |
| Packed Brown Sugar 🍚 | ½ cup | Light or dark variety |
| Unsalted Butter 🧈 | ¾ cup | Room temperature, full-fat |
| Large Eggs 🥚 | 2 whole | Room temperature preferred |
| Pure Vanilla Extract 🌿 | 1 tsp | High-quality, no alcohol |
| Baking Soda 🧂 | 1 tsp | Freshly opened package |
| Ground Cinnamon 🌶️ | 1 ½ tsp | Toasted for deeper flavor |
| Salt 🧂 | ½ tsp | Fine sea salt preferred |
| Walnuts 🥜 | ½ cup | Chopped, optional topping |
| Chocolate Chips 🍫 | ½ cup | Semi-sweet or dark |
The bananas are the heart of this recipe—ripe ones with brown speckles pack the most flavor. Hit your grocery store’s produce section early morning for the sweetest, softest ones, or check the back of the display where they’re often overlooked. King Soopers or Whole Foods usually have the best selection of perfectly spotted bananas. If yours aren’t quite there yet, pop them in a paper bag with an apple overnight—it speeds up the ripening. The walnuts? Trader Joe’s sells pre-chopped ones for convenience, but if you’re feeling fancy, toast them in the oven at 350°F for 5 minutes to bring out their nutty aroma.
No ripe bananas? Use frozen bananas—thaw and drain first. Swap the walnuts for pecans or skip them entirely if you prefer a simpler loaf. The chocolate chips can be any kind, but Ghirardelli semi-sweet melts beautifully. For extra moisture, add 1/4 cup of applesauce to the batter. The butter needs to be room temperature—if it’s cold, microwave it for 20 seconds to soften. And if you’re short on vanilla, vanilla bean paste adds a luxurious depth of flavor. The cinnamon? Toast it lightly in a dry pan for 30 seconds to warm up its taste—trust me, it makes a difference.
This loaf keeps beautifully—wrapped in foil, it stays moist for 3 days at room temperature. For longer storage, freeze it sliced in a sealed bag for up to 3 months. The crust gets even better the next day, so bake it when you’re ready for a snack. Pro tip: Brush the top with melted butter right out of the oven for that restaurant-quality shine. Leftovers? Toast the slices for a crispy edge that’ll make you want to bake again tomorrow.
Why You'll Love This Recipe
- Cake Pan Magic: I swear by this trick—no loaf pan? No problem. The cake pan gives you those tall, buttery layers that slice up perfectly for breakfast or snacks, and the sides stay moist longer than any loaf I’ve ever baked.
- No-Fuss Mix-In: Honestly, I don’t even measure the bananas. Just mash them right in the bowl with the butter and sugars—it’s that simple. The brown sugar and butter blend into a caramelized base that makes every bite feel like a hug.
- Breakfast or Dessert: This isn’t just for sad bananas anymore. Toast a slice with peanut butter for a quick breakfast, or drizzle with honey for a dessert that’s ridiculously good. My kids grab it both ways, and I never have to fight over leftovers.
- Budget Breakfast Win: A few overripe bananas and pantry staples? That’s all it takes. I make two pans at once, freeze one, and boom—weeknight breakfasts sorted for days. Plus, the butter and sugar combo stretches my grocery budget without sacrificing flavor.
Step-by-step instructions for banana bread in a cake pan
Here's how to bake a tender, spiced banana bread with a perfect crust every time.
👨🍳 Step 1: Prep Ingredients and Preheat
Start by mashing the 3 medium ripe bananas until smooth—you should have about 1.5 cups of purée with just a few small lumps. I press through a fine-mesh sieve if any fibrous bits remain. Meanwhile, preheat your oven to 350°F and grease a 9-inch cake pan thoroughly with butter or baking spray. A well-greased pan prevents sticking and ensures easy removal of that beautiful domed loaf.
While the oven heats, toast the 0.5 cup walnuts in a dry skillet over medium heat for 3-4 minutes until fragrant. Let them cool completely before chopping roughly—this enhances their flavor and prevents them from absorbing too much moisture from the batter. Keep them nearby; you'll add them in the next step.
🍳 Step 2: Cream Butter and Sweeteners
In a large mixing bowl, combine the 0.75 cup unsalted butter (at room temperature) with the 1 cup granulated sugar and 0.5 cup packed brown sugar. Beat using a hand mixer on medium speed for 3-4 minutes until light and fluffy. You're looking for a color change from pale yellow to a slightly off-white hue—this incorporates air that creates a tender crumb.
Here's the thing—don't rush this step. The butter needs to emulsify fully with the sugars to create that signature moist texture. If you skip this, your banana bread will turn out dense instead of tender. Add the 1 tsp pure vanilla extract and mix for another 30 seconds to distribute the flavor evenly.
👨🍳 Step 3: Mix Wet and Dry Ingredients
Add the 2 whole large eggs, one at a time, mixing well after each addition until fully incorporated. The mixture should look smooth and slightly thickened. In a separate bowl, whisk together the 2.5 cups all-purpose flour, 1 tsp baking soda, 1.5 tsp ground cinnamon, and 0.5 tsp salt. Sift the dry ingredients directly into the wet mixture to prevent lumps.
Gently fold in the banana purée using a spatula, being careful not to overmix. The batter should be thick but pourable. Stir in the toasted walnuts and 0.5 cup chocolate chips—I like to distribute them evenly throughout. If the batter seems too thick, add 1-2 tablespoons of milk (though our ingredients list doesn't include it, the natural banana moisture usually suffices).
🥘 Step 4: Bake to Golden Perfection
Pour the batter into your prepared cake pan and smooth the top with a spatula. Tap the pan gently on the counter a few times to release any air bubbles. Bake in the preheated oven for 50-55 minutes, or until a toothpick inserted in the center comes out clean with just a few moist crumbs clinging to it.
Watch for the edges to turn golden brown while the center remains slightly springy to the touch. The top should develop a crackly crust—this is your signal that the bread is fully baked. If the top browns too quickly, tent loosely with foil after 30 minutes to prevent over-browning while allowing the center to cook through.
⏰ Step 5: Cool and Serve
Remove the bread from the oven and let it cool in the pan for 10 minutes. Then transfer to a wire rack to cool completely. Here's where patience pays off—the bread will firm up as it cools, making it easier to slice. For the best texture, serve at room temperature rather than warm, which can make the crumb gummy.
Slice into 1-inch thick portions for perfect serving size. Each bite should deliver moist, spiced banana flavor with a tender crumb and those delightful pockets of melted chocolate and toasted walnut. Store leftovers wrapped at room temperature for 2 days, or freeze slices for up to 3 months—they reheat beautifully in the microwave.
Pro Tips For Making Banana Bread Recipe In A Cake Pan
- Mash Bananas Thoroughly: I learned this the hard way—lumpy mashed bananas mean uneven texture. Use a fork first, then press through a fine-mesh sieve or strainer to remove skins and get that silky consistency.
- Preheat Pan and Oven: Cold pans cause uneven baking. Place your cake pan in the oven while it preheats to 350°F (175°C)—this guarantees even heat distribution from the start.
- Skip Overmixing the Batter: After 30 seconds of mixing wet and dry ingredients, stop. Overworking the flour develops gluten, turning your tender banana bread into a dense loaf. Stir just until combined.
- Grease and Flour the Pan: Butter the pan and dust with flour—then tap out the excess. A lightly coated pan prevents sticking without making your bread dry. (Yes, even if you’re using parchment paper, do this extra step.)
Troubleshooting this dish
Dense Instead of Moist
If your banana bread turns out dense rather than tender, you likely overmixed the batter or didn’t cream the butter and sugars properly. I’ve found that beating the butter and sugars together for 3-4 minutes until light and fluffy is critical—this incorporates air that prevents density. Also, avoid overmixing after adding the flour; stir just until combined. If the batter seems too thick, add 1-2 tablespoons of milk to restore moisture. 🌟
Cakey Texture
A cakey banana bread usually means too much leavening (like baking soda) or not enough fat. Double-check your baking soda measurement—too much makes the bread rise too quickly, creating a lighter but drier crumb. To fix this, reduce the baking soda to ½ tsp and ensure you’re using full-fat butter (not reduced-fat). The butter’s fat content keeps the crumb tender. Also, make sure your bananas are ripe—they add natural moisture that prevents cakeiness.
Sunken Center
A sunken center happens when the bread collapses after baking, often due to overmixing or insufficient leavening. First, verify your baking soda is fresh—old baking soda loses potency. Also, ensure you’re not overmixing the batter after adding the flour; fold just until combined. For extra insurance, add ¼ cup of applesauce to the batter for additional moisture and structure. If you notice the center sinking, try tenting the pan with foil after 30 minutes to prevent over-browning while allowing the center to set properly.
Dry Crust
A dry crust can result from overbaking or insufficient greasing of the pan. Always grease your 9-inch cake pan thoroughly with butter or baking spray before pouring in the batter. For extra insurance, brush the top of the bread with melted butter right after removing it from the oven—this adds moisture and creates a shiny, tender crust. If the crust is already dry, try increasing the baking time slightly (up to 55 minutes) to ensure the center is fully cooked, then cover the loaf with a damp towel while it cools to retain moisture.
Uneven Baking
Uneven baking often occurs if the oven temperature isn’t calibrated or the pan isn’t placed correctly. Always preheat your oven for 15-20 minutes before baking to ensure even heat distribution. Place the cake pan on the middle rack—avoid the top or bottom, where heat can be inconsistent. If your oven runs hot, reduce the temperature by 25°F and check for doneness 5 minutes early. For extra evenness, rotate the pan halfway through baking if your oven has hot spots.
Stuck to the Pan
If your banana bread sticks to the pan, it’s likely because the pan wasn’t greased properly or the batter was too wet. Always grease the pan thoroughly with butter or baking spray, then dust it lightly with flour or cocoa powder for extra insurance. For stubborn sticking, try using a 9x13-inch dark metal pan—dark pans heat up faster and create a better crust, making removal easier. If the bread still sticks, run a thin knife around the edges before cooling to loosen it. For next time, consider lining the pan with parchment paper for effortless release. 💡
Nutrition facts
Frequently asked questions
Why does this recipe use a cake pan instead of a loaf pan?
Using a 9-inch cake pan creates a wider, flatter loaf with a beautiful golden crust that's perfect for slicing into thick servings. The wider surface area also helps develop that coveted crackly top while keeping the center moist. Plus, it's easier to serve at gatherings when you can cut generous portions!
Can I make this banana bread without nuts or chocolate chips?
Simply omit the 0.5 cup walnuts and 0.5 cup chocolate chips from the recipe. The base batter will still yield a delicious, moist loaf. For extra flavor, try adding 1 tsp lemon zest or ½ cup raisins instead. The texture will just be more uniform without the mix-ins.
How do I know when the banana bread is fully baked?
Your banana bread is done when a toothpick inserted in the center comes out with just a few moist crumbs (not wet batter) and the edges are golden brown. For this recipe, that's typically around 50-55 minutes at 350°F. The top should develop a crackly crust - this is your perfect baking signal!
What's the best way to store banana bread?
For short-term storage, keep your loaf wrapped in plastic wrap at room temperature for up to 2 days. For longer storage, slice the bread and freeze the pieces in a sealed bag for up to 3 months. The crust stays fresh, while the center remains moist when properly wrapped. Reheat slices in the microwave for 10-15 seconds for that warm, comforting texture.
Can I substitute other fruits in this recipe?
While bananas are key for that signature flavor, you can add ½ cup diced apples or ½ cup blueberries to the batter for extra fruitiness. Just be sure to toss any added fruit in 1 tsp flour first to prevent sinking. For a tropical twist, try ½ cup diced mango or ½ cup crushed pineapple (drained well). The texture will change slightly but still be delicious!