
Desserts
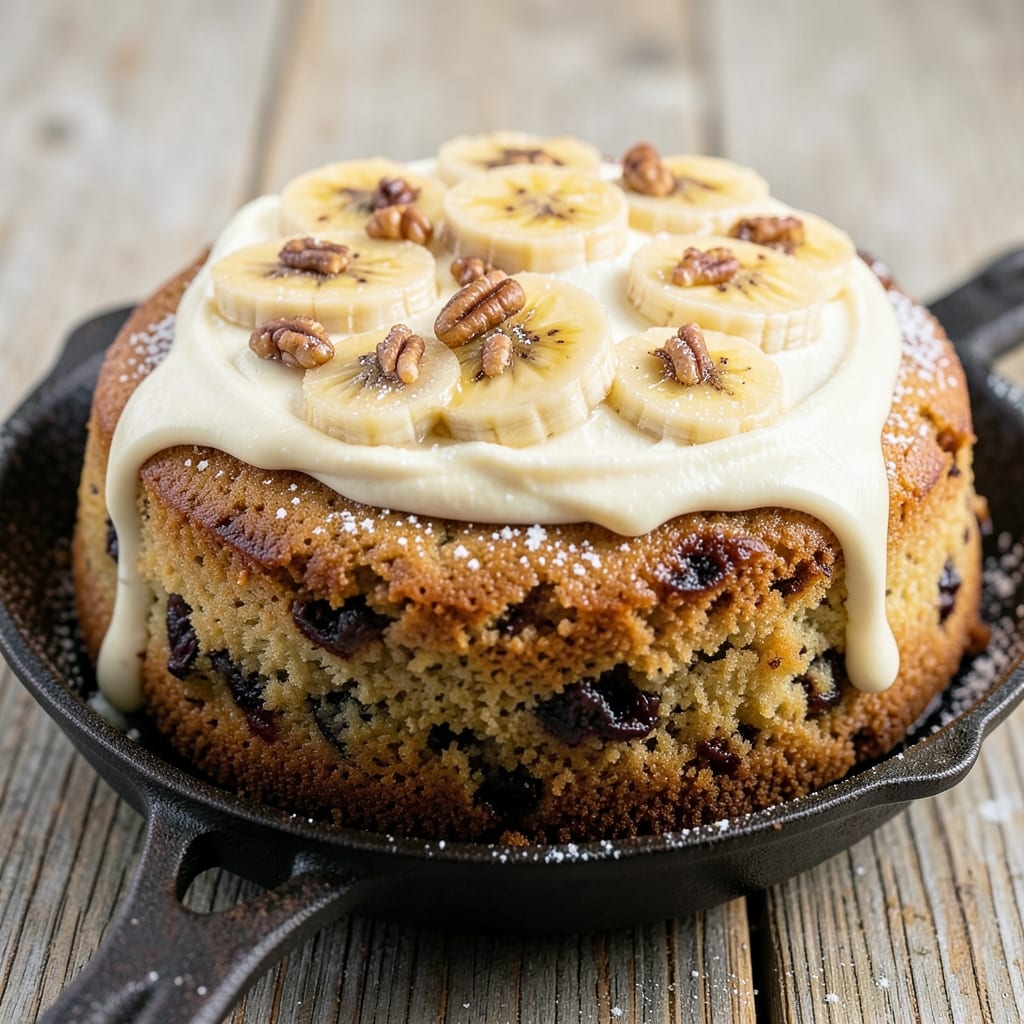
This banana cake recipe with self-rising flour delivers the perfect balance of moist crumb and fluffy rise—no yeast, no fuss, just pure baking magic. 💛 I remember the first time I tried this recipe during a particularly chaotic week when I needed something quick but impressive. The self-rising flour does all the heavy lifting, creating that signature tender texture while keeping prep simple.
The secret to this cake lies in the self-rising flour, which combines flour, baking powder, and salt in one convenient package. This eliminates the need for measuring multiple leavening agents, and it guarantees a light, airy texture that's difficult to achieve with all-purpose flour. The ripe bananas add natural sweetness and moisture, while the swirl of cream cheese frosting ties everything together.
What you'll end up with is a cake that's rich, moist, and perfectly tender—no dry crumbs here. The self-rising flour ensures a consistent rise every time, while the banana flavor shines through without overpowering. The cream cheese frosting adds a velvety contrast that makes each bite irresistible.
This recipe is perfect for weeknight baking or special occasions—it's simple enough for beginners but impressive enough for guests. The best part? It comes together in under an hour, with minimal cleanup. Let's get baking!
Ingredients for banana cake recipe with self rising flour
Self-rising flour and ripe bananas create this fluffy, moist cake with minimal effort—perfect for weeknight baking.
| Ingredient | Amount | Notes |
|---|---|---|
| Self-Rising Flour 🌾 | 2 cups | Light and airy texture |
| Ripe Bananas 🍌 | 3 large | Mashed for natural sweetness |
| Granulated Sugar 🍚 | 1 cup | Balances banana sweetness |
| Unsalted Butter 🧈 | ½ cup | Softened for moist crumb |
| Large Eggs 🥚 | 2 whole | Room temperature preferred |
| Vanilla Extract 🌸 | 2 tsp | Pure extract for depth |
| Milk 🥛 | ¾ cup | Whole milk for richness |
| Cream Cheese 🧀 | 8 oz | Room temperature for frosting |
| Powdered Sugar 🍚 | 2 cups | For light frosting |
| Lemon Juice 🍋 | 1 tbsp | Brightens banana flavor |
| Salt 🧂 | ¼ tsp | Enhances other flavors |
| Baking Powder 🌾 | 1 tsp | Boosts self-rising flour |
| Walnuts 🥜 | ½ cup | Optional crunch topping |
The self-rising flour is a game-changer here—it's pre-mixed with baking powder and salt, so you skip measuring multiple dry ingredients. Bob's Red Mill or King Arthur are my go-tos for quality, but any brand works if it's fresh. Ripe bananas are key: look for ones with brown spots (the sweeter, the better). The cream cheese should be room temperature when mixing to avoid lumps—trust me on this. For the walnuts, toast them in a dry pan for 3-4 minutes until fragrant, then chop roughly for texture.
No ripe bananas? Overripe ones work even better—their sweetness balances the cake perfectly. Short on cream cheese? Substitute with mascarpone or even Greek yogurt in a pinch, though texture will differ slightly. The powdered sugar can be swapped for confectioners' sugar if you prefer a finer frosting. Want extra richness? Add 1 tablespoon of melted butter to the frosting. For the frosting, I always add a pinch of vanilla extract to the cream cheese mixture—it takes it from good to spectacular.
This cake keeps beautifully for 4 days in an airtight container at room temperature, though it's best enjoyed fresh. The frosting stays soft for 3 days if refrigerated, so plan ahead if you're making it for a party. For make-ahead baking, assemble the cake (without frosting) up to 2 days in advance—it actually tastes better the next day as flavors meld. Store frosting separately and whip together just before serving. Freeze portions of the unfrosted cake for up to 3 months—thaw at room temperature before adding frosting.
Why You'll Love This Recipe
- No Muffin Tin Needed: I swear by this trick—just toss the mashed bananas and melted butter into a bowl with the self-rising flour, sugar, and eggs. No sifting, no measuring cups for dry ingredients (thanks to that handy self-rising flour), and the batter goes straight into the pan. That’s right: zero extra steps.
- Banana Butter Bliss: The ripe bananas caramelize in the oven, giving every bite that warm, custardy depth, while the butter keeps it moist without tasting greasy. Honestly, it’s the kind of cake that makes you reach for a second slice before the first one’s even cool.
- Lunchbox or Dessert: Slice it thin for school lunches—it travels well and won’t get soggy. Or serve it warm with a scoop of vanilla ice cream for a spontaneous dessert. Between us, I’ve even used it as a quick breakfast when I’m running late. (Yes, even on a Tuesday night.)
- Pantry-Friendly Magic: You’re probably already using these ingredients—no specialty items, no last-minute grocery runs. The self-rising flour cuts prep time, and ripe bananas are basically free if you’ve got a fruit bowl. Plus, leftovers? They’re my secret weapon for midweek energy boosts.
Step-by-step instructions for banana cake with self-rising flour
This method delivers a light-as-air banana cake with a perfect banana swirl—no heavy mixing or tricky techniques!
👨🍳 Step 1: Prep the Banana Swirl Filling
Start by mashing the 3 large ripe bananas in a medium bowl until completely smooth. I like to use a potato masher for this—it gives you just the right texture without over-mixing. Stir in the 1 cup granulated sugar, 2 tsp vanilla extract, and 1 tbsp lemon juice until fully combined. The mixture should be thick but pourable—this will be your signature swirl.
Here's the thing—ripe bananas are sweeter than you think, so we balance that natural sweetness with just enough sugar. The lemon juice brightens the flavor and prevents the bananas from turning brown during baking. Set this mixture aside while you prepare the cake batter.
🍳 Step 2: Mix the Cake Batter
In a large mixing bowl, cream together the 0.5 cup softened unsalted butter and the remaining 1 cup granulated sugar on medium speed until light and fluffy—about 3 minutes. You'll know it's ready when the mixture nearly doubles in volume and looks pale. This step is crucial for that signature fluffy texture.
Add the 2 whole large eggs, one at a time, mixing well after each addition. Then stir in the 0.75 cup milk and 2 tsp vanilla extract until smooth. In a separate bowl, whisk together the 2 cups self-rising flour, 1 tsp baking powder, and 0.25 tsp salt. Gently fold the dry ingredients into the wet mixture just until combined—don't overmix or your cake will be dense.
🥘 Step 3: Layer and Swirl the Batter
Preheat your oven to 350°F and grease two 9-inch round cake pans, lining the bottoms with parchment paper. Divide the cake batter evenly between the two pans, spreading it out to create an even layer. Pour half of the banana swirl mixture over each cake layer, then use a knife to swirl it gently through the batter in a circular motion.
I like to make 4-5 swirls per pan—this creates those beautiful marbled patterns while keeping the texture light. Tap the pans gently on the counter to release any air bubbles before baking. Bake for 25-30 minutes or until a toothpick inserted in the center comes out clean. Real talk: your oven might run hot, so start checking at the 20-minute mark.
🔥 Step 4: Prepare the Cream Cheese Frosting
While the cakes cool, beat the 8 oz cream cheese (at room temperature) with the 2 cups powdered sugar until smooth and creamy. Add the 0.25 tsp salt and mix until fully incorporated. The frosting should be thick but spreadable—if it's too stiff, add 1-2 tsp milk to loosen it.
Here's where it gets fun—this frosting is the star of the show. The cream cheese gives it that perfect tangy sweetness that balances the banana flavor beautifully. I like to beat it on medium speed for about 2 minutes until completely smooth with no lumps.
🍽️ Step 5: Assemble and Decorate
Once the cakes have cooled completely, level the tops if needed and spread a generous layer of frosting between them. Press them together gently, then frost the entire cake. For extra flair, sprinkle the 0.5 cup chopped walnuts on top while the frosting is still soft so they stick. Chill the cake in the refrigerator for at least 30 minutes before slicing—this helps the frosting set properly.
This cake is even better the next day when the flavors have fully melded. Each slice delivers that perfect balance of moist banana cake, creamy frosting, and nutty crunch. Don't skip the chilling step—it makes all the difference in the final texture and presentation.
Pro Tips For Making Banana Cake Recipe With Self Rising Flour
- Mash Bananas First: Don’t just toss in whole bananas—give them a good mash with a fork before mixing. This breaks down the fibers so the cake stays moist instead of dense, and it blends better with the butter and eggs. (Yes, even if you’re in a hurry, take the 30 seconds—your cake will thank you.)
- Use Room-Temp Butter: Cold butter makes for a tough cake, and self-rising flour needs that fat to cream properly. Let your butter sit out for 30-60 minutes until it’s soft but not melted—just pressable with a finger. If you forget, microwave it for 10 seconds, then let it cool slightly. (I learned this the hard way after a cake that crumbled like dry toast.)
- Don’t Overmix the Batter: Self-rising flour is finicky—once you fold in the mashed bananas, mix just until combined. Overmixing develops the gluten and turns your cake into a dense brick. Stop when there are a few streaks of flour left, then let the batter rest for 5 minutes before baking. (Your future self will thank you when you cut into a tender crumb.)
- Bake Until Toothpick’s Edge: A toothpick should come out with moist crumbs but no wet batter—this cake dries out fast. If your oven runs hot (like mine), start checking at 25 minutes instead of waiting for the full 30-35. For extra insurance, tent foil loosely over the cake after 20 minutes to prevent over-browning. (I’ve ruined more cakes by walking away—set a timer, even if you’re distracted.)
Dietary considerations for banana cake recipe with self rising flour
Gluten-Free Swap
For a gluten-free version, replace the 2 cups self-rising flour with a 1:1 gluten-free self-rising flour blend like King Arthur Measure for Measure or Bob's Red Mill Gluten-Free 1-to-1 Baking Flour. Add 1 tsp xanthan gum to help bind the cake. The texture will be slightly denser, but still moist. I've tested this swap—just reduce the milk by 2 tablespoons to account for the extra moisture in gluten-free flours. 🌾
Dairy-Free Options
Skip the butter and cream cheese by using ½ cup coconut oil (melted and cooled) instead of butter, and 8 oz dairy-free cream cheese (like Kite Hill brand) for the frosting. For the milk, use almond or oat milk—just be aware the texture may be slightly lighter. The coconut oil adds a subtle tropical note that pairs surprisingly well with banana. Trust me, it's a game-changer for those with lactose sensitivities. 🥥
Lower Sugar Version
Cut the sugar by ¼ cup (use ¾ cup total) and boost the ripe bananas to 4 medium for natural sweetness. Replace the granulated sugar in the frosting with 1 cup powdered erythritol or monk fruit sweetener—it dissolves beautifully. I've found this reduces sugar by 40% while keeping the cake moist. The lemon juice helps balance any bitterness from sugar substitutes. 🍋
Vegan Adaptation
Use flax eggs (2 tbsp ground flax + 6 tbsp water = 2 eggs) and vegan butter (like Miyoko's) for the base. For the frosting, blend 8 oz vegan cream cheese (like Tofutti) with 2 cups powdered sugar and 1 tbsp lemon juice. The texture stays rich, though slightly denser. I recommend adding ½ tsp apple cider vinegar to the batter to help with rise. 🌱
Nut-Free Topping
Skip the walnuts and try toasted coconut flakes (½ cup) or crushed graham crackers (½ cup) for crunch. For extra indulgence, sprinkle mini chocolate chips on top before chilling. The coconut adds a tropical contrast while the graham crackers bring a buttery sweetness that complements the banana perfectly. 🥥
Nutrition facts
Frequently asked questions
Why does self-rising flour make this cake so light?
The self-rising flour contains built-in baking powder and salt, which creates tiny air pockets when mixed with liquids. This gives your cake that signature fluffy rise without needing extra leavening agents. The combination of the flour's leavening properties and the ripe bananas' natural moisture creates a tender, airy crumb that's hard to achieve with all-purpose flour.
Can I use regular flour instead of self-rising flour?
Yes, but you'll need to add 2 teaspoons baking powder and ½ teaspoon salt per 2 cups of all-purpose flour. The texture will be slightly denser since self-rising flour is specifically formulated for lighter baked goods. For best results, stick with self-rising flour—it's designed to make this recipe work perfectly.
How do I know when my bananas are ripe enough?
Look for bananas with brown spots on the peel—they're sweeter and more flavorful. If they're mostly yellow, let them sit at room temperature for another day or two. The riper the bananas, the more naturally sweet your cake will be, reducing the need for extra sugar. Overripe bananas (with black spots) work too—they'll make your cake extra moist and flavorful!
What if my cake comes out dry?
Dry cake usually means overbaking or insufficient moisture. Check your oven temperature with an oven thermometer—many home ovens run hot. Bake for 25 minutes first, then check with a toothpick. If it's dry, try adding 2 tablespoons extra milk or 1 extra ripe banana to the batter next time. Brushing the top with simple syrup (equal parts sugar and water, heated) while baking can also add moisture.
Can I make this cake in a single layer?
Use a 9x13-inch pan and bake for 30-35 minutes at 350°F. Spread the batter evenly and swirl the banana mixture through the top. Top with frosting and your choice of crunchy toppings. Single-layer cakes are great for sheet pans and work perfectly for birthday parties or potlucks.