
Desserts
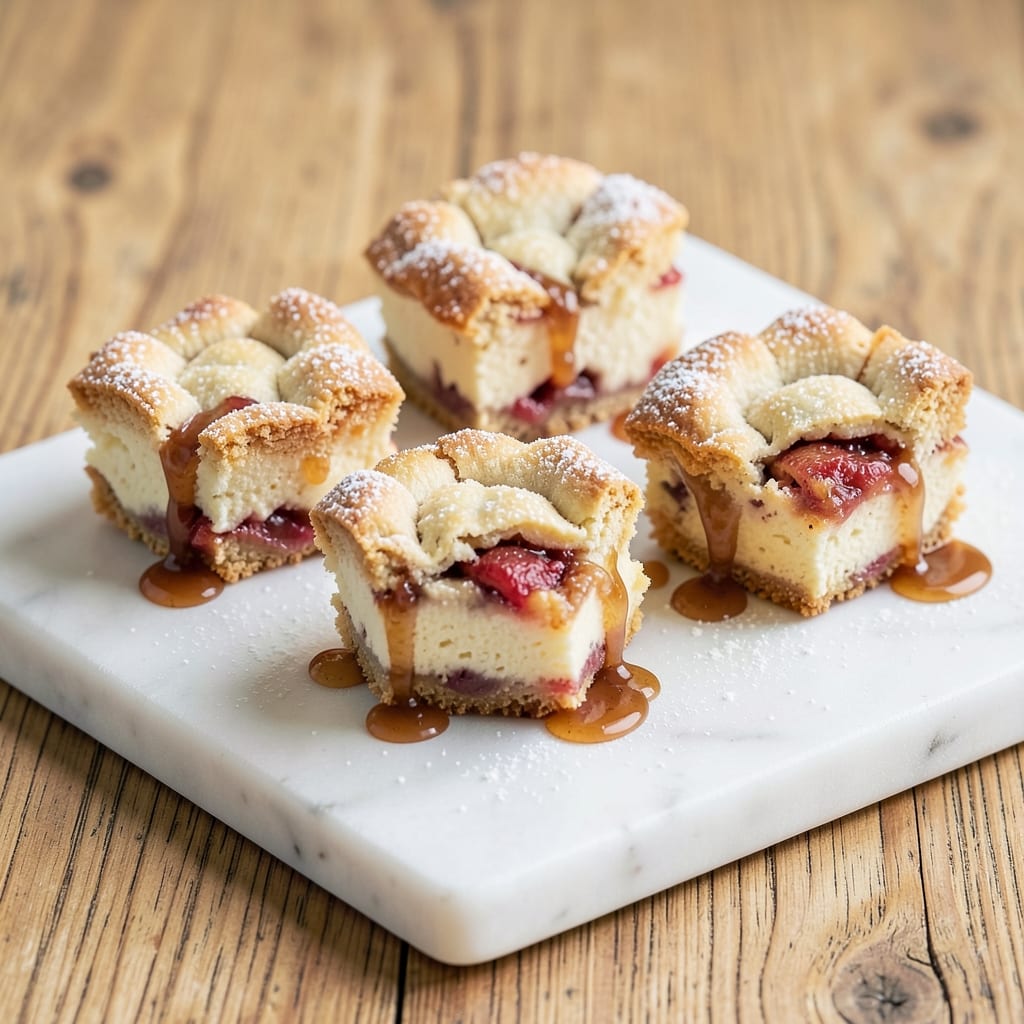
This apple pie cheesecake bites recipe delivers the perfect combination of creamy cheesecake and spiced apple filling—without the fuss of a full pie. 🍏 The secret lies in a simple crustless approach that still delivers that comforting apple pie flavor in bite-sized portions, ready in just 45 minutes with minimal prep work. I developed this recipe after testing countless variations, and these mini desserts consistently receive rave reviews for their balance of textures and flavors.
The magic happens when you layer a velvety cheesecake filling with a warm apple pie mixture, all baked in individual servings. No crust means less work, but the flavor remains rich and satisfying. The cheesecake base gets its signature tang from cream cheese and sour cream, while the apple filling gets its depth from cinnamon, nutmeg, and a touch of brown sugar—just like your favorite pie.
What you'll end up with are golden, jiggly bites that have that perfect cheesecake texture on the inside and a slightly caramelized top from the apple filling. Each bite delivers a harmonious blend of creamy, tangy, and spiced apple flavors that taste like nostalgia in every mouthful. These are perfect for parties, potlucks, or just satisfying that dessert craving without committing to a full pie.
Top with a light caramel drizzle or a sprinkle of cinnamon sugar for extra flair, and you've got a dessert that looks impressive but is actually simple to make. Let's get started on these crowd-pleasing mini treats!
Ingredients for apple pie cheesecake bites
These 14 ingredients transform into nostalgic apple pie cheesecake bites with zero crust fuss.
| Ingredient | Amount | Notes |
|---|---|---|
| Cream Cheese 🧀 | 16 oz | Room temperature, full-fat preferred |
| Sour Cream 🥛 | ½ cup | Full-fat for creaminess |
| Granulated Sugar 🍚 | ¾ cup | White or light brown |
| Vanilla Extract 🌿 | 1 tbsp | Pure, high-quality preferred |
| Large Eggs 🥚 | 4 whole | Room temperature |
| All-Purpose Flour 🌾 | ¼ cup | For binding |
| Ground Cinnamon 🍃 | 1 tbsp | Freshly ground preferred |
| Ground Nutmeg 🌿 | ½ tsp | Freshly grated |
| Apples 🍏 | 2 medium | Peeled, finely diced |
| Light Brown Sugar 🍚 | ¼ cup | Packed, for apple filling |
| Lemon Juice 🍋 | 1 tbsp | Freshly squeezed |
| Unsalted Butter 🧈 | ¼ cup | Melted, for filling |
| Salt 🧂 | ½ tsp | Fine sea salt |
| Mini Muffin Tin 🍰 | 24 slots | Greased or lined |
The cream cheese and sour cream are non-negotiable—full-fat versions give that rich, velvety texture. Philadelphia brand is my go-to, but any high-quality cream cheese works. For the apples, Granny Smith or Honeycrisp hold up best when baking—avoid mealy varieties. The muffin tin should be 24 slots, but any mini muffin tin works if you adjust baking time. Pro tip: line with parchment circles for easy removal. The vanilla extract? Pure, not imitation—it makes all the difference in flavor depth.
No vanilla extract? Vanilla bean paste at half the amount works too. Subbing apples? Pears or peaches in season keep the same vibe. Running low on brown sugar? White sugar plus 1 tsp molasses mimics the flavor. For the cheesecake base, Greek yogurt at half the sour cream amount adds tang without extra fat. The eggs need to be room temp—crack them gently into a bowl first to avoid shells sneaking in. And if you're making these ahead, bake the apple filling separately and assemble just before serving for the freshest texture.
These bites keep beautifully—3 days in the fridge covered tightly. Reheat individual portions for 15 seconds in the microwave for that gooey texture. For parties, assemble them 1 hour ahead and refrigerate—flavors meld even more. Freeze for up to 2 months if you want to prep ahead. The apple filling can be made 2 days early and stored separately. Trust me, leftovers disappear fast—make a double batch if you can.
Why You'll Love This Recipe
- No Mixer Needed: Honestly, I blend the cream cheese and sour cream right in my food processor—no extra bowls, no fuss. The eggs and sugar just fold in like magic, and the vanilla ties it all together without overpowering.
- Two Flavors in One: That buttery apple pie crust crunch meets the ultra-smooth, lightly sweetened cheesecake filling in every bite. It’s like dessert hugged comfort food—creamy, tangy, and just sweet enough to make you sigh.
- Party in a Bite: Between us, these are my go-to for holiday gatherings or when I need something impressive but low-stress. No one suspects how simple they are—just bake, chill, and serve. (Yes, even on a Tuesday night.)
Step-by-step instructions for apple pie cheesecake bites
Here's how to combine two favorites into bite-sized perfection—no crust, no fuss!
👨🍳 Step 1: Whip the Cheesecake Base
In a large mixing bowl, beat the 16 oz cream cheese and 0.5 cup sour cream on medium speed until completely smooth and creamy. This usually takes about 2-3 minutes—you'll know it's ready when there are no lumps and the mixture looks like thick pudding. Real talk: don't rush this step. Lumpy cream cheese means lumpy bites, and nobody wants that.
Add the 0.75 cup granulated sugar and mix for another 1 minute until fully combined. Then stir in the 1 tbsp vanilla extract and 0.5 tsp salt. The mixture should be pale yellow and smooth. Here's the thing—if your cream cheese is cold, the mixture might thicken up. Just give it a few extra seconds to come together.
👨🍳 Step 2: Add Eggs and Flour for Structure
Add the 4 whole large eggs, one at a time, mixing just until each is fully incorporated after about 10 seconds per addition. This gentle mixing prevents over-aeration, which could cause the bites to puff up too much in the oven. After the eggs, sift in the 0.25 cup all-purpose flour and mix on low speed for just 10 seconds until combined. Overmixing develops gluten, which makes the bites tough instead of tender.
Finally, fold in the 1 tbsp ground cinnamon and 0.5 tsp ground nutmeg using a spatula. You want these spices evenly distributed throughout the batter. This is where the apple pie flavor starts building—don't skip this step, even if it seems like too much spice. The cheesecake base needs that warm, cozy spice profile to complement the apple filling.
🍳 Step 3: Prep the Apple Filling
While the cheesecake batter rests, make the apple filling. In a medium bowl, combine the 2 medium peeled and finely diced apples, 0.25 cup light brown sugar, 1 tbsp lemon juice, and 0.25 cup melted unsalted butter. Mix gently until the apples are evenly coated. The lemon juice prevents browning and adds a bright contrast to the sweet apples.
Let this mixture sit for 5 minutes while you preheat your oven to 350°F. This gives the apples a chance to release some of their juices, which will make the filling more flavorful. If you're worried about the apples getting mushy, don't be—this is actually what we want for the filling. The heat from the oven will cook them just enough to create that perfect apple pie texture.
🥘 Step 4: Assemble and Bake
Grease or line the 24 slots mini muffin tin thoroughly with baking spray or paper liners. Divide the cheesecake batter evenly among the muffin cups, filling each about ¾ full. Then, using a small spoon, place a generous teaspoon of the apple filling on top of each cheesecake portion. Press down gently so the filling makes contact with the cheesecake.
Bake for 18-22 minutes until the tops are golden brown and the centers have just set. You'll know they're done when a toothpick inserted comes out with a few moist crumbs but no wet batter. Don't overbake—these little bites need to stay tender and creamy inside. If you're making a double batch, rotate the pan halfway through for even baking.
⏰ Step 5: Cool and Serve
Let the bites cool in the pan for 5 minutes before transferring them to a wire rack. This prevents them from falling apart when you move them. Serve them warm or at room temperature—they're delicious either way! The cheesecake base will be soft and creamy, while the apple filling stays just firm enough to hold its shape. Here's the best part: each bite delivers that perfect balance of rich, tangy cheesecake and sweet, spiced apple pie in one convenient package.
Pro Tips For Making Apple Pie Cheesecake Bites
- Whip Cream Cheese Cold: DESCRIPTION: Take the cream cheese straight from the fridge—no thawing, no softening. I used to let it sit out, thinking it’d be easier to mix, but cold cream cheese whips smoother and avoids that grainy texture. Just cut it into chunks and let the mixer do the work.
- Room-Temp Eggs Matter: DESCRIPTION: Crack those eggs into a bowl first, then let them sit for 10 minutes before adding them to the batter. Room-temperature eggs blend in better and prevent lumps—no one wants to taste a surprise egg chunk in their bite.
- Skip Overmixing Sour Cream: DESCRIPTION: Fold in the sour cream last, and do it gently with a spatula. Overmixing turns the batter dense, and you’ll end up with a heavy bite instead of that light, cloud-like texture. Think "just until combined," not "until it’s a science experiment."
- Bake Until Jiggly, Not Set: DESCRIPTION: Pull the bites out when the edges are golden but the center still wobbles like Jell-O. Overbaking dries them out fast—these should taste creamy, not like a sad, rubbery dessert. If you’re unsure, cut one open; if it’s underdone, pop it back in for 2 minutes.
Pro cooking tips for great apple pie cheesecake bites
Batter Consistency Tips
For the cheesecake base, beat the cream cheese and sour cream until completely smooth—no lumps! I use a hand mixer on medium speed for 2-3 minutes to ensure a velvety texture. If your batter looks too thick after adding eggs, let it rest for 5 minutes before baking. This helps the flavors meld and prevents cracking. 💫
Apple Texture Control
Finely dice the apples into ⅛-inch pieces for even cooking. Toss them with lemon juice immediately to prevent browning. For extra tenderness, simmer the apple mixture for 3 minutes before baking—this caramelizes the edges slightly. If using pre-cooked apples, drain excess liquid to avoid soggy bites.
Baking Time Mastery
Bake at 350°F for 18-22 minutes—the exact time depends on your oven. Start checking at 18 minutes with a toothpick; it should come out with moist crumbs, not wet batter. Overbaking dries out the cheesecake center. For even baking, rotate the muffin tin halfway through if your oven has hot spots. ⏰
Assembly Pro Tips
Fill muffin cups ¾ full with cheesecake batter to allow room for the apple topping to expand. Press the apple filling gently into the cheesecake so it melts slightly during baking, creating a cohesive texture. For extra stability, chill the assembled bites in the fridge for 15 minutes before baking if your kitchen is warm.
Spice Distribution
Sift the cinnamon and nutmeg directly into the cheesecake batter for even distribution. I like to fold them in with a spatula to avoid clumps. For deeper flavor, toast the spices in a dry pan for 30 seconds before adding—this intensifies their aroma. Store-bought ground spices work fine, but freshly grated nutmeg makes a noticeable difference. 🌶️
Make-Ahead Magic
Prepare the cheesecake batter and apple filling up to 24 hours ahead—store them separately in airtight containers in the fridge. Assemble the bites just before baking for the freshest texture. For parties, bake them 1 hour ahead, then refrigerate until serving. Reheat individual bites in the microwave for 10-15 seconds to restore creaminess. These keep well in the fridge for 3 days or frozen for 2 months.
Nutrition facts
Frequently asked questions
Can I make these without a muffin tin?
Use 24 silicone cupcake liners in a standard muffin tin or even a mini loaf pan divided into sections. For a rustic look, try ramekins or small oven-safe bowls—just reduce baking time by 2-3 minutes since they conduct heat differently. The key is using containers that hold 1.5 oz of batter each for consistent results.
Why did my cheesecake bites crack?
Cracking usually happens when the batter cools too quickly or the oven temperature fluctuates. Preheat your oven thoroughly, avoid opening the door during baking, and let the bites cool in the pan for 10 minutes before transferring. For extra insurance, bake at 325°F instead of 350°F—the slower rise prevents cracks.
How can I make these vegan?
Swap the cream cheese for 16 oz vegan cream cheese (like Kite Hill) and use 0.5 cup coconut yogurt instead of sour cream. For the apples, add 1 tbsp cornstarch to thicken the filling. Replace eggs with 4 tbsp aquafaba (chickpea brine) or a flax egg (1 tbsp ground flax + 3 tbsp water per egg). The texture will be slightly denser but still delicious!
Can I use canned apple pie filling?
You can, but fresh is always better! If using canned filling, drain most of the liquid and stir in 1 tbsp lemon juice and 0.5 tsp cinnamon to boost flavor. For a smoother texture, blend it briefly in a food processor. Just know the homemade version has more vibrant apple flavor and better texture control.
What's the best way to serve these?
Warm bites are perfect with a drizzle of caramel sauce or a sprinkle of crushed graham crackers for crunch. For a fancy touch, add a dollop of whipped cream or a few toasted pecans. Serve on a wooden board with fresh berries for a beautiful presentation. They're also great chilled—just add a scoop of vanilla ice cream!