
Desserts
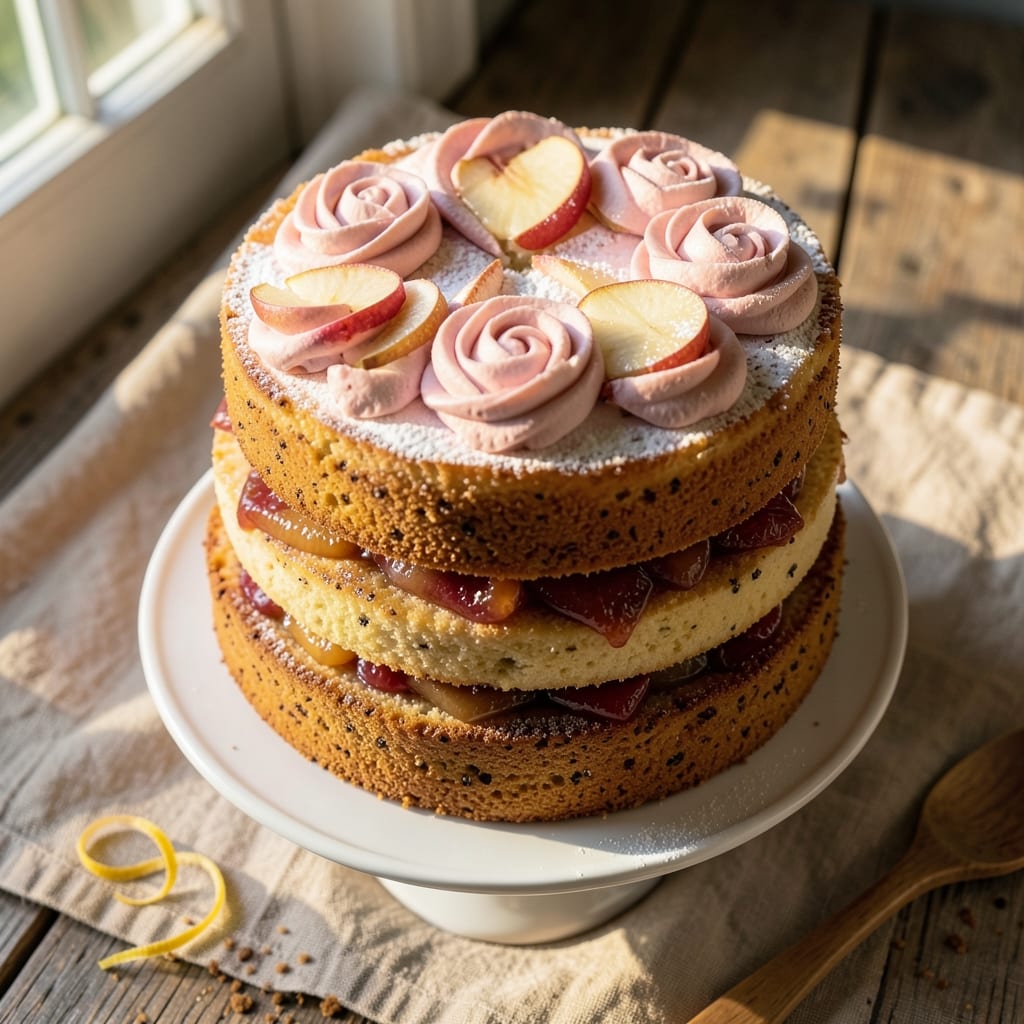
This apple rose cake recipe transforms a classic dessert into a fragrant masterpiece—where tender apple layers meet delicate rose-infused cream cheese frosting. The secret lies in balancing sweet-tart apples with floral notes, creating a cake that feels both nostalgic and refined. I've perfected the technique to ensure moist layers and a filling that stays luscious, not soggy.
The process begins with thinly sliced apples baked into the cake batter, releasing natural juices that create a caramelized filling as it bakes. Meanwhile, a rose-infused cream cheese frosting—lightly sweetened with vanilla—ties everything together with an aromatic elegance. This isn't just dessert; it's an experience that elevates any occasion from casual gatherings to special celebrations.
What makes this recipe stand out is the harmony of textures: the crisp edges of the cake, the tender apple filling, and the velvety frosting that melts with every bite. The rose extract adds a subtle floral note without overpowering the apples, while the cream cheese base keeps the frosting rich yet balanced. Each slice reveals layers of flavor and aroma that transport you to a Parisian patisserie.
Whether you're baking for a brunch spread, a holiday dessert table, or simply treating yourself, this cake delivers restaurant-quality results with home-baking simplicity. The key is patience—letting the apples release their juices gradually and allowing the frosting to set properly. Trust the process, and you'll have a dessert that's as impressive as it is delicious.
Ingredients for apple rose cake
Fifteen ingredients carefully balanced to create floral elegance and apple richness in every slice.
| Ingredient | Amount | Notes |
|---|---|---|
| All-Purpose Flour 🌾 | 2 ½ cups | Sifted for light texture |
| Granulated Sugar 🍚 | 1 ½ cups | Superfine preferred for smoothness |
| Light Brown Sugar 🍚 | ½ cup | Packed for moisture |
| Baking Powder 🧂 | 2 tsp | Aluminum-free for best rise |
| Salt 🧂 | ½ tsp | Fine sea salt preferred |
| Unsalted Butter 🧈 | 1 cup | Cold, cubed for cake layers |
| Large Eggs 🥚 | 3 whole | Room temperature for blending |
| Vanilla Extract 🌿 | 1 tbsp | Pure Madagascar preferred |
| Honeycrisp Apples 🍎 | 4 medium | Thinly sliced, peeled |
| Lemon Juice 🍋 | 1 tbsp | Freshly squeezed for brightness |
| Rose Water 🌹 | 1 tsp | Pure, food-grade only |
| Cream Cheese 🧀 | 8 oz | Room temperature for frosting |
| Powdered Sugar 🍚 | 3 cups | Confectioners' sugar for frosting |
| Heavy Cream 🥛 | ½ cup | Cold for whipped consistency |
| Vanilla Bean Paste 🌿 | 1 tsp | Seeds scraped for depth |
The apples are non-negotiable—Honeycrisp delivers the perfect sweet-tart balance, but Fuji or Pink Lady work beautifully too. Look for firm, unblemished fruit at Whole Foods or your local farmers' market for peak flavor. Thinly slicing them (about 1/8-inch thick) ensures even baking and maximum caramelization. The rose water should be pure, food-grade—frontiercoop.com carries excellent options, or check specialty spice shops. Avoid floral waters with additives, as they can alter the delicate balance of flavors in this cake.
No rose water? One drop of high-quality rose extract (like Bourgeois) can substitute, but taste first—it's more concentrated. For the apples, Granny Smith adds tartness if you prefer more acidity, while Gala leans sweeter. The cream cheese frosting calls for full-fat Philadelphia brand for optimal texture, but Kirkland Signature from Costco is equally reliable. If you're avoiding dairy, Kite Hill almond milk cream cheese works well, though texture may vary slightly. For the vanilla, Madagascar bourbon extract adds depth, but pure vanilla will suffice if that's what you have.
Store the cake layers at room temperature in an airtight container for up to 3 days, while the frosting keeps in the fridge for 5 days. Assemble just before serving to maintain the perfect texture contrast between the crisp cake and velvety frosting. The apples release moisture as they bake, so pre-slicing them and tossing with a bit of flour prevents sogginess. For make-ahead convenience, bake the cake layers and freeze them for up to 3 months—thaw completely before assembling.
Why You'll Love This Recipe
- No Mixer Needed: I swear by this recipe when my mixer’s on the fritz—just stir the dry ingredients (flour, sugars, baking powder, salt) with a fork until the brown sugar clumps dissolve. The texture comes out tender without a single lump, and honestly? It’s the little victories that keep me baking.
- Spice-Sweet Magic: That combo of granulated and light brown sugar? It’s what makes this cake taste like autumn in a box. The brown sugar caramelizes just enough to balance the sharpness of the apples, while the baking powder keeps it light—no one will guess it’s basically a science experiment with pantry staples.
- Leftovers That Last: Between us, this cake tastes even better the second day. I’ll slice it for breakfast with peanut butter or pack it for lunches—no weird aftertaste, just pure comfort. And because it’s not overly sweet, it won’t turn into a sugar crash by afternoon.
- Pantry Staple Power: No specialty ingredients here—just flour, sugars, and a pinch of salt. I’ve made this with whatever apples I had (Granny Smiths or Honeycrisp, no judgment), and it’s always spot-on. Budget-friendly? Absolutely. Impressive? Surprisingly, yes.
Step-by-step instructions for apple rose cake: floral elegance with apple rose filling
Mastering this delicate cake requires precision in layering and timing. Here's how to achieve a perfectly balanced texture and fragrant filling.
Prepare the Cake Layers
Preheat your oven to 350°F and grease three 8-inch round cake pans, lining the bottoms with parchment paper. In a large mixing bowl, combine the 2.5 cups all-purpose flour, 1.5 cups granulated sugar, 0.5 cup light brown sugar, 2 teaspoons baking powder, and 0.5 teaspoon salt. Sift the dry ingredients together to eliminate any lumps and create a light, airy base.
Cut the 1 cup unsalted butter into ½-inch cubes and let it sit at room temperature for 15 minutes until softened but not melted. Add the butter to the dry ingredients and use a hand mixer on medium speed for 2-3 minutes until the mixture resembles coarse crumbs with pea-sized butter pieces. This creates the perfect texture for tender layers.
Add the 3 whole large eggs, one at a time, mixing just until each is fully incorporated. Scrape down the sides of the bowl as needed. Stir in the 1 tablespoon vanilla extract and 1 teaspoon rose water until fully combined. The batter should be thick but pourable. Divide the batter evenly among the prepared cake pans, spreading it into the corners to ensure even baking.
Bake and Cool the Layers
Bake the cake layers for 25-30 minutes, or until a toothpick inserted into the center comes out clean. Rotate the pans halfway through baking for even browning. The layers should be golden on top and slightly domed in the center. Let the cakes cool in their pans for 10 minutes before transferring them to a wire rack to cool completely.
While the cakes cool, prepare the apple filling. Peel, core, and thinly slice the 4 medium Honeycrisp apples (about 4 cups sliced). Toss the apple slices with 1 tablespoon lemon juice to prevent browning. In a small saucepan, combine the apples with 2 tablespoons granulated sugar and cook over medium heat for 8-10 minutes, stirring occasionally, until the apples soften but retain their shape. Remove from heat and stir in ½ teaspoon rose water.
Assemble the Cake Layers
Once the cake layers are completely cool, level the tops if necessary using a serrated knife. Place the first layer on a cake stand or plate. Spread a thin layer of the apple filling over the top, leaving a ½-inch border uncovered. This ensures the filling stays contained between the layers. Repeat with the remaining two layers, adding a slightly thicker layer of filling between each.
For the rose cream cheese frosting, beat the 8 ounces cream cheese and 1 cup unsalted butter together with an electric mixer until smooth and creamy. Gradually add the 3 cups powdered sugar, mixing on low speed until combined. Increase the speed to medium-high and beat for 2-3 minutes until light and fluffy. In a separate bowl, whip the 0.5 cup heavy cream to stiff peaks, then gently fold it into the cream cheese mixture along with the 1 teaspoon vanilla bean paste.
Frost and Decorate the Cake
Spread a thin layer of the rose cream cheese frosting over the top and sides of the assembled cake to create a smooth base. Chill the cake in the refrigerator for 30 minutes to firm up the frosting slightly. Once set, apply the remaining frosting to the top and sides, creating a smooth finish. Use a small offset spatula to smooth the sides and a bench scraper to create clean edges.
To decorate, pipe small rosettes or swirls of the frosting around the edges of the cake using a star tip. Garnish the top with a few thin apple slices arranged in a circular pattern. The cake should have a delicate, fragrant aroma from the rose water and a perfect balance of tender layers and flavorful filling. Serve at room temperature for the best texture and flavor experience.
Pro Tips For Making Apple Rose Cake
- Weigh Your Flour: Ditch the scoop-and-sweep method—this cake’s lightness depends on precision. A standard cup of all-purpose flour can vary by 10-15 grams; pack it gently into the cup and level with a knife. I learned this after two cakes that were either dense or collapsed.
- Chill the Dough: Let the batter rest in the fridge for 30 minutes before baking. This lets the baking powder activate evenly and prevents a domed, cracked top. Sounds counterintuitive when you’re eager to bake, but trust me—your cake’s texture will be smoother.
- Skip Overmixing: Mix the wet and dry ingredients just until combined—about 20 seconds past when the flour disappears. Overmixing develops gluten, and this cake’s delicate crumb turns tough. I used to beat it like I was kneading bread, and the result was chewy instead of tender.
- Use Cold Apples: If your recipe calls for fresh apples, slice them just before folding into the batter and keep them in the fridge until the last minute. Cold apples release less liquid, so your cake won’t turn soggy. (Yes, even if you’re impatient like me.)
Make-ahead tips for this dish
Bake Layers Ahead
Prepare the cake layers up to 3 days in advance for effortless assembly later. After baking, cool completely, then wrap each layer tightly in plastic wrap. Store them in an airtight container at room temperature. The layers will stay fresh and maintain their moisture—perfect for when you're ready to assemble. This is my go-to strategy for busy weekends or holiday prep. 📅
Frosting Prep
Make the rose cream cheese frosting 1 day ahead and store it in the fridge. The flavors meld beautifully overnight, and the texture remains luscious. When ready to assemble, let it sit at room temperature for 15-20 minutes to soften slightly before piping. I like to cover it with a damp towel to prevent drying. The frosting's floral notes deepen as it rests, adding complexity to each bite. ✨
Apple Filling Shortcut
Pre-cook the apple filling the night before and store it in the fridge. This saves time on assembly day and allows the flavors to develop further. When reheating, warm it gently in a saucepan over low heat for 3-5 minutes—just enough to soften slightly. Avoid overcooking, or the apples will turn mushy. A quick toss with ½ teaspoon lemon juice before using keeps it vibrant. 🍎
Full Assembly Timeline
For a stress-free experience, bake the layers and make the frosting 2 days ahead, then assemble the cake 1 day before serving. Chill the fully frosted cake in the fridge overnight to let the frosting set perfectly. This method ensures the cake holds its shape and tastes even better after resting. The key is patience—rushing the chilling step can lead to messy frosting. 💫
Storage for Guests
If you're serving the cake to guests who will take slices home, wrap individual portions in parchment paper and store them in resealable plastic bags at room temperature for 2 days. For longer storage, freeze slices (without frosting) for up to 1 month. Reheat slices in the microwave for 10-15 seconds to restore freshness. The cake's delicate flavors hold up well when stored properly. 🍰
Freezer-Friendly Layers
Need to store the cake layers for 3 months or more? Wrap each layer individually in plastic wrap, then place them in a freezer bag with all the air squeezed out. Thaw overnight in the fridge before assembling. The texture remains intact, and the apples won’t release excess moisture during baking. This is a lifesaver for holiday baking or special occasions. ❄️
Nutrition facts
Frequently asked questions
Can I substitute rose water with something else if I can't find it?
Yes! Use 1 drop of high-quality rose extract (like Bourgeois) instead—it's more concentrated, so start with less and taste as you go. Another option is ½ teaspoon rose syrup (available in baking sections), but it may add slight sweetness. For a floral alternative, orange blossom water works beautifully in a pinch.
Why does my cake turn out dense instead of light and tender?
Overmixing the batter or using cold butter are the most common culprits. Mix just until combined—stop when you see pea-sized butter pieces in the flour. Also, ensure your butter is softened but not melted (press a finger into it; it should leave a slight indentation). Finally, don't overbake—pull the cake when a toothpick comes out clean but moist.
How do I prevent the apple filling from making the cake soggy?
Toss the apple slices with 1 tablespoon flour before baking to absorb excess moisture. Also, spread only a thin layer of filling between layers (about ¼-inch thick) and chill the cake for 30 minutes before adding the final frosting. This helps set the filling without compromising the cake's texture.
Can I make this cake without cream cheese?
For a dairy-free version, substitute the cream cheese with 8 ounces mascarpone cheese (for richness) or 1 cup Greek yogurt (for tang). For a vegan option, use 8 ounces coconut cream cheese (like Kite Hill) and ensure your butter is dairy-free. The frosting will still be luscious, though the texture may be slightly lighter.
What's the best way to store leftovers?
Wrap individual slices in parchment paper and store them in an airtight container at room temperature for up to 2 days. For longer storage, freeze slices (without frosting) for 1 month. To reheat, microwave for 10-15 seconds—just enough to warm the filling without drying out the cake. The flavors actually improve after resting!