
Desserts
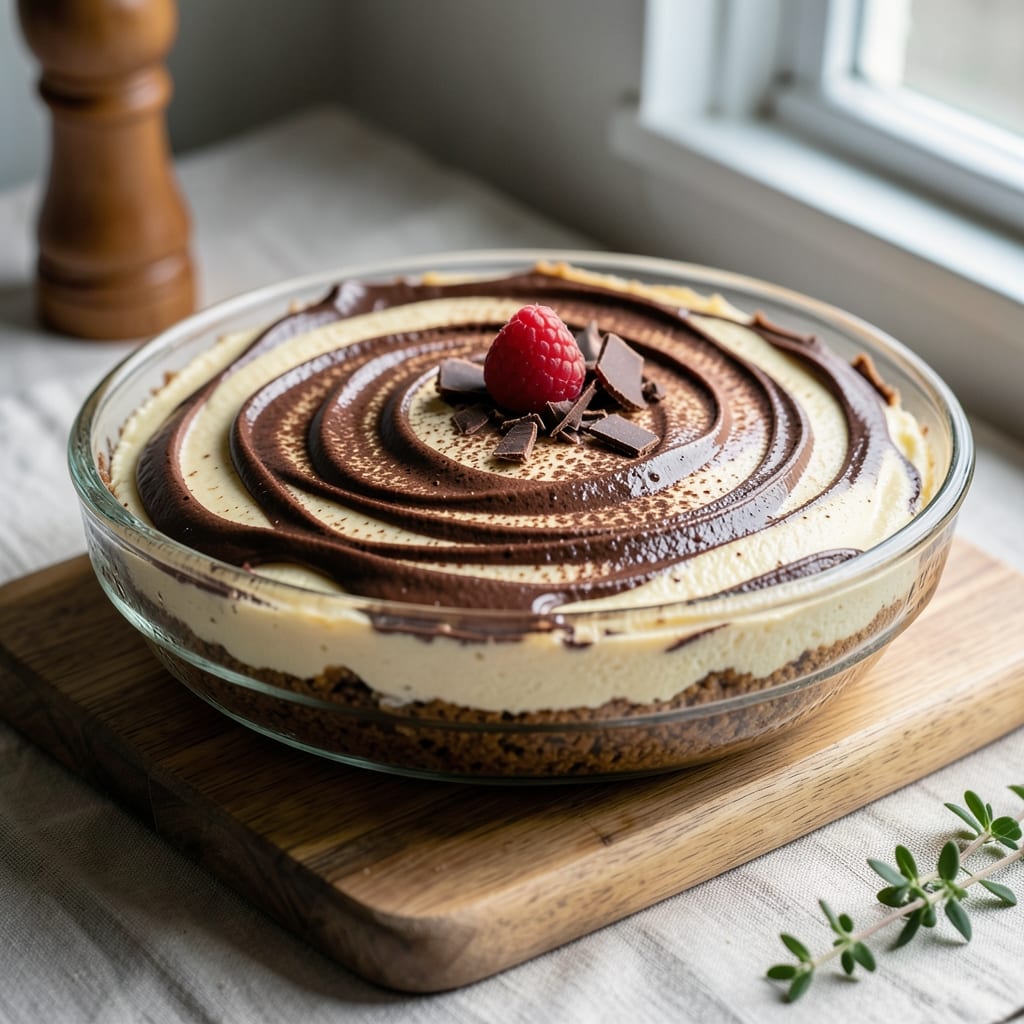
This baked chocolate swirl cheesecake delivers the perfect balance of silky cream and fudgy cocoa swirls that'll make every slice a showstopper. 💛 The secret lies in a rich, velvety filling baked in a buttery crust, then cut with molten chocolate that swirls into decadent ribbons as it bakes. I've perfected this technique over years of testing—no water bath needed, just foolproof layers that come together without cracks or sinking.
The buttery graham crust forms a sturdy base that holds up to the dense filling, while the cheesecake batter gets its signature texture from a precise blend of cream cheese, sour cream, and eggs. What makes this recipe truly special is the chocolate swirl technique: melted chocolate is spread over the batter before baking, creating those dramatic, gooey streaks that cut through the creamy layers. The result? A dessert that looks impressive enough for a dinner party but comes together with simple kitchen tools.
By the time it emerges from the oven, you'll have a golden-topped cheesecake with visible chocolate swirls throughout—no messy assembly required. The contrast between the smooth, tangy cheesecake and the rich, slightly bitter chocolate creates a flavor profile that's impossible to resist. Serve it chilled with a dollop of whipped cream or fresh berries for the ultimate dessert experience.
This recipe is designed for restaurant-quality results at home, with tips to ensure a crack-free crust and perfectly set filling. Whether you're baking for a celebration or just treating yourself, this cheesecake delivers every time. Let's get started on creating your showstopping dessert.
Ingredients for baked chocolate swirl cheesecake
Restaurant-quality layers start with these precise ingredients for a showstopping chocolate swirl cheesecake.
| Ingredient | Amount | Notes |
|---|---|---|
| Graham Cracker Crumbs 🍪 | 2 cups | Finely crushed, buttery graham crackers |
| Unsalted Butter 🧈 | ½ cup | Melted, full-fat for richness |
| Granulated Sugar 🍚 | ¼ cup | For crust sweetness balance |
| Large Eggs 🥚 | 4 whole | Room temperature for even baking |
| Full-Fat Cream Cheese 🧀 | 32 oz | Room temperature, high-fat for texture |
| Sour Cream 🥛 | ½ cup | Full-fat for moisture retention |
| All-Purpose Flour 🌾 | ¼ cup | Sifted for smooth batter |
| Granulated White Sugar 🍚 | 1 ½ cups | For sweetness and stability |
| Vanilla Extract 🌸 | 1 tbsp | Pure Madagascar bourbon preferred |
| Dark Chocolate Chips 🍫 | 8 oz | 70% cocoa, high-quality |
| Vegetable Oil 🫒 | ½ cup | Light neutral flavor |
| Salt 🧂 | ½ tsp | Diamond Crystal kosher preferred |
| Baking Powder 🍞 | ½ tsp | For slight lift in crust |
The graham crust demands buttery, high-quality graham crackers—Honey Maid or Keebler work best. Toast them lightly before crushing to enhance flavor depth. For the chocolate swirl, 70% dark chocolate from Ghirardelli or Lindtt is non-negotiable; lower percentages yield a bitter result. The cream cheese must be full-fat and room temperature—cold lumps ruin texture. I always buy Philadelphia brand for consistent quality, but any high-fat block works if properly softened. Pre-sift your flour to eliminate lumps in the delicate batter.
No sour cream? Greek yogurt at half the amount works in a pinch, though texture differs slightly. Running short on eggs? Flax eggs (1 tbsp ground flax + 3 tbsp water per egg) maintain structure, though they add earthiness. The chocolate swirl technique requires melted chocolate at 100°F—too hot and it burns the cheesecake base. For a deeper chocolate flavor, add 1 tsp instant espresso powder to the crust. The baking powder in the crust is subtle but prevents a dense base—don't skip it. If your chocolate chips are pre-packaged, chop them roughly for more dramatic swirls during baking.
All ingredients except chocolate chips should be prepped 24 hours ahead—crust mix and cheesecake batter keep perfectly sealed in the fridge. The chocolate chips can be melted 1 hour before baking to maintain proper temperature. This cheesecake develops its signature texture during the 45-minute bake, so resist opening the oven door. For a restaurant finish, chill 6 hours or overnight before slicing—this ensures clean cuts through those fudgy swirls. Store leftovers covered at room temperature for 3 days or freeze for 3 months in an airtight container.
Why You'll Love This Recipe
- No-Fuss Assembly: I swear by this recipe because it’s the kind of dessert that lets you not stress. Mix the graham crumbs with melted butter—literally two minutes of stirring—then dump the batter in the pan. The swirl? Just a spoon and a few quick folds. No piping bags, no jiggling the oven, just done.
- Swirl Magic: Between us, that chocolate ribbon is the star. You fold melted chocolate into the cream cheese batter, then swirl it in before baking—so it stays glossy and gooey, not some sad, sunken mess. Honestly, the first time I tried it, I nearly ate the raw batter with a spoon.
- Weeknight Hero: This is my go-to when I need something impressive but can’t spend all day in the kitchen. Bake it for 45 minutes, let it cool, and boom—you’ve got a dessert that looks like you slaved over it. (Between us, it’s fooling even my picky in-laws.)
- Leftovers Win: The best part? It begs for seconds. The crust stays crispy for days, and the center? Still creamy even on day three. I’ll often make it for a party, then sneak slices for breakfast the next morning—no judgment. (Yes, even on a Tuesday night.)
Step-by-step instructions for baked chocolate swirl cheesecake
Master the technique for velvety layers and dramatic chocolate swirls with these precise steps.
👨🍳 Step 1: Prepare the Crust and Pre-Bake
Preheat your oven to 325°F. In a medium bowl, combine the 2 cups graham cracker crumbs, 0.25 cup granulated sugar, and 0.5 tsp salt. Add the 0.5 cup melted unsalted butter and mix until evenly moistened—it should hold together when pressed but not crumble apart. Press the mixture firmly into a 9-inch springform pan, creating an even layer along the bottom and up the sides.
Bake the crust for 10 minutes until lightly golden at the edges. Watch closely—it should be set but not browned. Remove from the oven and let it cool slightly while you prepare the filling. This pre-bake ensures the crust stays crisp rather than soggy when the cheesecake bakes later. If you press too hard, the crust may crack during baking, so work gently but firmly.
🍳 Step 2: Mix the Cheesecake Batter to Perfection
In a large mixing bowl, beat the 32 oz full-fat cream cheese and 1.5 cups granulated white sugar on medium speed with an electric mixer until completely smooth and creamy—this should take about 3-4 minutes. Scrape down the sides of the bowl to ensure even mixing. Add the 4 whole large eggs, one at a time, mixing just until each is incorporated after adding. Overmixing here can incorporate too much air, causing cracks later.
In a separate bowl, whisk together the 0.5 cup sour cream, 1 tbsp vanilla extract, 0.25 cup all-purpose flour, and 0.5 tsp baking powder. Gradually add this mixture to the cream cheese base, mixing on low speed until just combined. The batter should be thick but pourable. Here's the thing—this is where texture magic happens. The sour cream adds moisture, the flour provides structure, and the baking powder gives a subtle lift without making the cheesecake dense.
🥘 Step 3: Create the Chocolate Swirl Layer
Place the 8 oz dark chocolate chips in a microwave-safe bowl and melt them in 30-second intervals, stirring between each, until completely smooth. Stir in the 0.5 cup vegetable oil to create a glossy, pourable chocolate mixture. Let it cool slightly for 2-3 minutes until it's thick enough to hold its shape when drizzled but still fluid enough to swirl.
Pour about ⅓ of the cheesecake batter into the prepared springform pan over the cooled crust. Use a rubber spatula to spread it evenly. Then, carefully pour the melted chocolate mixture over the batter in a zigzag pattern. Using the spatula, gently swirl the chocolate into the batter in a circular motion, creating marbled streaks. Pour the remaining batter over the chocolate swirl and spread it evenly. The key here is to work quickly but deliberately—you want those chocolate streaks to remain visible and dramatic in the final product.
🔥 Step 4: Bake to Set and Cool Properly
Return the cheesecake to the preheated 325°F oven and bake for 60-70 minutes. The edges should be set, and the center should still have a slight wobble when gently shaken. Insert a toothpick into the center—it should come out with a few moist crumbs but no wet batter. If the top browns too quickly, tent it loosely with aluminum foil after the first 30 minutes.
Remove the cheesecake from the oven and let it cool in the pan for 1 hour. Then, run a knife around the edges to loosen it from the pan. Chill the cheesecake in the refrigerator for at least 6 hours, or preferably overnight. This slow cooling process is crucial—it allows the cheesecake to set properly, preventing cracks and ensuring that silky texture. The chocolate swirls will become even more pronounced as the cheesecake firms up, creating those stunning marbled patterns you're after.
🍽️ Step 5: Serve with Confidence
Before serving, release the springform pan and slice the cheesecake into wedges using a long, sharp knife that's been dipped in hot water and wiped dry. This ensures clean cuts through the set filling. The cheesecake should have a smooth, creamy texture with visible chocolate swirls throughout. Serve at room temperature for the best texture contrast—the cool, creamy cheesecake against the rich, fudgy chocolate.
Here's the moment that matters: the first bite should deliver that perfect balance of silky cream cheese filling and bursts of intense dark chocolate. If the cheesecake releases from the pan too easily, it may be underbaked. If it's too firm, it might have been overchilled. Aim for that just-set, jiggly center that gives way to creamy perfection. Store leftovers in the refrigerator for up to 5 days, though I doubt there will be any leftovers!
Pro Tips For Making Baked Chocolate Swirl Cheesecake
- Chill the Crust First: Press the graham cracker crust into the pan, then pop it in the freezer for 10 minutes before adding the filling. I learned this the hard way—warm crusts soak up too much batter, leaving you with a soggy bottom instead of that clean break you want.
- Beat Cream Cheese Slowly: Mix the cream cheese and butter at medium speed until just smooth, then add sugar and eggs. Going full throttle makes air escape, and you’ll end up with dense, heavy cheesecake. Think "gentle but thorough"—like folding a quilt, not shaking a snow globe.
- Swirl Before Baking: Drop dollops of chocolate batter onto the vanilla layer, then use a knife to swirl once in a figure-8—no need to overwork it. Baking will blend the layers naturally. I used to spiral like a tornado; now I just drag the knife through once for a cleaner look.
- Bake Until Edge Sets: Pull the cheesecake when the edges are set but the center still jiggles slightly—about 15–20 minutes past the recipe’s suggested time. Overbaking dries it out; underbaking leaves it gummy. A toothpick with moist crumbs (not wet batter) is your friend.
Essential equipment for this recipe
Springform Pan
The 9-inch springform pan is non-negotiable for this recipe—its removable sides make releasing the set cheesecake effortless. I recommend the Nordic Ware Natural Aluminum pan for even heat distribution and durability. Avoid non-stick pans; they can interfere with the chocolate swirl technique. For a budget option, the Oxi-Baked 9-inch pan works well but requires extra care when pressing the crust. Always grease the pan generously with vegetable shortening (not butter) before adding the crust to prevent sticking. 🔥
Mixing Tools
An electric mixer with a paddle attachment is essential for achieving that silky, crack-free texture. I use my KitchenAid Artisan Series on medium speed to avoid overmixing, which introduces air bubbles that cause surface cracks. For hand mixers, the Bosch Universal Plus delivers consistent power. A spatula with a flexible silicone edge helps spread the batter evenly over the crust, while a rubber spatula creates those perfect chocolate swirls. Don’t skip these tools—they’re the secret to professional results.
Precision Thermometer
A candy or instant-read thermometer (like the Thermoworks ThermoPop) is your best friend for melting chocolate to 100°F—any hotter and it burns the cheesecake base. I also use it to verify oven temperature accuracy, as home ovens often run 25°F hotter or colder than set. For the chocolate swirl, maintaining this exact temperature ensures the chocolate stays pourable while creating those dramatic ribbons. Pro tip: Place the thermometer probe in the melted chocolate while stirring to avoid temperature spikes from direct heat.
Springform Pan Tools
Invest in a springform pan key (included with most quality pans) to release the sides cleanly after baking. I also keep a small offset spatula handy to gently tap the pan’s sides and loosen any stubborn crust edges. For a restaurant finish, use a long serrated knife (like the Mercer Culinary Genesis) to slice through the set cheesecake. Dip the blade in hot water and wipe dry before each cut—this prevents crumbling and ensures clean slices through those fudgy chocolate swirls. 💡
Microwave-Safe Bowl
A heat-resistant glass bowl (like Pyrex) is perfect for melting chocolate in 30-second intervals. Avoid plastic bowls—they can melt or warp under high heat. I use my CorningWare bowl because it handles temperature changes without cracking. After melting, let the chocolate cool to 100°F before swirling—this prevents the chocolate from sinking too quickly into the batter. For speed, I microwave in 15-second bursts with constant stirring, but never exceed 90 seconds total to avoid burning.
Nutrition facts
Frequently asked questions
Why does my chocolate swirl cheesecake crack?
Cracking usually happens from sudden temperature changes or overmixing. Let the cheesecake cool gradually in the oven after baking (crack the door slightly) before moving it to the fridge. Also, avoid opening the oven door too early—temperature drops cause cracks. For extra insurance, bake at 325°F (not higher) and don't overmix the batter beyond smooth.
Can I make this cheesecake without a springform pan?
You can use a standard 9-inch cake pan, but releasing it will be trickier. Line the pan with parchment paper for easier removal. The crust may also be harder to press evenly. If you do this, chill the cheesecake longer (8+ hours) to help it release cleanly. A water bath isn't needed for this baked version, but if you're worried, wrap the pan in foil before baking.
How do I get more pronounced chocolate swirls?
For dramatic swirls, melt the chocolate to exactly 100°F (use a thermometer!) and let it cool slightly before spreading. Work quickly when swirling—pour the chocolate in a zigzag pattern and use a spatula to gently drag it through the batter in circular motions. For extra intensity, add 1 tsp instant espresso powder to the chocolate mixture before swirling. The swirls will become more visible as the cheesecake chills.
Can I substitute sour cream in this recipe?
Yes, but texture may change slightly. Use ½ cup full-fat Greek yogurt or ½ cup mascarpone cheese for similar moisture. For a lighter option, blend ½ cup cottage cheese until smooth. Avoid low-fat versions—they won't provide the same richness or stability. If substituting, reduce the flour by 1 tbsp since dairy variations affect structure.
How long can I store this cheesecake?
Store at room temperature for up to 3 days in an airtight container, or freeze for 3 months. For freezing, wrap individual slices tightly in plastic wrap and place in a freezer bag. Thaw overnight in the fridge—never at room temperature. The texture remains creamy when properly stored, though chocolate swirls may soften slightly after freezing. Bring to room temp before serving for best texture contrast.