
Desserts
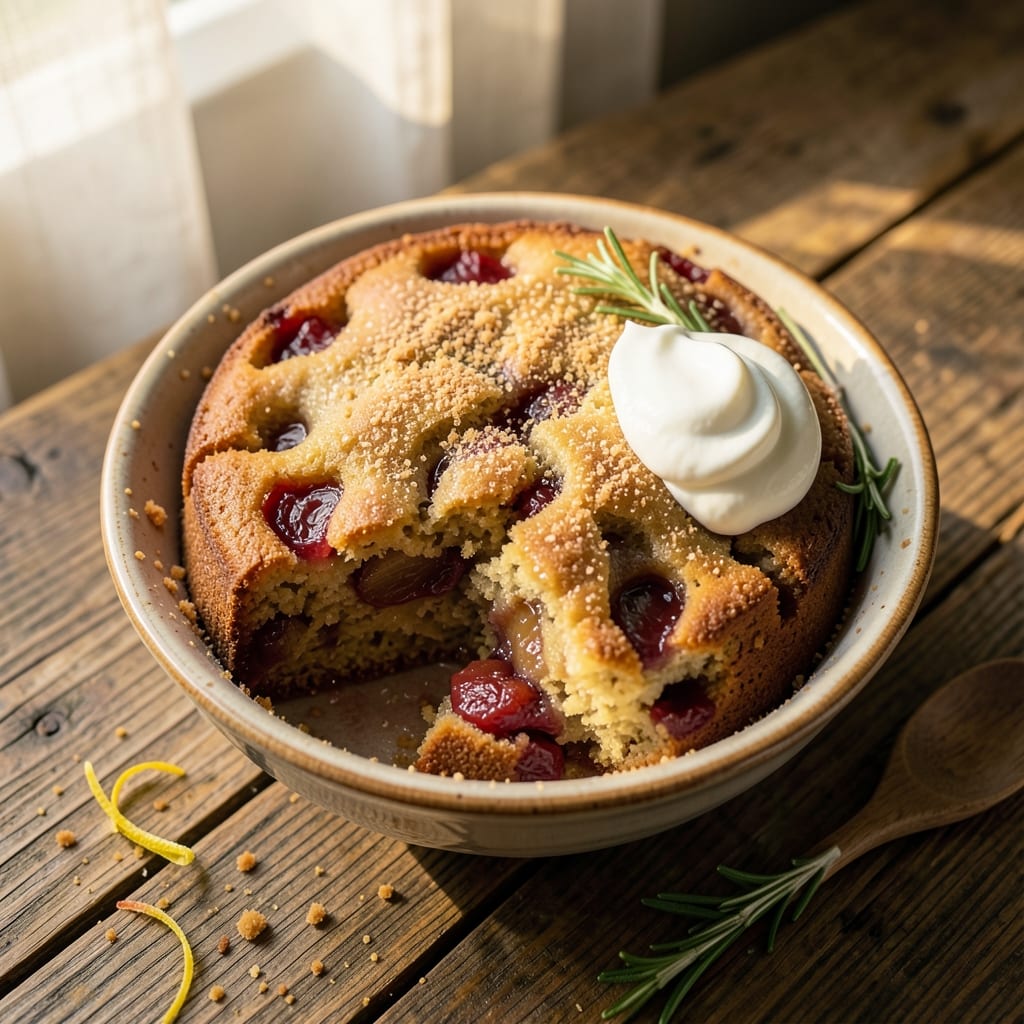
This apple cake recipe with stewed apples delivers the cozy, spiced perfection of fall in every slice—tender crumb meets jammy, caramelized filling that tastes like a hug from Nana Mae's kitchen. 🍏 The secret lies in stewing the apples until they're soft and fragrant, then folding them into a buttery cake batter that bakes up golden and moist. I perfected this version after years of testing, balancing structure and indulgence so each bite has that perfect contrast of cake and fruit.
What sets this recipe apart is the two-stage baking process: first, the cake layer bakes until set, then the stewed apples are spooned into the center before the final bake. This creates that signature layered effect where warm spice-infused apples peek through the buttery crust. The recipe uses simple pantry staples—flour, sugar, eggs, and of course, apples—but transforms them into something restaurant-worthy with just a few professional techniques.
By the time it emerges from the oven, you'll have a cake with crisp edges, tender crumb, and pockets of spiced apple filling that's rich enough to stand alone or elegant enough for company. The aroma alone—warm cinnamon, caramelized apples, and vanilla—will have everyone gathering around your kitchen. Serve with a dollop of whipped cream or a drizzle of caramel glaze for that final touch of indulgence.
This recipe works equally well for weeknight desserts or holiday gatherings, scaling beautifully from a 9-inch cake to a sheet pan version. The stewed apple technique means you can use any apples—tart Granny Smiths or sweet Honeycrisp—without adjusting the recipe. Let's get baking!
Ingredients for apple cake recipe with stewed apples
Simple pantry staples transform into a restaurant-worthy apple cake with jammy filling.
| Ingredient | Amount | Notes |
|---|---|---|
| All-Purpose Flour 🌾 | 2 ½ cups | Sifted for even texture |
| Granulated Sugar 🍚 | 1 ½ cups | White or light brown |
| Light Brown Sugar 🍚 | ½ cup | Packed firmly |
| Unsalted Butter 🧈 | 1 cup | Cold, cubed for mixing |
| Large Eggs 🥚 | 2 whole | Room temperature |
| Vanilla Extract 🍯 | 1 tbsp | Pure vanilla preferred |
| Ground Cinnamon 🌿 | 2 tsp | Freshly ground preferred |
| Ground Nutmeg 🌿 | ½ tsp | Freshly grated |
| Salt 🧂 | ½ tsp | Fine sea salt |
| Baking Powder 🍞 | 2 tsp | Aluminum-free preferred |
| Mixed Apples (Granny Smith & Honeycrisp) 🍏 | 4 medium | Peeled, cored, sliced |
| Lemon Juice 🍋 | 2 tbsp | Freshly squeezed |
| Granulated Sugar (for stewing) 🍚 | ¼ cup | For caramelizing apples |
| Ground Cinnamon (for stewing) 🌿 | 1 tsp | Enhances apple flavor |
The apples are the heart of this cake, so pick firm, flavorful varieties. Granny Smiths add tartness while Honeycrisp brings natural sweetness—both hold up beautifully during stewing. If you can't find these, Fuji or Braeburn work well too. For the best texture, peel and slice them uniformly (about 1/4-inch thick). Costco or local orchards often have seasonal deals on bulk apples, making this a budget-friendly recipe for larger batches. Look for apples that feel heavy for their size and have vibrant color—those are your winners.
No Granny Smiths? Mix tart and sweet apples—think McIntosh with Gala. Running low on cinnamon? Cardamom at half the amount adds a unique warmth. The butter should be cold when you mix it—cut it into small cubes and let it sit at room temperature for just 30 minutes before creaming. For the stewed apples, don't rush the cooking time—soft but still holding shape is ideal. If your apples release a lot of liquid, reduce the sugar slightly to balance the sweetness. The lemon juice brightens everything, so fresh is non-negotiable here—bottled just won't cut it.
Store the dry ingredients—flour, sugar, spices—in airtight containers for up to 6 months. The apples can be peeled and sliced ahead, then stored in lemon water for 2 days in the fridge. Once baked, this cake keeps well at room temperature for 3 days or in the fridge for 5 days. For longer storage, wrap tightly and freeze for up to 3 months. The filling actually improves overnight, so if you can, bake it a day ahead—trust me on this.
Why You'll Love This Recipe
- No Mixer Needed: I swear by this recipe when my hands are full—just cream butter and sugars by hand, toss in the flour, and fold in those warm stewed apples. The dough stays soft enough to handle without cracking, and the texture comes out tender every time.
- Stewed Apples Steal the Show: That caramelized sweetness from the stewed apples? It’s the star. The brown sugar butters them just enough to melt into the cake while keeping a subtle chew, and the butter keeps it rich without being heavy. Honestly, the first bite makes me forget about store-bought cakes.
- Weeknight or Celebration: Between us, this cake is my go-to for potlucks and lazy Sundays. The same batter works for a quick breakfast cake (add cinnamon) or a dessert showstopper (drizzle with honey). My kids even ask for it at school lunches—yes, really.
- Leftovers That Don’t Suck: Unlike cakes that dry out in two days, this one stays moist for at least five. I’ll slice it for toast the next morning or pack it for work—still warm, still delicious. And because it’s not overly sweet, it won’t turn into a sugar crash by noon.
Step-by-step instructions for apple cake with stewed apples
Master this technique for a moist crumb and perfectly caramelized filling.
🍳 Step 1: Stew the Apples Until Tender and Caramelized
In a medium saucepan, combine the sliced apples, the 0.25 cup granulated sugar for stewing, and the 1 tsp ground cinnamon for stewing. Cook over medium-low heat for 10-12 minutes, stirring occasionally, until the apples soften and release their juices. The mixture should thicken slightly and develop a glossy sheen.
Here's the thing—you want the apples to break down but still retain their shape. When they're tender enough to pierce with a fork but not mushy, add the 2 tbsp lemon juice. This brightens the flavor and balances the sweetness. Let the mixture cool completely before using—this prevents the cake from becoming soggy when baked.
👨🍳 Step 2: Cream Butter and Sugars for Maximum Fluffiness
In a stand mixer fitted with the paddle attachment, beat the 1 cup unsalted butter (cold, cubed) with the 1.5 cups granulated sugar and 0.5 cup light brown sugar on medium speed for 3-4 minutes. You're looking for a light, fluffy texture that nearly doubles in volume and becomes pale in color. This creaming process incorporates air, which creates a tender crumb.
I press down gently on the butter mixture during the first minute—this prevents it from curdling and ensures even distribution of the sugars. The reason we wait until the mixture is pale is that cold butter absorbs into the sugars instead of creating that gorgeous, airy texture we're after.
👨🍳 Step 3: Add Eggs and Dry Ingredients for Perfect Texture
Add the 2 whole large eggs, one at a time, mixing on low speed after each addition until fully incorporated. Then add the 1 tbsp vanilla extract and mix for another 10 seconds. In a separate bowl, whisk together the 2.5 cups all-purpose flour, 2 tsp baking powder, 2 tsp ground cinnamon, 0.5 tsp ground nutmeg, and 0.5 tsp salt.
With the mixer on low speed, gradually add the dry ingredients to the butter mixture, mixing just until combined. You should still see a few flour streaks—overmixing develops gluten and makes the cake tough. Once combined, fold in the cooled stewed apples using a silicone spatula. This ensures even distribution without deflating the batter.
🥘 Step 4: Prepare and Bake the Cake for Even Rising
Preheat your oven to 350°F and grease a 9-inch round cake pan or line it with parchment paper. Pour the batter into the prepared pan and smooth the top with a spatula. Bake for 40-45 minutes or until a toothpick inserted into the center comes out clean. The cake should be golden brown and spring back slightly when pressed.
I always tap the pan gently on the countertop after removing it from the oven—this helps release any air pockets and ensures an even rise. Let the cake cool in the pan for 10 minutes, then transfer it to a wire rack to cool completely. This gradual cooling prevents cracking and maintains the moist texture we worked so hard to achieve.
⏰ Step 5: Serve Sliced for Maximum Moisture
Once the cake is completely cool, slice it into 8 equal wedges using a sharp serrated knife. The stewed apples should be visible in each slice, creating a beautiful contrast with the golden crumb. Serve at room temperature for the best texture—this allows the flavors to meld and the cake to reach its peak tenderness.
Real talk: this cake tastes even better the next day when the flavors have fully developed. Store any leftovers in an airtight container at room temperature for up to 3 days or refrigerate for up to 5 days. The moist crumb and spiced apple filling make this a showstopper for any occasion.
Pro Tips For Making Apple Cake Recipe With Stewed Apples
- STEW APPLES UNTIL SOFT: I learned this the hard way—undercooked apples stay chunky and watery. Simmer them with the spices until they break down completely, about 15-20 minutes, so they blend into the batter like a thick, fragrant purée. No one wants to bite into a surprise apple core.
- CREAM BUTTER COLD: Don’t let that butter soften before mixing—whisk it with the sugars while still cool. This keeps the cake tender instead of dense, and the cold butter creates pockets for air. (Yes, even if you’re impatient like me.)
- WEIGH THE FLOUR: Scooping flour from the bag packs it down, adding extra weight and making the cake dry. Use a kitchen scale or spoon-and-level method—this recipe needs precision, and your future self will thank you.
- BAKE UNTIL SPRINGY: The cake’s done when it pulls away from the pan edges and springs back when pressed gently. Overbaking turns it tough, so check at 30 minutes and tent with foil if needed. A toothpick test is fine, but don’t rely on it alone.
Wine and beer pairings for this recipe
Red Wine Pairings
For this warm, spiced apple cake, I reach for a dry Riesling from Germany or a Pinot Noir from Oregon—both cut through the richness while complementing the caramelized apples. The crisp acidity of Riesling (like Dr. Loosen Blue Slate) balances the cake's sweetness, while Pinot Noir (try Domaine Serene) adds earthy notes that echo the nutmeg and cinnamon. Serve slightly chilled for the best contrast. 🍷
White Wine Alternatives
A Sauvignon Blanc from New Zealand or Loire Valley Chenin Blanc works beautifully too. The citrusy brightness of Cloudy Bay or the honeyed depth of Vouvray lifts the warm spices in the cake. I've also enjoyed pairing it with a Gewürztraminer—its lychee and floral notes create an unexpected but delightful contrast with the apples.
Apple Cider Cocktail
For a non-alcoholic option, I make a spiced apple cider cocktail by simmering 2 cups apple cider with 1 cinnamon stick, 2 star anise pods, and 1 tsp vanilla extract for 15 minutes. Strain and serve warm—it's like drinking the cake's flavors in liquid form. Add a splash of ginger beer for fizz if you want extra sparkle.
Beer Pairings
A crisp Belgian witbier like Hoegaarden or Stella Artois cleanses the palate between bites, while a honey ale (such as Allagash Honey Brown) enhances the cake's caramelized sweetness. For something bolder, try a dry English bitter—the hoppy bitterness contrasts nicely with the rich cake. Just avoid overly sweet or malty beers that'll clash with the spices.
Coffee Pairing
If you prefer coffee, go for a medium-roast dark chocolate blend—the cocoa notes mirror the cake's warm spices while the acidity brightens the apples. I love Peet's Major Dickason's Blend or a Mexican Chiapas for this pairing. Brew it slightly stronger than usual to stand up to the cake's richness.
Seasonal Adaptations
In fall, I often serve this cake with a mulled wine made from Cabernet Sauvignon reduced with orange peel and cloves. For summer, swap the wine for a sparkling rosé—its acidity keeps the cake from feeling too heavy. The key is always balancing the cake's sweetness with something bright and refreshing. 🍎✨
Nutrition facts
Frequently asked questions
Can I use canned apples instead of fresh?
Fresh apples are ideal for that perfect texture, but you can use unsweetened canned apple slices in a pinch. Drain them well and pat dry completely to prevent a soggy cake. Add an extra 1/4 tsp cinnamon to compensate for the lack of fresh apple flavor. For stewing, you'll need to simmer them slightly longer to achieve the same tenderness.
Why does my cake turn out dry?
Overbaking is the most common cause—check for doneness at 35 minutes instead of waiting for the full 45 minutes. Another culprit? Skipping the cooling step. Let the cake cool completely before slicing, or the moisture will escape. For extra moisture, brush warm slices with simple syrup right before serving.
Can I make this cake in a different pan size?
Yes! For an 8-inch pan, reduce baking time by 5-7 minutes and watch closely. For a 9x13-inch sheet pan, spread batter evenly and bake 30-35 minutes. Adjust oven temp to 325°F for sheet pans to prevent over-browning. The key is maintaining the same batter depth—about 1-inch thick.
How do I store leftovers to keep them moist?
Wrap tightly in plastic wrap, then place in an airtight container. Store at room temperature for 2 days or refrigerate for 5 days. For longer storage, freeze slices between parchment paper for up to 3 months. The secret? Reheat slices in a 300°F oven for 5-7 minutes before serving—they'll taste almost fresh-baked!
What's the best way to reheat slices?
For maximum moisture, wrap slices in a damp paper towel and microwave for 10-15 seconds. Or bake at 300°F for 5-7 minutes until warmed through. Avoid the oven broiler—it dries out the edges. The cake reheats beautifully, making it perfect for breakfast or after-dinner treats.